Did you ever want to add a toggle button to your WordPress website but don’t know how?
While many websites use the toggle module to display different content by a switch, it could be helpful for you to know.
This article will teach you three ways to add a toggle button to WordPress.
What is Toggle Button
A toggle button is a great way to display different content on click. It acts very similarly to the accordions or the tabs.
Two different contents are assigned to the tabs, and clicking the toggle button will switch the visible content.
Many websites use the toggle button on their pricing pages to display different packages.
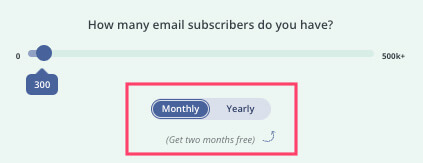
The toggle button saves you from bombarding your visitors with information that may be irrelevant to them but still accessible if needed.
Displaying different sections with a toggle design is a wise idea for both the business and the visitors.
Methods to Add a Toggle Button
There are multiple ways to add a toggle feature to your WordPress website, and in this tutorial, we will cover the following:
- Use a Gutenberg block.
- Toggle widget for Elementor.
- Build our own with HTML, CSS, and JavaScript.
All ways are great and will initially achieve the same thing. However, choosing your preferred method should base on which plugins you use and your approach.
Because Gutenberg is the default WordPress editor and most used, we will use it first.
Add a Toggle Button with a Gutenberg Block
Although the Gutenberg editor doesn’t have a toggle block by default, it is still possible to add one by installing a plugin.
Installing a blocks plugin will add many extra features missing from the core editor.
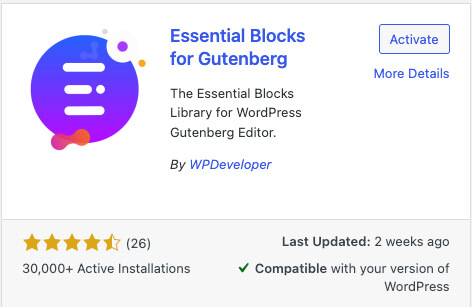
Essential Blocks for Gutenberg is one of my favorite plugins to achieve this goal.
Before using the toggle block, we will need to install and activate the plugin on our WordPress website.
Therefore, navigate to Plugins -> Add new, and search for essential blocks. Once found, install and activate it.
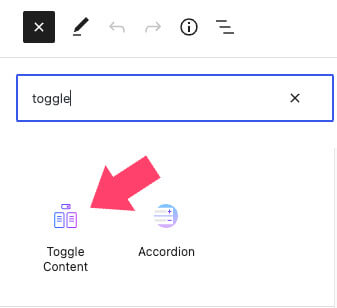
Then, edit one of your pages, click on the plus icon, and add a new toggle block.
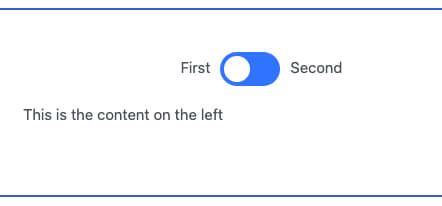
The toggle block will be divided into two sections, left and right. First, enter custom content on the left, switch, and type content on the right.
Once entered, move on to the three tabs on the right sidebar: General, Style, and Advanced.
For example, to change the default blue background color, click on the Style tab, expand the Background option, and set your custom color.
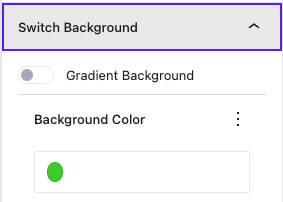
Keep exploring the different options of the block and adjust the shape and colors of the toggle button based on your needs.
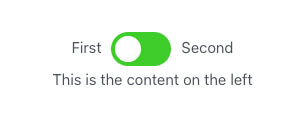
Please remember to save the changes and visit the live page to verify that it’s working correctly.
Toggle Button Widget for Elementor
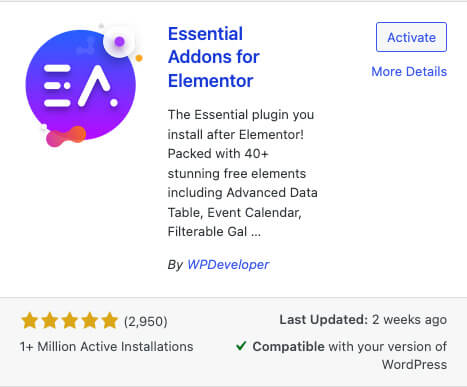
WPDeveloper, the company that developed the plugin above, also created a plugin for Elementor users.
Initially, all the added Gutenberg blocks now exist as Elementor widgets.
The Essential Addons plugin (free and pro) will add 90 unique widgets to Elementor.
The toggle button widget is part of the Pro version, which you can get from the official website for $39.98 or us for only $4.99.
Once downloaded, navigate to the plugins screen of your WordPress website and install the free version first from the plugins repository. Then, click the Upload button, select the plugin’s pro version, and activate it.
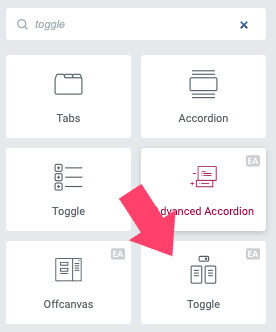
Once both are active, click on your desired page’s edit with Elementor button, and search for the toggle widget.
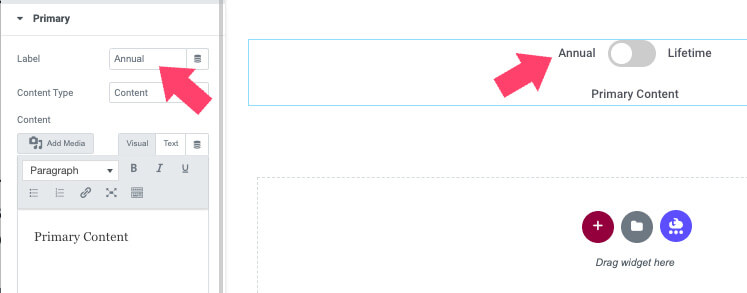
The section will be divided into primary and secondary content tabs, and you can control each handle label and content.
Like any Elementor widget, use the Style tab to customize any aspect of its look, such as colors, shape, etc.
For example, to change the button shape from round, expand the Switch Style drop-down list and select rectangle.

Keep styling the toggle button by changing its size and colors, and save the changes when finished.
Remember to visit the live page and verify it’s working as expected on the front end.
Please note: in both plugins above, you can use shortcodes to populate the sections with more complex content, such as pricing tables, before and after images, etc.
Read the following section if you prefer to use HTML markup to display toggled content rather than installing a plugin.
WordPress Toggle Button without a Plugin
Adding a toggle button to your website is possible without a plugin, and it’s pretty easy.
Three components assemble the content toggle switcher:
- HTML – the structured markup of the elements.
- CSS – customize and style the look of each feature.
- jQuery – react to the visitor’s click to show or hide the content.
Please make sure to change the content of the toggle switch handles and text instead of the existing ones.
HTML
Edit your desired page, and paste the HTML below inside an HTML block.
<div class="toggleSection">
     <div class="toggleButtonHandles">
          <div class="beforeToggleLabel">Before label</div>
          <div class="toggleButtonSwitch">
               <label class="toggleButton">
                    <input type="checkbox">
                    <span class="slider round"></span>
               </label>
          </div>
          <div class="afterToggleLabel">After lable</div>
     </div>
     <div class="toggleContent active"><p>I'm the primary content</p></div>
     <div class="toggleContent"><p>I'm the secondary content</p></div>
</div>
After saving the changes, visit the page to ensure you can see the content on the screen.
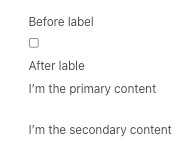
As of now, before implementing the CSS rules, the content will be unstyled and plain. We now should prettify it with CSS.
CSS
Copy the CSS code below, and paste it inside the stylesheet file of your current child theme.
.toggleSection {
	text-align: center;
}
/* The switch - the box around the slider */
.toggleButtonHandles {
     display: flex;
     align-items: center;
     justify-content: center;
}
.toggleButton {
     position: relative;
     display: inline-block;
     width: 60px;
     height: 34px;
}
.toggleButtonSwitch {
	padding: 0 10px;
}
/* Hide default HTML checkbox */
.toggleButton input {
     opacity: 0;
     width: 0;
     height: 0;
}
/* The slider */
.slider {
     position: absolute;
     cursor: pointer;
     top: 0;
     left: 0;
     right: 0;
     bottom: 0;
     background-color: #ccc;
     transition: .4s;
}
.toggleContent {
	display: none;
}
.toggleContent.active {
	display: block;
}
.slider:before {
     position: absolute;
     content: "";
     height: 26px;
     width: 26px;
     left: 4px;
     bottom: 4px;
     background-color: white;
     transition: .4s;
}
input:checked + .slider {
     background-color: #2196F3;
}
input:focus + .slider {
     box-shadow: 0 0 1px #2196F3;
}
input:checked + .slider:before {
     transform: translateX(26px);
}
/* Rounded sliders */
.slider.round {
     border-radius: 34px;
}
.slider.round:before {
     border-radius: 50%;
}
Then, refresh the page that holds the toggle button to see the new look of the switch.

You can now click on the rounded slider to verify that the toggle handle is moving from side to side. Although the button reacts to clicks, it still doesn’t manipulate to show or hide the sections.
jQuery
Finally, the last piece of the puzzle is the jQuery code, which is in charge of hiding or showing the content based on our selection.
You can use FTP software to create a new script file or insert the JavaScript into Elementor.
Alternatively, you can use the Simple Custom CSS and JS plugin to achieve similar results.
jQuery(document).ready(function( $ ){
	$( '.toggleButton input' ).click(function() {
		$('.toggleContent').toggleClass('active');
	});
});
After implementing the code, test the toggle button once again. If used correctly, clicking on the slider will switch and display different content.

This is a solid starting point; a user with a basic understanding of CSS and JavaScript can expand and customize it further to fit the website’s needs.
Additional Articles
- Add copy to clipboard button to WordPress
- How to add timeline content to Elementor
- Add text over an image in Elementor
- PowerPack plugin for Elementor – walkthrough and review
- How to add a countdown timer in WordPress
Conclusion
Toggle buttons are gaining popularity in modern web design and strategies. Marketers use them in various ways, some for a better user experience and other to display relevant content.
This article showed you how to add a toggle button to your WordPress website in three ways.
Leave us a comment and tell us which way you chose to achieve this task.
Also, make sure to subscribe to our YouTube channel and like our page on Facebook.


