Out of the box, Elementor is a very flexible page builder plugin, and we can do many things with it. It’s packed with great options and widgets that allow us to design almost anything we want.
Although it has many great design options, it is still missing key features that could make it a better plugin than what it is right now.
This article will show you how to use the Ultimate Add-ons for Elementor plugin to add additional widgets.
What is the Ultimate Addons for Elementor Plugin
The Ultimate Addons for Elementor is a stand-alone plugin that will add widgets and features to Elementor and expand our design options.
Because Elementor is limited, companies like UAE (Ultimate Addons for Elementor) took it upon themselves to improve it to be a complete page builder.
It extends the functionality of Elementor by giving you a library of extra widgets, templates, and blocks to style your website.
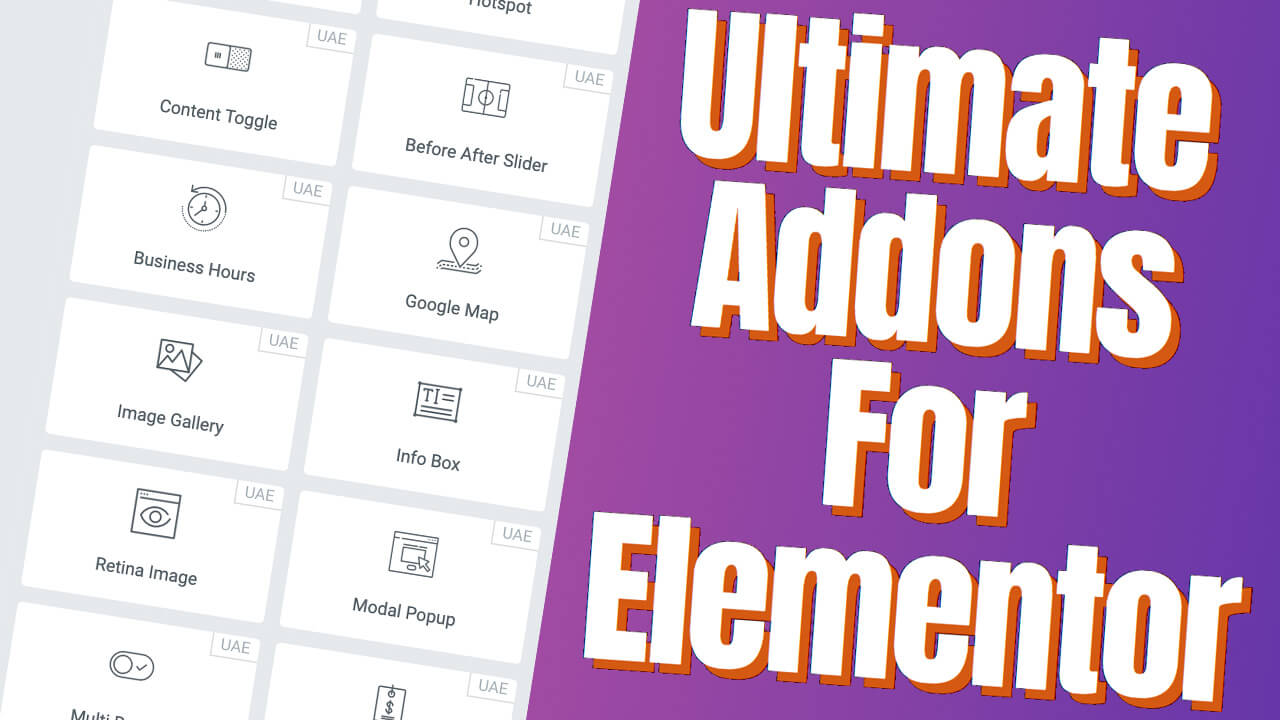
Some of the many added widgets are:
- Fancy heading
- Content toggle
- Before and after slider
- Infobox
- Multi buttons
- Timeline
- Countdown timer
- Table of content
- Many more
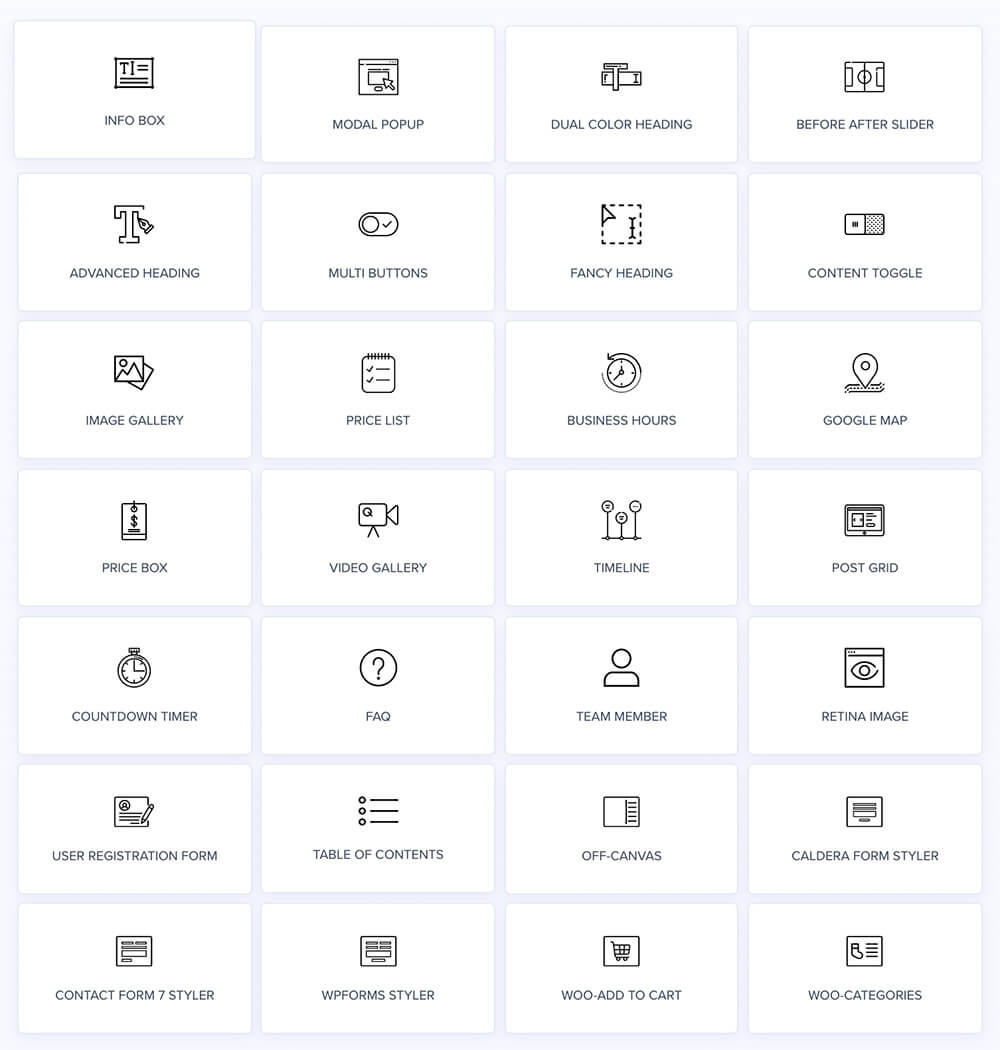
This is just a partial list, and the complete list contains many more widgets. In addition, UAE is always adding more widgets to the plugin all the time.
How to Use the Ultimate Addons for Elementor
Using the plugin features is simple. Activate it and use the additional widgets added to Elementor.
Let’s start by downloading the plugin first.
Step #1: Download the Plugin
Unlike most freemium WordPress plugins, UAE doesn’t have any free version for you to use.
If you would like to use the UAE plugin, you’ll need to purchase the pro version from the get-go.
You can get the plugin at the official website or from us for only $4.99.
Once purchased (from our website or theirs), download the plugin (zip file) to your computer.
Then, you’ll need to upload it to your WordPress website. That’s very easy to do.
Navigate to Plugins -> Add New -> Upload Plugin and choose the UAE plugin you just downloaded.
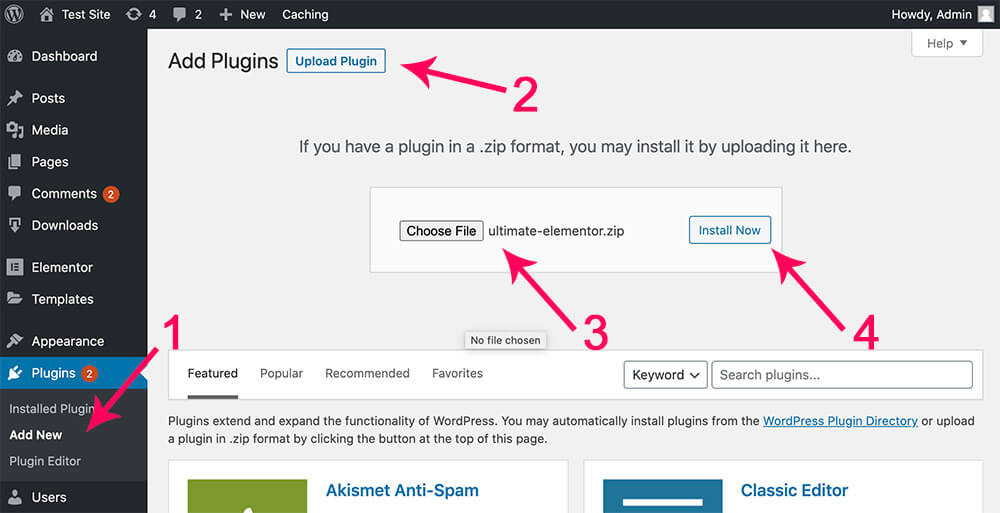
Click on Install and then on Activate.
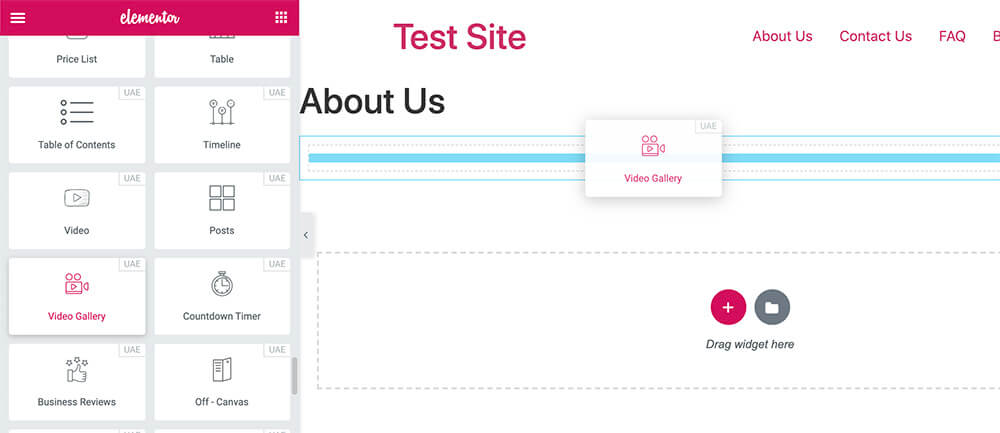
Step #2: Access the Widgets
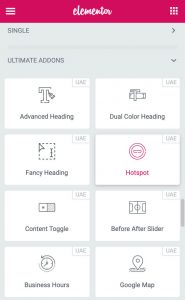
To access all the goods that the plugin offers, navigate to your desired page and click on Edit With Elementor.
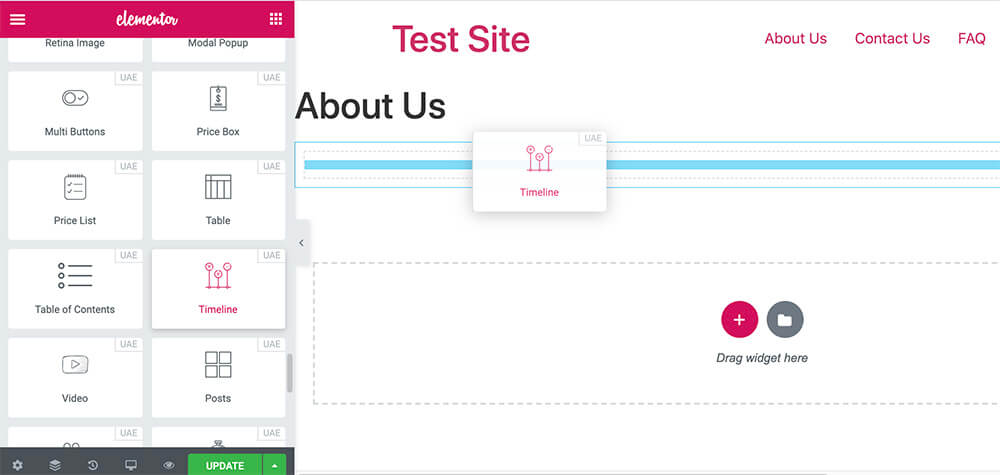
Then, scroll down, and you’ll see a new section added to the bottom of the Elementor left sidebar called ULTIMATE ADDONS.
There you will see all the new widgets added for you to use and try. All the new widgets are marked with the UAE letters at their top right corner.
Step #3: Style the Widgets
Because UAE was built for Elementor, editing their widgets is identical to editing any Elementor official widget.
Like any other widget, the Ultimate Addons for Elementor widgets have three tabs. Content, Style, and Advanced.
The options inside each tab will change based on the widget you are editing. Just like the options of the Content tab of the official Heading widget is different than the options of the Content tab of the official Image widget.
The idea is similar. The Content tab is in charge of everything related to the widget’s content, the Style tab is on the design, and the Advanced tab is everything else like the margin, padding, and some responsive options.
Ultimate Addons Widgets Examples
In this section, I will answer a couple of popular questions asked frequently by Elementor users.
The first question is how to create a timeline and the second question is how to display a video gallery.
Timeline Widget
Timeline sections are a great way to display a company or project’s progress during a certain amount of time.
One of my favorite timelines made by the SimilarWeb website shows how the company established itself and its steps to get to the present time.
Timelines are beautiful and intractable sections because when scrolling down the page, the timeline vertical spine will follow the page and fill the timeline.
Out of the box, Elementor does not have a timeline widget, but the Ultimate Addons for Elementor does!
To create a timeline, drag the Timeline widget to your desired location.
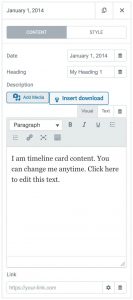
Inside the Content tab, inside the Timeline Items, you can enter the events you would like to display.
For each event, you’ll have the option to enter the date, heading, and description.
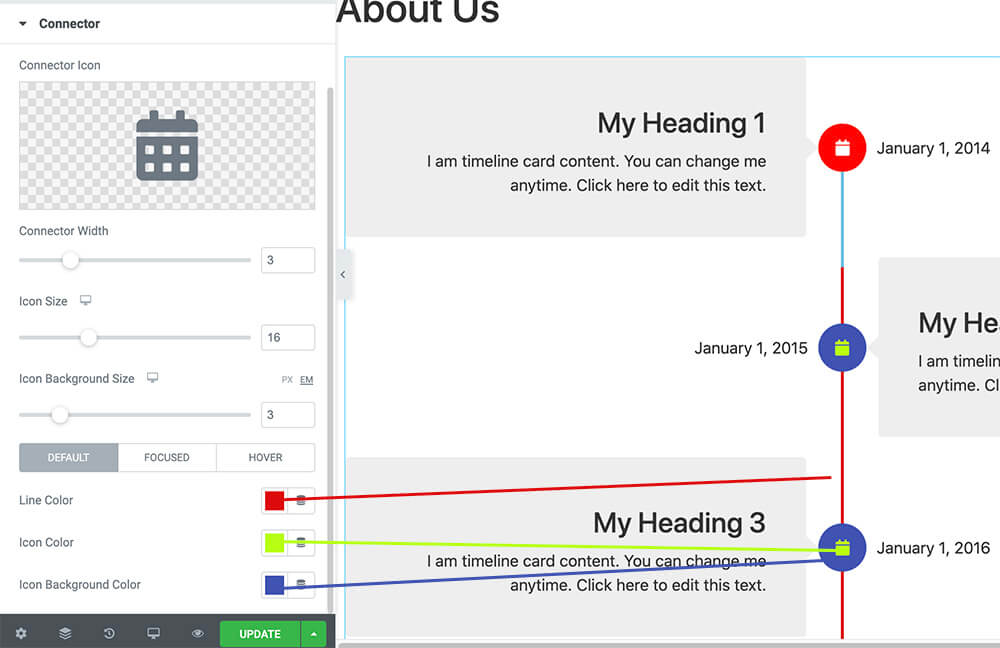
To style the timeline elements, move to the Style tab, and you will be able to style any part of the widget.
Most likely, you already know how to change the text items’ color and size, such as the heading and the dates.
You may be missing how to change the style and colors of the connector, spine, and icons.
To change the color of the connector, open the Connector tab, and look for the line color option at the bottom inside the Default tab.
The default options will determine how the elements look before the scrolling effects style takes over.
The default color is light grey, but you can change it to any other color.
The icon color and the icon background color are self-explanatory and will control the colors of the icons.
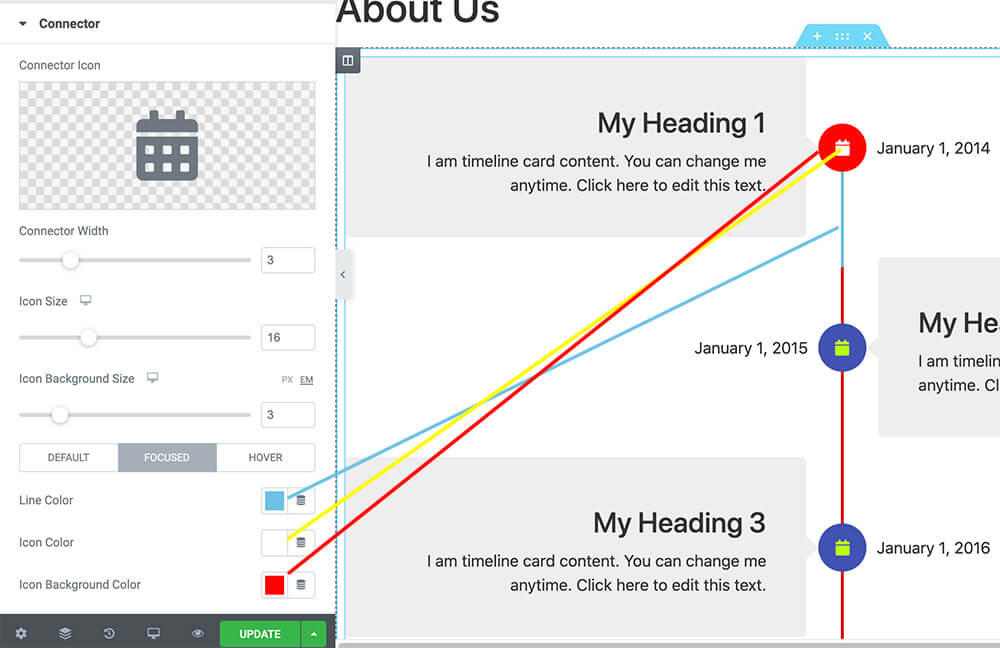
If you would like to change the colors of the connector and the icons when scrolling the page, move to the Focused tab.
Like in the default tab, you can change the color of the three elements, the connector color, the icon color, and the icon background color.
Of course, there are many more things to change, such as the responsive view for mobiles and tablets, but that will be based on your needs and desires.
You can also read our full article on creating a timeline section with Elementor.
Video Gallery Widget
To display a video gallery with Elementor, you will also need to have the Ultimate Addons for Elementor.
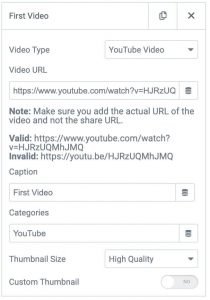
From your Elementor edit screen, drag the UAE Video Gallery widget to your desired location.
The video gallery widget will load six videos out of the box, but you can add or remove as many as you wish.
Each video item will have a few options such as type, URL, caption, categories, and thumbnail options.
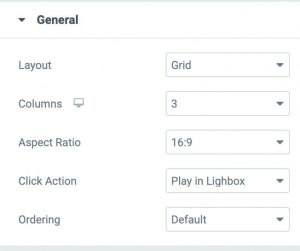
Inside the General tab, you can change the default columns number, the videos aspect ratio, and the click action.
The most incredible thing about this video gallery widget is the Filterable Tabs.
By enabling the filterable tabs to on, the categories tab will appear above the video gallery and will filter the results when clicking on the tab.
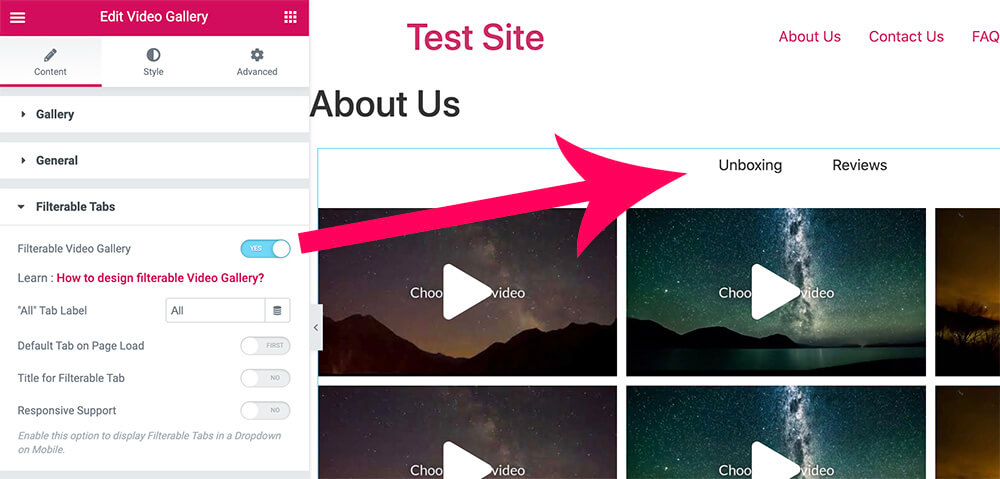
For example, if you own a technology website, you can create a video gallery with a mix of unboxing and review videos.
When a visitor clicks on the unboxing category, it will only display the unboxing videos. When he clicks on the reviews category, it will only display the reviews videos.
Conclusion
In this article, you learned how to use The Ultimate Addons for the Elementor plugin.
UAE will add many more options than the native Elementor page builder plugin doesn’t have.
We recommend you take the UAE plugin for a spin because you’ll find it very useful and fun to work with.
In the comment box below, let us know which one you prefer widget or which one you need help with.
Also, make sure to subscribe to our YouTube channel and like our page on Facebook.