When creating a WordPress website, you probably ran into tutorials requiring you to add code snippets. Whether it’s CSS or PHP functions, it’s better (or must) to do it in a child theme.
In this tutorial, you’ll learn how to create a WordPress child theme in a few different ways.
But first of all, let’s find out what is a child theme and why we need it.
What is a Child Theme
A WordPress child theme is a limited version of the parent theme, sits on top of it, and inherits the design and functionality of the parent theme.
When both themes, the parent and the child, are activated, WordPress will prioritize the child-theme files over the parent theme and deliver them first.
For example, let’s say that your parent theme has a style.css file with body {background: white;}. If the child theme style.css file has body {background: blue;}, it will overwrite the parent theme style and paint the body tag with a blue background color.
WordPress will automatically load the parent theme files if your child theme doesn’t have the parent theme files instead.
Why Creating a Child Theme
We need to create a WordPress child theme to add or modify the core files of our website.
Alternatively, you can also create a custom plugin for using functions. Please read our article on how to create a site-specific custom plugin.
Let’s take the background color of the body tag, for example, once again. If you want to change the background color to blue, you can modify the style.css file of the parent theme and change it there.
However, when updating the parent theme, the changes you made will get lost and overwritten by the more updated version.
Therefore, a child theme is a crucial component to have when building a website. The changes will stay and roll over with the new update when you have a child theme installed.
Creating a WordPress child theme is a quick and easy process that I highly recommend.
In the next section, we will show you two ways how to make it. Choose the way that suits you most.
How to Create a Child Theme in WordPress
There are a few ways to create a child theme in WordPress. You can use an online generator, a plugin, or code it yourself.
Let’s go through some of the options down below.
Method #1: Create a Child Theme with an Online Generator
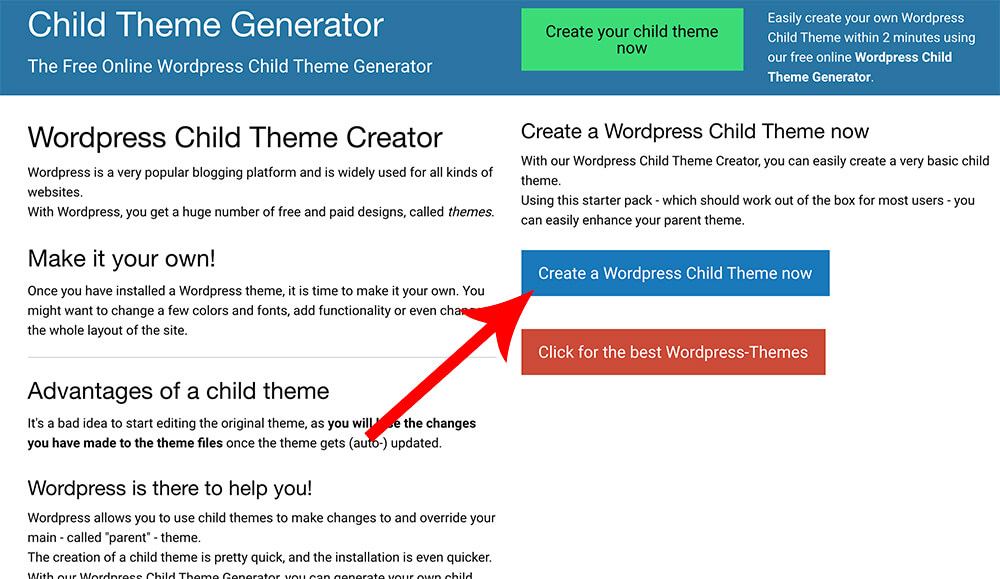
We will use an online generator website to create our child theme in this method. This is an excellent way to make one without installing any plugin on our website. Therefore, it’s quick and easy.
- Navigate to the child-theme generator website.
- Click on the Create a WordPress Child Theme now button.
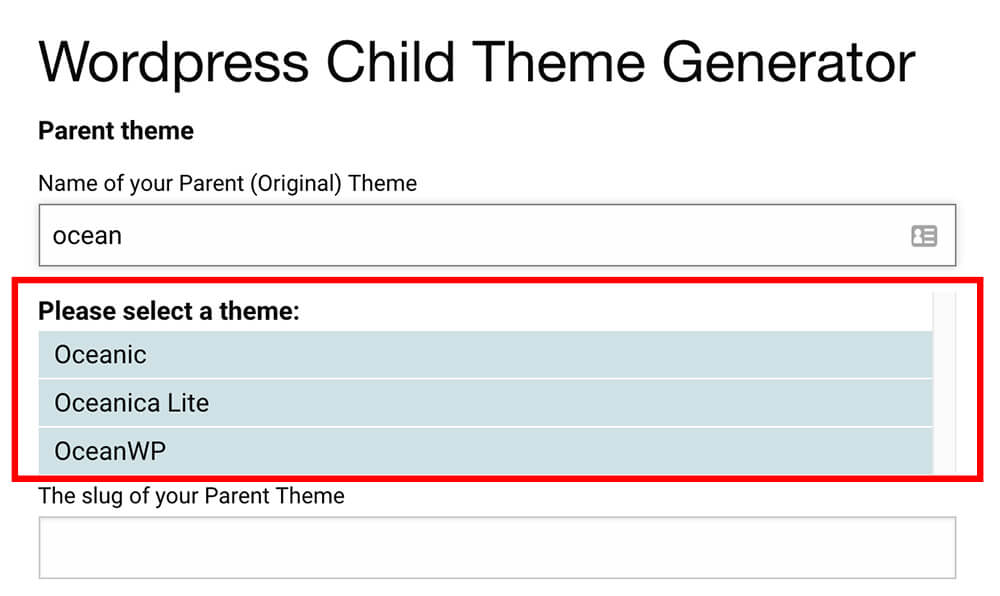
In the ‘Parent Theme’ field, start typing the name of your parent theme. When ordering, the website will load some options relevant to what you’re typing in for you. You then choose the parent theme name from the available options.
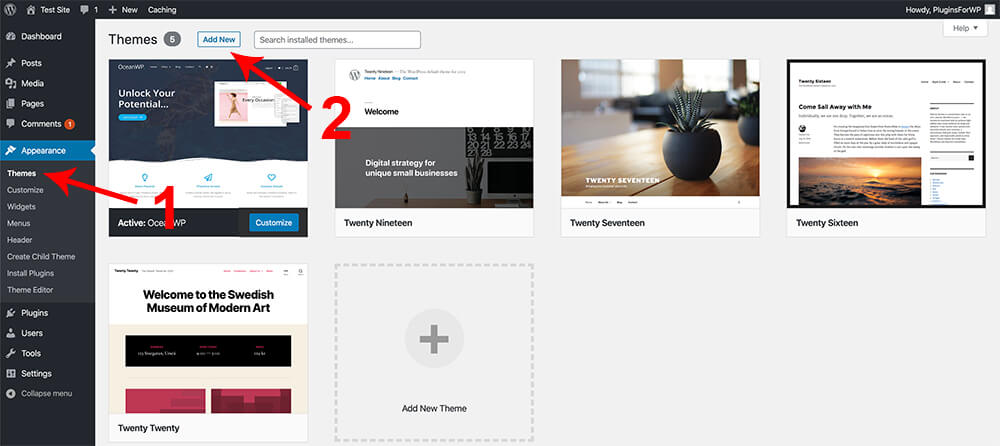
If you don’t know what’s your parent theme name is, log in to your WordPress website and from your dashboard, navigate to Appearance -> Themes. The activated theme (the one on the top left) is your parent theme.
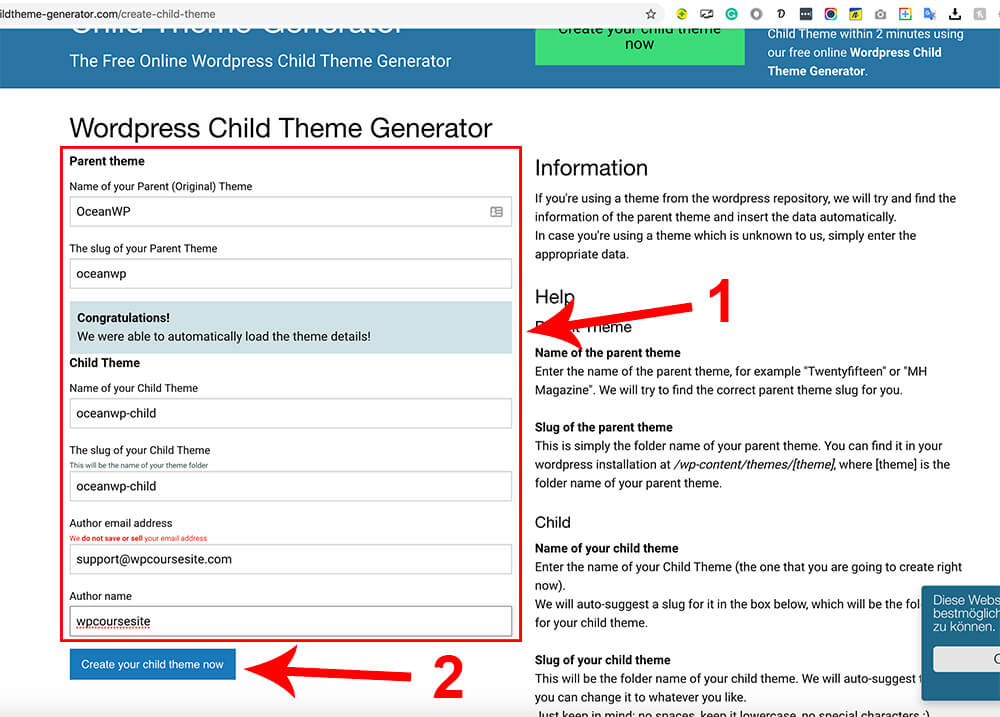
The generator will auto-generate the parent slug based on the theme you chose.
In the Name of your Child Theme field, type your parent theme name with a dashing child added in the end, for example, oceanwp-child.
The slug of your Child Theme will match the name of your child theme.
The Author’s email address and the Author’s Name are just extra details that will be added to the
style.cssFile of the child theme. It doesn’t matter what you’re entering there.When done, click on the Create your child theme now button.
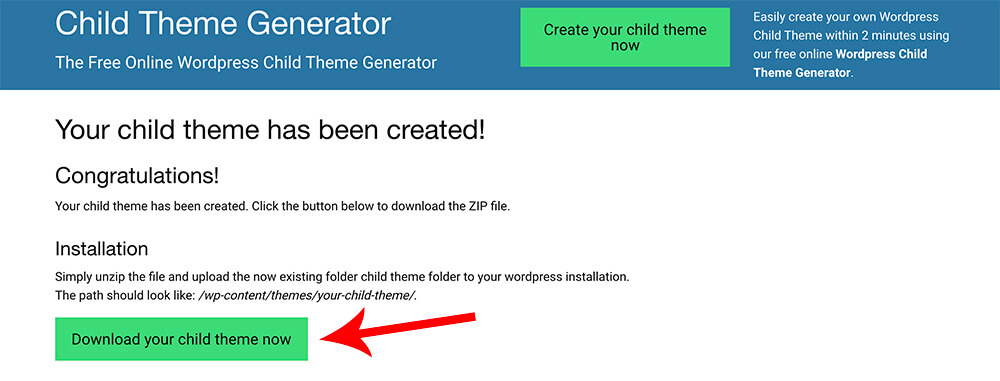
On the next screen, click and Download the child theme to your computer (it’s a zip file).
Once downloading our freshly made child theme, we will need to upload it to our website.
To do that, log in to your WordPress dashboard, navigate to Appearance -> Themes and click on the Add new button at the top.
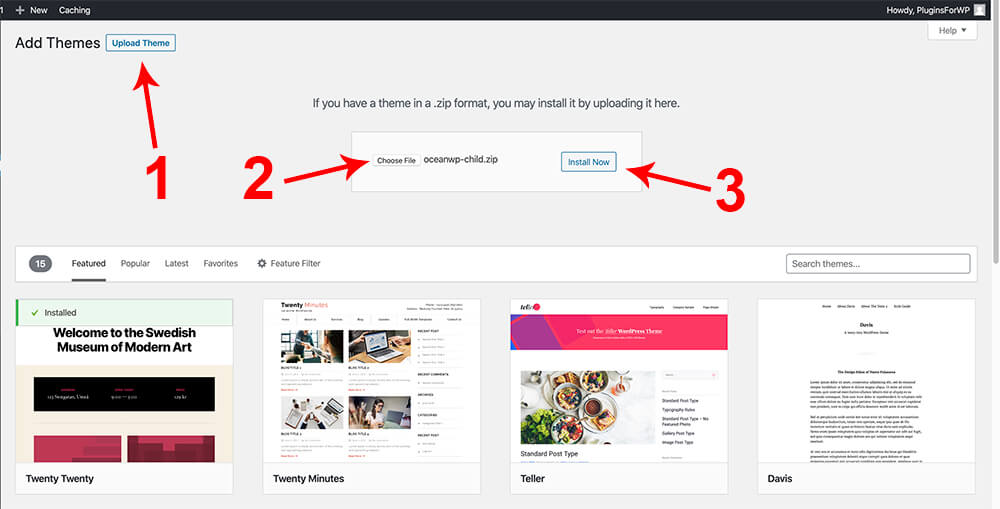
Click on the Upload theme button and then Choose File on the next screen. Choose the zip file that you’ve just created and click Install Now. Once the installation has been complited, click on activate to start using the child theme.
- Once activating the child theme, visit your website and see that nothing changed (it’s a good thing). From now on, any changes that need to apply to your website, whether it’s design-wise or codes, need to be devoted to the child theme.
Additional online child theme generators
Method #2: Create a Child Theme With a Plugin
We will create our child theme with a WordPress plugin in this method.
Install the Child Themify plugin
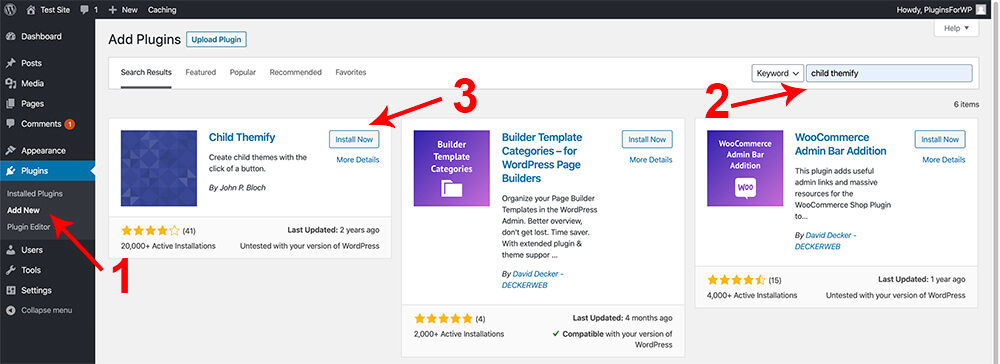
From your WordPress dashboard, navigate to Plugins -> Add new, search, install and activate the Child Themify plugin.
Create the child theme
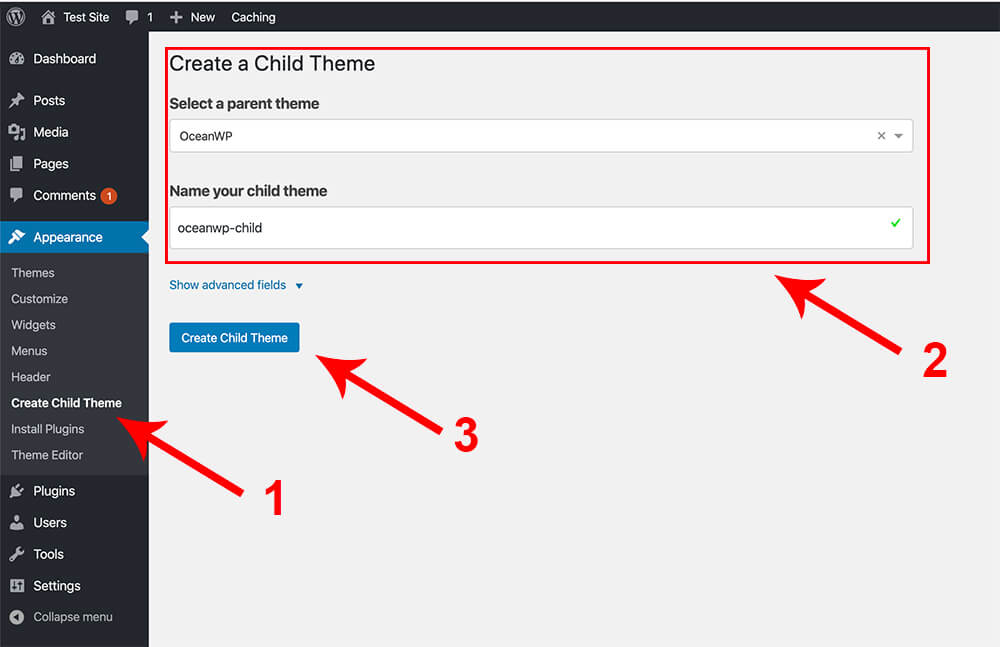
Once installing the Child Themify plugin, a new option was added to your Appearance menu. Click on Create Child Theme.
On this screen, choose your parent theme from the drop-down menu and enter a child theme name, like your parent theme plus dash child added to the end—for example, oceanwp-child.
Click on the Create Child Theme button.
Once clicking the Create Child Theme button, you’ll get a message notifying you that the child theme was created successfully. You can click on the Go check it out button or navigate to Appearance -> Themes.
You’ll see the new child theme on the Themes screen that you’ve just created. Please hover your mouse on it and click activate.
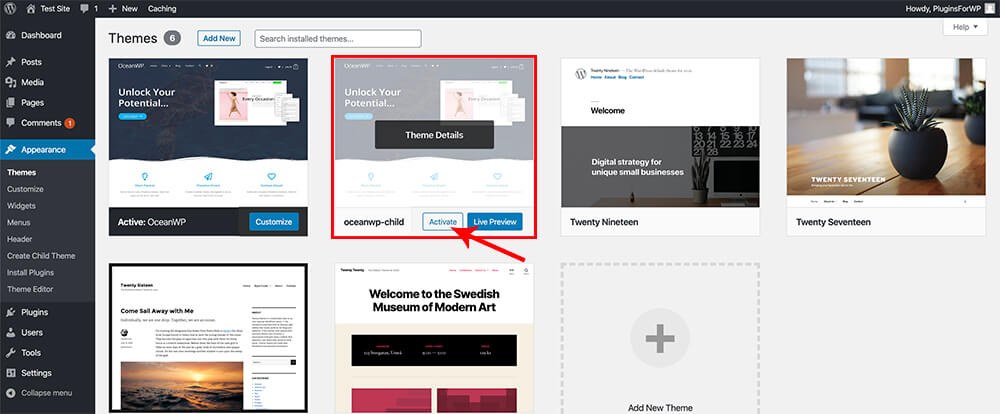
Once activating the child theme, visit your website and see that nothing changed (it’s a good thing).
Moving forward, any changes that need to apply to your website, whether it’s design-wise or codes, need to be used in the child theme.
Conclusion
In this article, you learned how essential child themes are, why we need them, and how to create them.
Leave us a comment and let us know which methods you used. In addition, if you have any difficulties in creating it, let us know which theme you’re using, and we will make it for you.
Also, make sure to subscribe to our YouTube channel and like our page on Facebook.


