Does your business have multiple physical locations? If so, adding a store locator feature to your WordPress website will help you tremendously.
Letting your website’s visitors find the right branch for them, based on their needs, will keep them happy and improve your foot traffic.
This article will teach you how to use a plugin to add a store locator in WordPress.
Why Use Store Locator
Store locator plugins for WordPress use Google Maps to display the different locations of your business.
The Google Maps module has many excellent perks, such as the different map views, geolocation, and directions to reach the nearest store.
In addition, clicking on a store location will open a modal window with relevant information about the specific branch. Some extra information can be hours of operation, phone number, or special instructions like where to park.
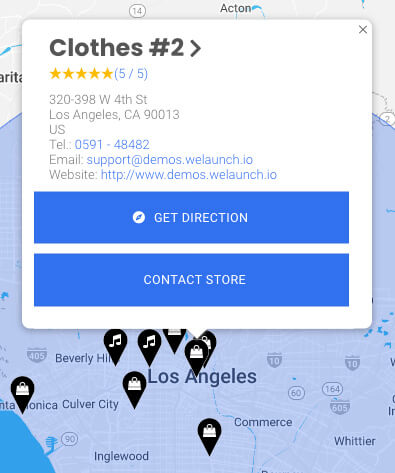
The extra information will reduce the number of questions your customers may have and save your workers valuable time to move on with their job tasks.
When the customer is ready to visit his chosen branch, he can click on the branch on his smartphone. Clicking on the store location will automatically open the Google Maps app, ready to navigate them to the destination.
The seamless integration between your website and Google Maps will improve your overall customer experience and brand reputation.
There are two requirements to fill before embedding a store locator on our website. The first is to install a dedicated plugin, and the second is to generate a Google Maps API key.
- Generate the Google Maps API key.
- Install a store locator plugin.
Regardless of your plugin of choice, we will need to generate a Google Maps API key to display it on our site.
Generate Google Maps API Key
Displaying Google Maps on our WordPress website requires us to create a unique API key.
Note: you must have a Google account with billing enabled to generate a key.
If you only want to display a few locations individually, you can bypass generating the API key process. You can read more about our embedded Google Map in the Divi article.
However, to fully enjoy any store locator plugins, you must obtain a valid API key. Here is how you do it:
- First, navigate to the Google Maps Platform website.
- Then, click on the Get Started button.
- Once inside the Google cloud platform, click the create billing account link and enter your payment details (Google asks for your payment details for safety reasons, and you won’t be charged automatically).
- Navigate into the APIs & Services -> Credentials screen.
- Click on the Create credentials button and choose the API key option.
- A popup window will open up with your new API key.
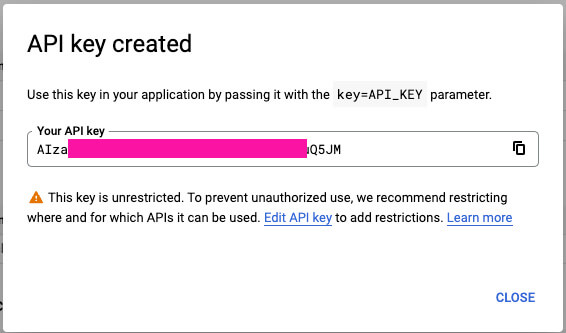
Great, your API key is ready to be used. You can copy it to the clipboard. We will use it shortly, but let’s now talk about store locator plugins.
Store Locator Plugin for WordPress
We can use multiple store locator plugins to embed a map on our website. There are all very similar in their features.
A store locator plugin will create two components:
- Dedicated custom post type page for every store you’ll add.
- Search page with Google Map to display some or all locations.
When choosing which store locator plugin to use, consider all the plugin’s features.
We tested the store locator plugins by YITH, wpexpertsio, and agilelogix. They are all excellent choices. However, the WordPress store locator plugin by weLaunch is our plugin of choice.
The WordPress store locator plugin has many great features to help us style maps and create advanced filters and categories for every store.
In addition, it can easily integrate with your WooCommerce store and let your visitors check if a particular product is in stock and in which location.
More on that later, but let’s install the plugin for now.
Install the Store Locator plugin for WordPress
First, we must install and activate the store locator plugin on our website.
You can download the store locator plugin from the official weLaunch website or us for only $4.99.
The downloaded zip file contains two plugins. One is the weLaunch Framework, and the second one is the store locator plugin. We need to install and activate them both.
From your WordPress website, navigate to Plugins -> Add New -> Upload plugin and install the weLaunch framework plugin first.
Once activated, repeat the process and install the store locator plugin.
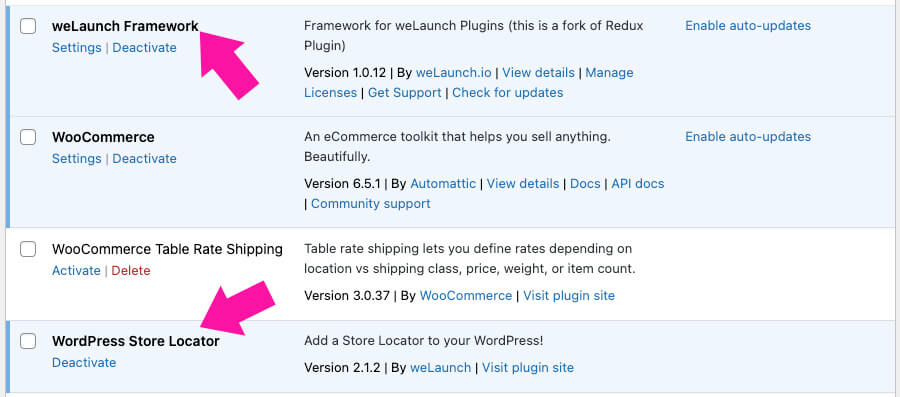
Once both plugins are active, we can enter the Google API key we generated in the last step.
To do that, navigate to Store Locator -> Settings -> General, fill in the Google API key field, and save the changes.
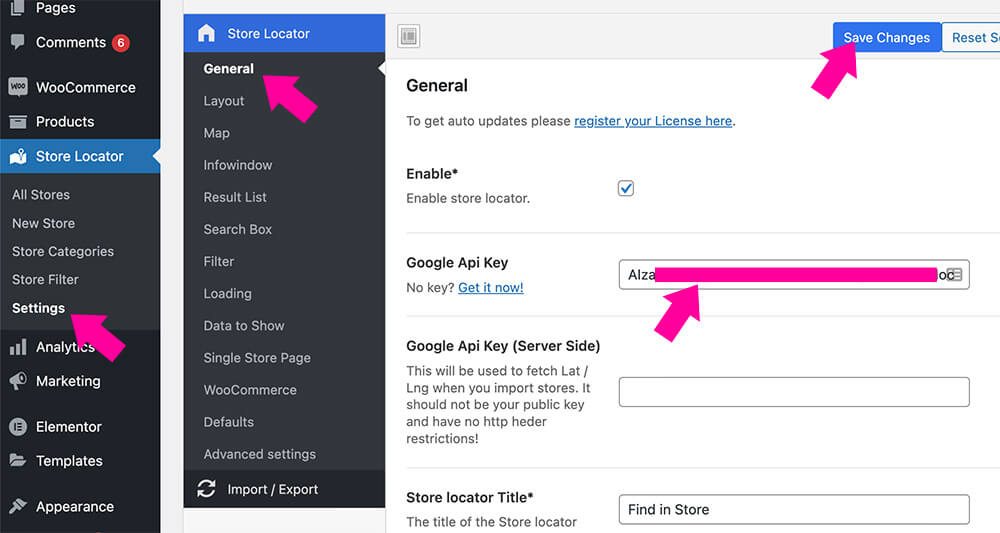
After saving, move on to the next step and create store categories and filters.
Categories and filters
WordPress taxonomies such as categories and tags can help us filter the results and find the right branch based on their needs.
If all your locations are identical, adding categories and filters is an optional step and not required.
For example, let’s take an individual who owns a few food industry businesses. One stream of his can be dining-in restaurants with a full-blown menu, while a different company can be coffee shops that only serve coffee with limited menu options.
In a case like the above, assigning different categories to the businesses will be wise. For example, one category can be ‘Restaurants,’ while the other is ‘Coffee Shops.’
To create new categories, navigate to Store Locator -> Categories, enter a category name and click on the add new category button.
Once added, you’ll see all the category names on the right side.
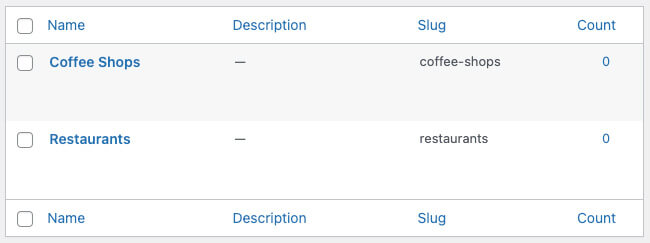
Categories are helpful for more complex types of businesses, and in most cases, you probably won’t even need to create different varieties.
If all your locations are essentially operating similarly, with minor differences, it’s better to use filters instead.
Let’s retake our coffee shop example and assume that all locations have the same menu but different features. For example, one place can have Wifi while the other doesn’t. Another branch can be pet-friendly while others aren’t, and so on.
Letting our customers filter the locations on the map based on their specific needs will make deciding which branch to go to much more straightforward.
To create filters, navigate to Store Locator -> Filters and enter your desired parent filters.
Only the 2nd level filters will be shown as checkboxes inside the store locator. The 1st level filters will be used as the filter top names.
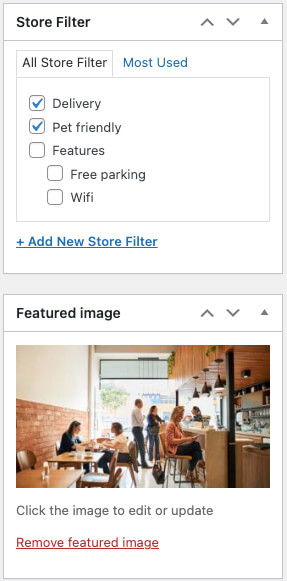
In our example, we will create a parent filter named ‘Features’ and enter Wifi, parking, pet-friendly, and delivery.
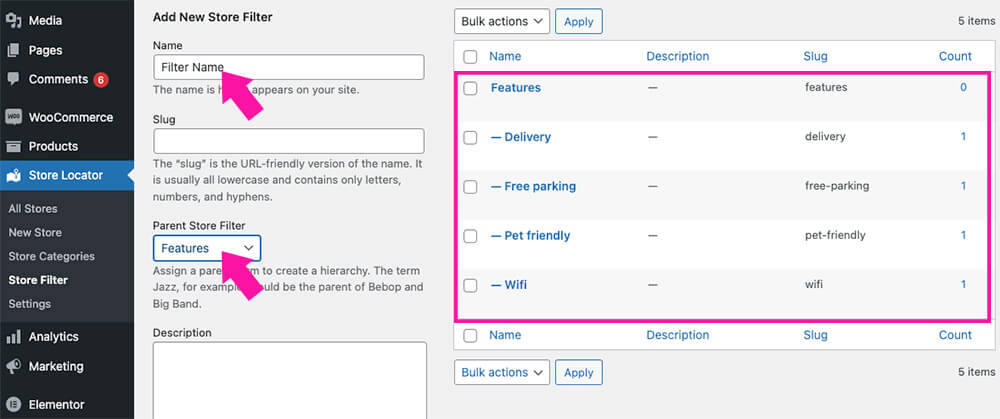
Great job. When our list of filters is ready, it’s time to move on and start adding store locations.
Add store locations
We reach the fun part, where we can start adding our store locations.
Every store you’ll add will be registered as a custom post type and have its page.
To create a store, navigate to Store Locator -> All Stores and click on the New Store button.
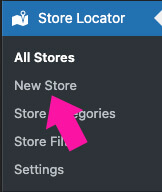
Adding a new store is similar to creating any other custom post type, such as a WooCommerce product.
You’ll need to add a title, description, and other details unique to stores, such as an address, contact information, and hours of operation.
Let’s continue with the same scenario and add a new coffee shop location.
The title can be the address itself or a short description of the place. Something that can differentiate between this location to the others. A title like ‘iBean Waterfront’ will work great.
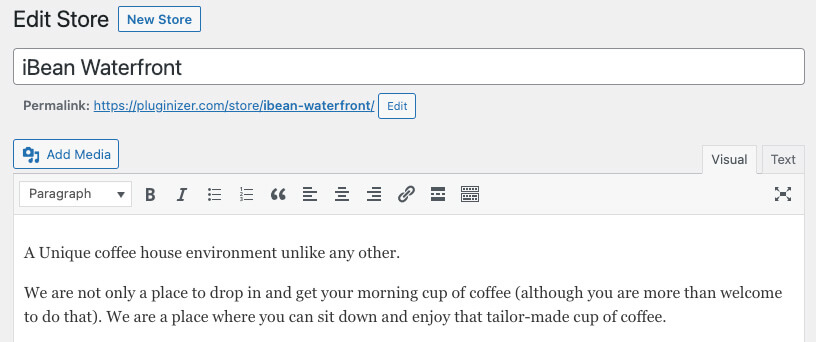
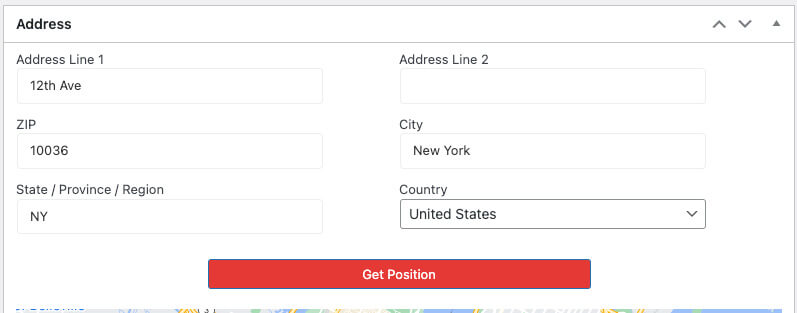
Then, keep adding the other relevant information asked on that page. For example, fill in descriptions, addresses, and operation hours.
Enable all the features this location offers on the right sidebar, such as parking and Wifi, and set a featured image.
Publish the store and repeat the process to add additional stores when done.
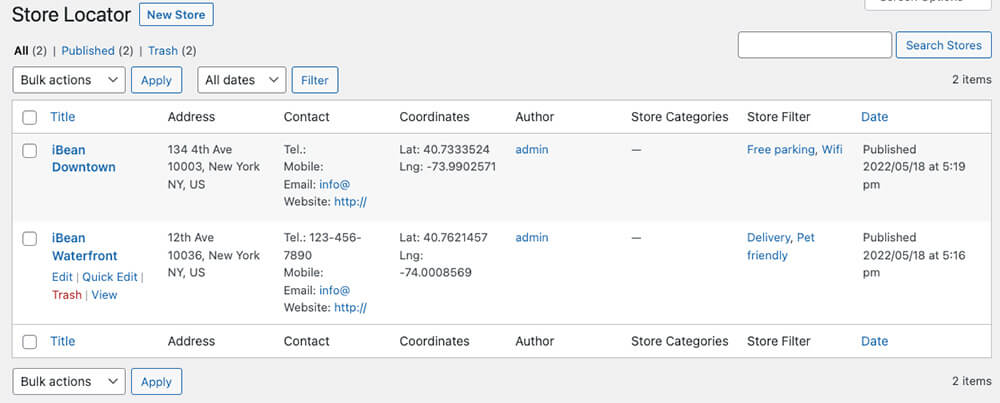
Once we have entered all addresses, it’s time to display the map with pins of the different locations.
Display the map with the store’s locations
We will need to use the plugin’s native shortcode to display the Google Map with the various locations we entered.
Thus, create a new page, enter the [wordpress_store_locator] in a Gutenberg shortcode block, and click on publish.

Once published, visit the page to view what the map looks like. The sidebar with the search bar, filters, and store locations will be positioned on the left, while the map with pins will be placed on the right.
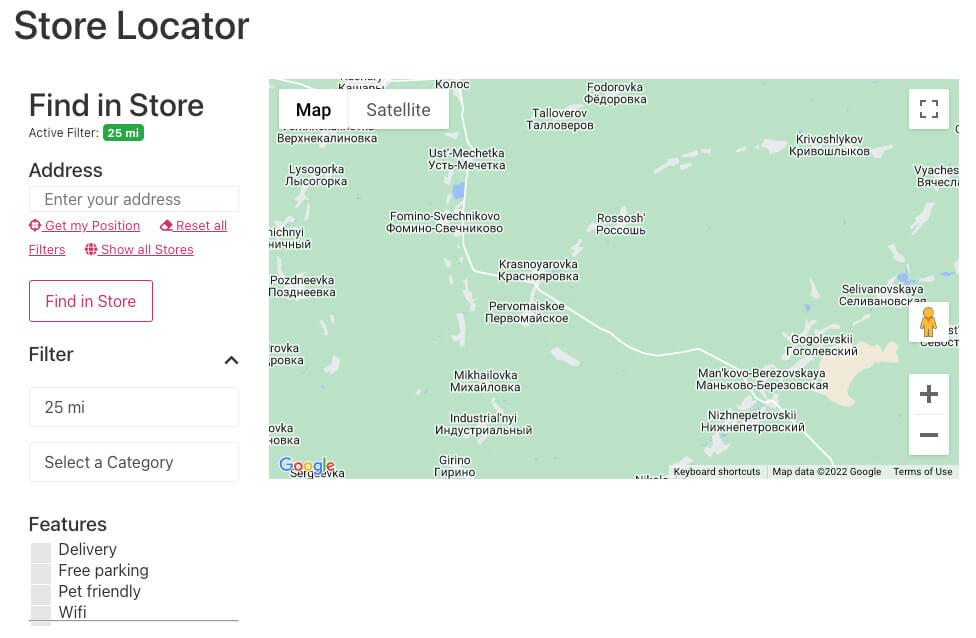
The client will need to enable the browser to use his current location or enter one manually inside the address field.
Then, the map will display a pin with your location and all the available stores near you in the distance range.
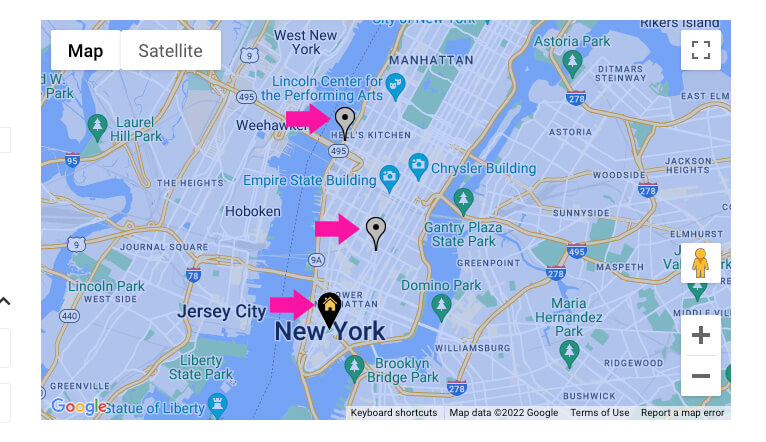
Feel free to test the filters by selecting your desired options and waiting for the map to update with the relevant results.
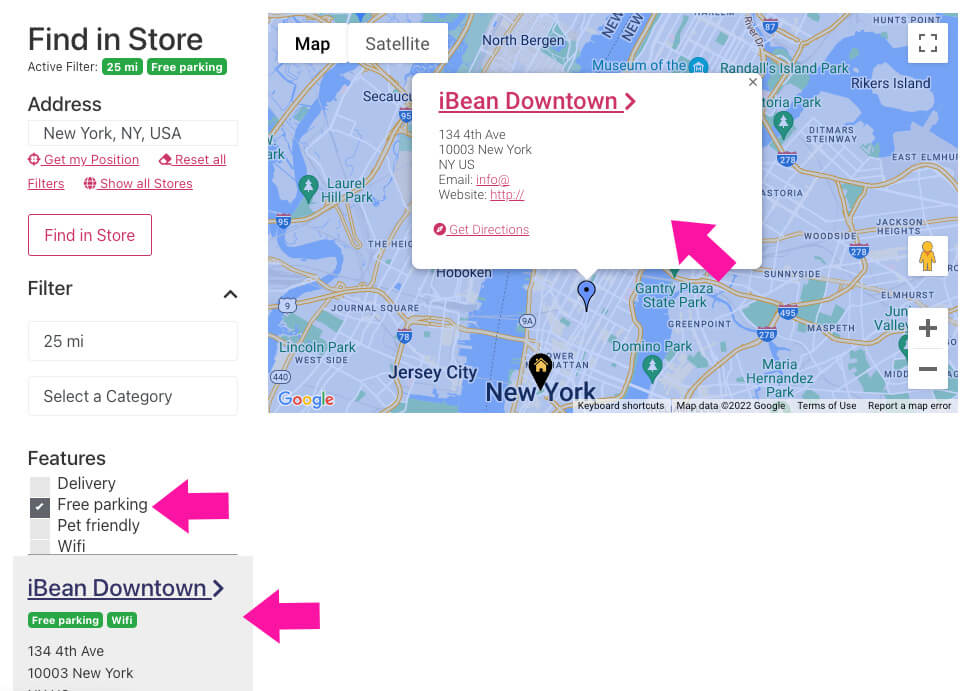
You can also hover over the store in the search results to see its location on the map and more details such as an address and phone number.
Once everything works as expected, we can keep moving and customize the map’s look and functionality.
Customize the Store Locator Plugin
One of the reasons why this store locator is our plugin of choice is thanks to the unlimited options to style and customize every aspect of it.
You can modify every part of the plugin by navigating to the relevant tab inside the Store Locator -> Settings screen.
Because we can tweak so many different settings, it’s impossible to cover them all. However, there are some that we would like to point out.
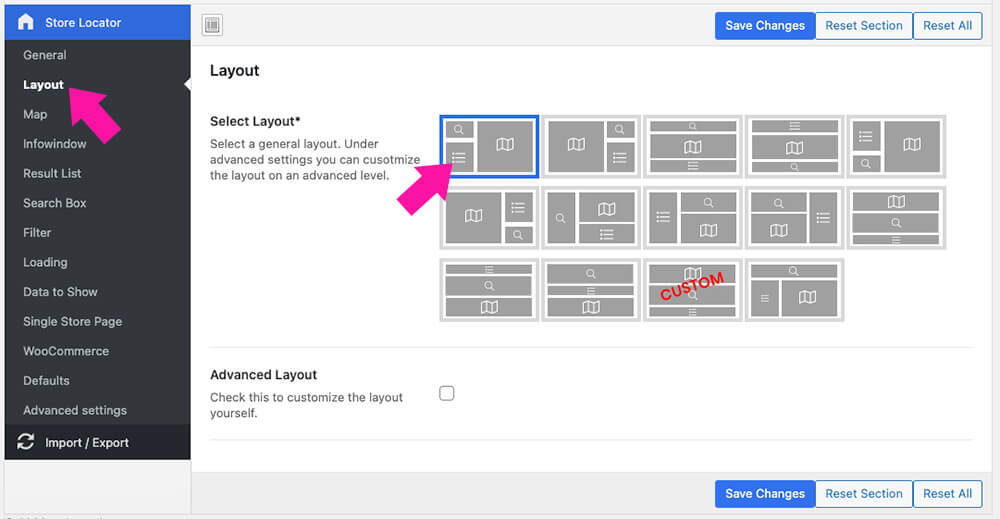
Layout
You can change the default layout of the store locator shortcode to a different template or a custom design.
Navigate to Settings -> Layout, and choose one of the many other available options.
Map height
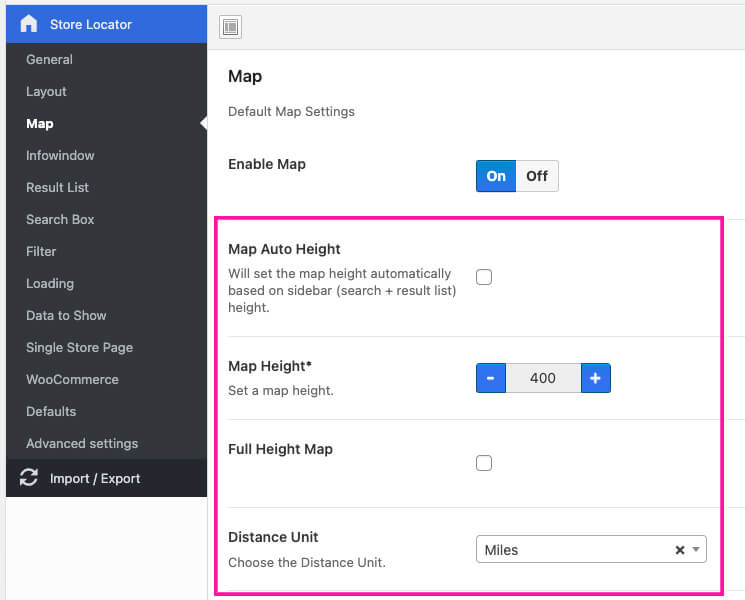
By default, the map’s height will be automatically determined by the search results height. If you only have a few locations, you can keep them.
However, I recommend setting a maximum height instead to make it more visually appealing. Thus, navigate the map tab, uncheck the map auto height box, and set a specific number.
Another option you may like to change on this page is the distance unit. The default distance unit is set to KM, but you can change it to miles.
Data to show
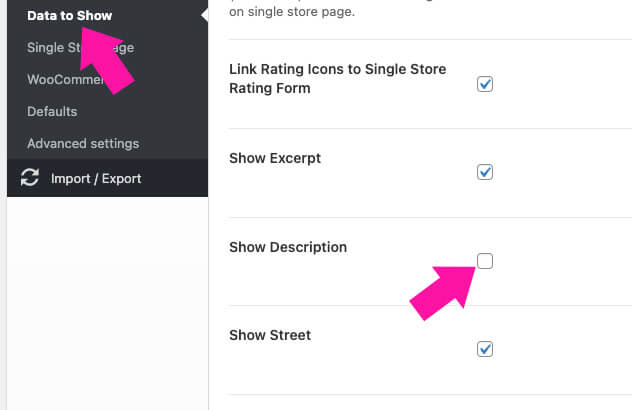
When hovering over a location from the search results list, the popup window will display a lot of information regarding the store.
Some of the data is irrelevant and better to be left out. In my opinion, the full description of each store is unnecessary and, therefore, should be hidden.
You can decide what to display or hide inside the data to show the tab. Many options are checked by default, but you can uncheck them based on your preferences.
Single store page
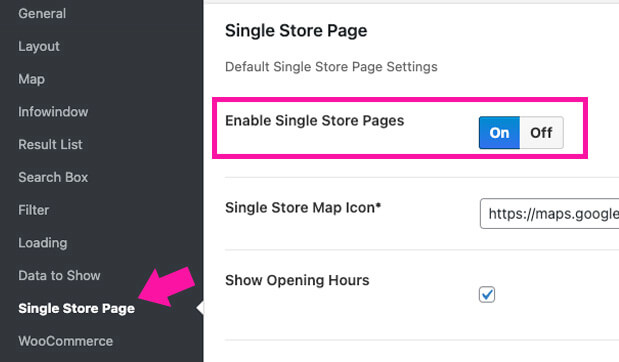
As mentioned earlier, every store will have a designated page with its URL. The store page will display all the information you entered, including descriptions, hours, and featured images.
Navigate the single store page tab and uncheck the boxes if you want to hide some elements.
Alternatively, you can also disable the single store page altogether. The stores will still be displayed on the map, but clicking on them won’t open the store page.
There are so many more options than you can change. I recommend you review them and adjust them based on your business requirements.
Save the changes and revisit the store locator page to test the results.
Conclusion
This article taught you how to use the store locator plugin to display all your store locations on your WordPress website.
Leave us a comment and tell us if you have any questions regarding the process. We will be happy to help as much as possible.
Also, make sure to subscribe to our YouTube channel and like our page on Facebook.

