User experience is one of the essential aspects that every store owner should pay attention to.
Simplifying the shopping process for our customers can help them make the right decision much quicker and for us to increase revenue and start filling the order.
By default, WooCommerce product variations are displayed in a dropdown list that covers the different options from the view.
This is not a good practice for two main reasons:
- The variations are hidden; the customer must click the dropdown menu to view the options.
- Unfortunately, once clicked, the customer still may not see all the existing variations (such as colors), requiring him to scroll down.
Studies show a customer’s average time on a page is roughly 45 to 80 seconds. Therefore, considering that both reasons above will make the visitor spend valuable time, we should change and optimize it.
One of the most effective ways to make shopping more enjoyable is displaying all options in a swatches view.
Swatches will lay out all the product options, ensuring the customers see them all while speeding up the shopping journey process. That’s a win-win situation for the customer and the business.
We can change and convert the default variation dropdown list to buttons in multiple ways, and in this tutorial, we will focus on two.
Change the Dropdown List to Radio Buttons with a Function
In this first method, we will use a PHP function to change the default dropdown list to radio buttons.
You’ll need to paste the function below at the bottom of the functions.php file of your child theme.
Note: please back up your website before editing core files.
function convert_drowpdown_variables_to_buttons_woocommerce() {
	add_action( 'wp_print_footer_scripts', function() {

        ?>
        <script type="text/javascript">

        // DOM Loaded
        document.addEventListener( 'DOMContentLoaded', function() {

            // Get Variation Pricing Data
            var variations_form = document.querySelector( 'form.variations_form' );
            var data = variations_form.getAttribute( 'data-product_variations' );
            data = JSON.parse( data );

            // Loop Drop Downs
            document.querySelectorAll( 'table.variations select' )
                .forEach( function( select ) {

                // Loop Drop Down Options
                select.querySelectorAll( 'option' )
                    .forEach( function( option ) {

                    // Skip Empty
                    if( ! option.value ) {
                        return;
                    }

                    // Get Pricing For This Option
                    var pricing = '';
                    data.forEach( function( row ) {
                        if( row.attributes[select.name] == option.value ) {
                            pricing = row.price_html;
                        }
                    } );

                    // Create Radio
                    var radio = document.createElement( 'input' );
                        radio.type = 'radio';
                        radio.name = select.name;
                        radio.value = option.value;
                        radio.checked = option.selected;
                    var label = document.createElement( 'label' );
                        label.appendChild( radio );
                        label.appendChild( document.createTextNode( ' ' + option.text + ' ' ) );
                    var span = document.createElement( 'span' );
                        span.innerHTML = pricing;
                        label.appendChild( span );
                    var div = document.createElement( 'div' );
						div.className = "radioButton";
                        div.appendChild( label );

                    // Insert Radio
                    select.closest( 'td' ).className = "variationButtons";
					select.closest( 'td' ).appendChild( div );

                    // Handle Clicking
                    radio.addEventListener( 'click', function( event ) {
                        select.value = radio.value;
                        jQuery( select ).trigger( 'change' );
                    } );

                } ); // End Drop Down Options Loop

                // Hide Drop Down
                select.style.display = 'none';

            } ); // End Drop Downs Loop

        } ); // End Document Loaded

        </script>
        <?php

    } );
}
add_action( 'woocommerce_variable_add_to_cart', 'convert_drowpdown_variables_to_buttons_woocommerce' );
Once pasted, revisit the relevant product page to ensure the attributes have changed to radio buttons.
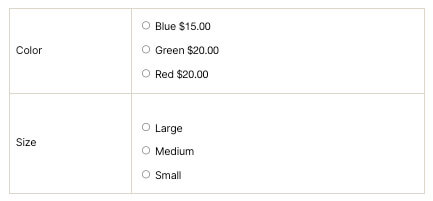
The structure’s look is based on your active theme and may look different from one to another.
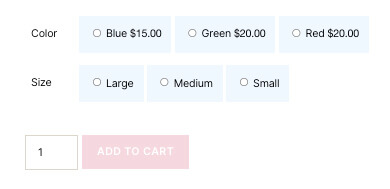
You can also improve the section’s appearance with custom CSS to display it better.
Here are basic CSS rules to prettify the radio buttons. You can keep building on that based on your needs.
.variations, .variations th, .variations td {
	border:none;
}
.variationButtons {
	display: flex;
}
.radioButton {
	padding: 10px 15px;
	background-color: aliceblue;
	margin-right: 5px;
}
.reset_variations {
	display: none!important;
}
You must use a WordPress plugin if you want something more robust with additional options.
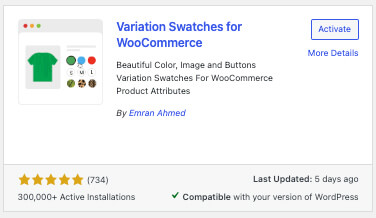
Change the Dropdown List to Swatches with a Plugin
We can use many decent WooCommerce plugins to convert the attributes list to buttons. However, this tutorial will focus on the Variation Swatches For WooCommerce plugin.
Upon activating the plugin, all the variations will be transformed from their current view to buttons.
That’s practical and saves us valuable time from individually changing it for each product.
The plugin’s free version is limited but still very useful. You can browse the different options by navigating to the Swatches Settings screen.
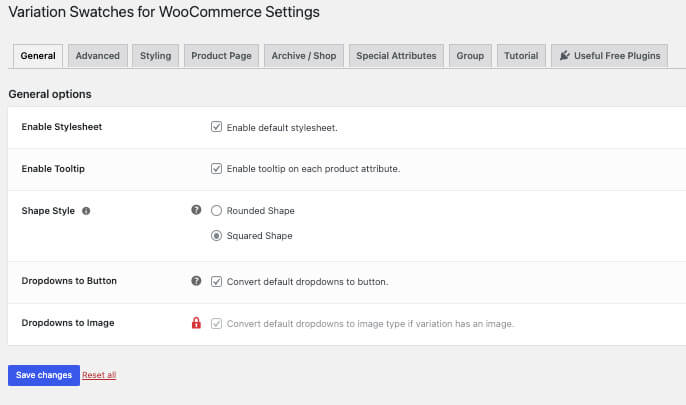
To get ideas and learn how to implement the different variations, navigate to the Swatches Settings -> Tutorial tab and watch the videos.
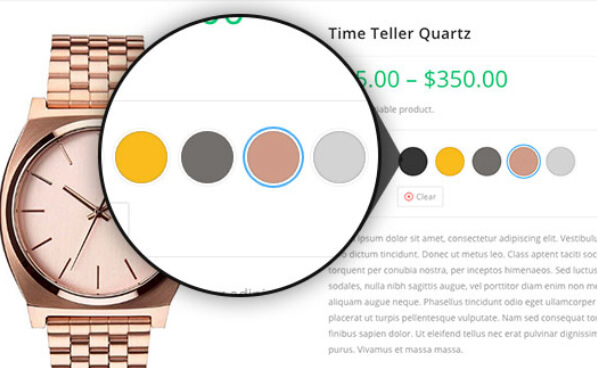
One example is to change the color variations from text to actual colors.
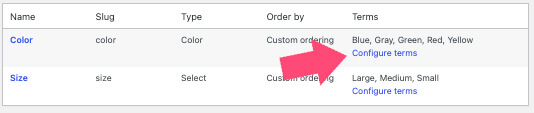
First, navigate to the Products -> Attributes screen, and edit the Colors attribute.
Then, change the attribute type from select to color, and update the changes.
Once updated, the product colors will be displayed in a simple color palette. We need to assign the right color to each option to change that.
Therefore, navigate to the Attributes screen, and click the Configure terms link.
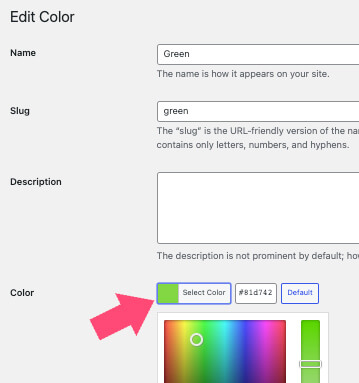
Click edit under the desired color name, and use the color picker box to assign its color.
Once you have saved the changes, visit the product page, and verify that the attribute changed to the color you assigned to it.
You’ll then repeat the process and assign each variation its corresponding color.
If you’re interested in the pro version of the plugin, you can get it from the official developer or us for only $4.99.
Related Articles
- How to Reorder and Sort Product Attributes in WooCommerce
- How to Disable Image Zoom and Lightbox for WooCommerce Products
- How to Easily Change Default Sorting and Reorder Products in WooCommerce
- How to Add Additional Variation Images to Products in WooCommerce
- How to Change the Sale Badge Text and Color in WooCommerce
Conclusion
This tutorial taught you how to change the WooCommerce product attributes dropdown list into beautiful buttons.
Comment and tell us which method you used to achieve this task.
Also, make sure to subscribe to our YouTube channel and like our page on Facebook.