Did you ever find yourself sending invoices to customers who ordered from your store outside the WooCommerce platform?
If the answer is yes, you probably know how frustrating and time-consuming it can be. Creating the order, prices, shipping address, and customer detail can be a hassle and energy drainer.
Sharing the cart link, already filled with the desired products, will save you valuable time to focus on other essential tasks.
In this article, I’ll show you how to add a cart sharing feature to WooCommerce.
Benefits to Share Cart Link
As we briefly discussed in the above section, saving time is only one of the benefits.
When a customer is placing an order over the phone, via a contact form, or an email, you’ll need to take extra information about them in addition to the items they are interested in.
Additional information can include their name, address, billing address, order notes, etc.
However, when using the cart-sharing feature, you’ll only need to retrieve the products they’re interested in. Then, once you have added the desired items to the cart, send them the cart’s link, and let them fill in the rest.
While going through the checkout process of your WooCommerce store, they’ll need to fill in the required fields on the checkout page themselves.
That way, you’ll minimize errors from miscommunication between you and the clients.
Some of the other pros why of using a cart-sharing link:
- Bulk discount – the store owner can share the cart link, already populated with a coupon code.
- Exposure – satisfied customers can easily forward the cart link to their friends or family, increasing sales and a higher conversion rate.
- Upsell – customers checking out inside your WooCommerce store (rather than paying an invoice) have a more significant chance to add additional items to the cart, increasing revenue.
- Minimize human errors – the customers can see what items they’re paying for before checking out and modify the order if necessary.
- Recover lost sales – by letting your customers save their cart, and return to the checkout process later.
A cart-sharing feature will improve the shopping experience for your customers while helping the store’s owner increase sales and revenue.
How to Add a Cart Share Feature to WooCommerce
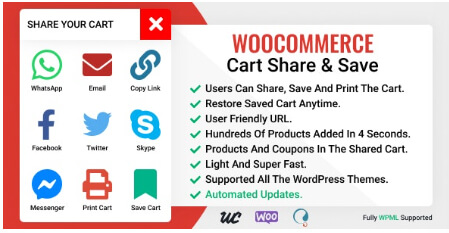
Using the Cart Share plugin, you can add a cart share feature to WooCommerce.
Add a cart share feature to WooCommerce, by following the steps below:
-
Download the Cart Share plugin (from the official website for $38 or us for only $4.99).

-
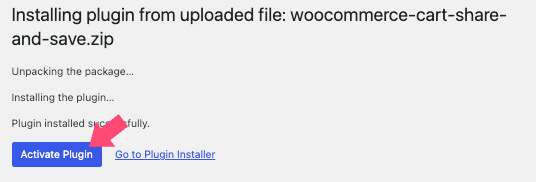
Install and activate the plugin on your WordPress website.

-
Visit the cart page and test the cart share button.

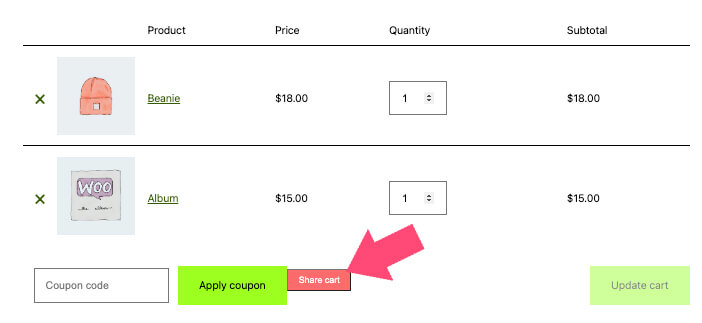
By default, the cart-sharing plugin will automatically add the share button upon activating.
You’re golden if the basic settings are all you were looking for. First, however, let’s dive in and explore some of the plugin’s settings.
The Cart Share Plugin Options
The cart share plugin comes with many customization options. Let’s check some of them.
The Appearance tab will enable you to change the button and the popup style.
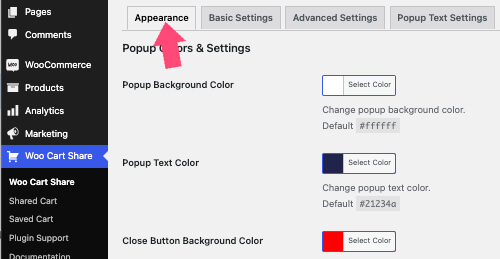
Consistency is one of the most vital cores of online businesses, and matching the button to your color scheme is smart.
Some other elements we can change are the background color, text color, close button, hover color, and many more.
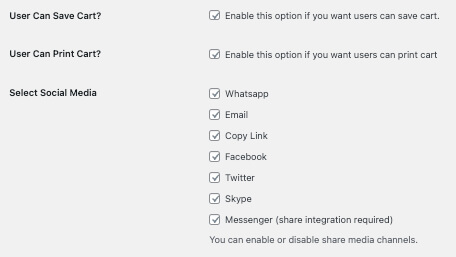
You can change the button location and functionality inside the Basic Settings tab.
By default, the share cart button will appear to the right of the coupon field, but you can change its location from the dropdown list menu.

In addition, you can enable the option to save the cart and select the social media links inside the popup box.
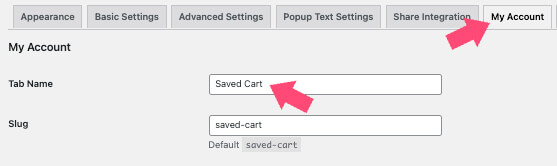
Also, if you want to remove the Saved Cart tab from the account page, navigate to the My Account tab and delete the tab name value.
Please make sure to scroll down the page and click on the Save Changes button once finished.
Conclusion
This article showed you how to further optimize your WooCommerce shop by adding the feature to share the cart link.
We have many more optimization ideas that will help you increase sales and revenue; you can read them on the WooCommerce articles archive page.
Leave us a comment and tell us if you have any further questions regarding the plugin or need additional help setting it up.
Also, make sure to subscribe to our YouTube channel and like our page on Facebook.