


Background colors and images are some of the most effective ways to decorate and revive website pages.
A beautiful website won’t only be more enjoyable to visit, but it will convert much better than a standard one.
In this article, I’ll show you how to set a background image or color to any page in Elementor.
Different Ways to Set the Background
There are two different ways to set a background image or color to a page using the Elementor page builder.
First, we will assign the desired style to the entire website, and second, we will set the background to the <body> tag of a specific page.
If you set a background color or image globally to the entire website, it can still be overwritten by settings applied on a specific page.
If you’re looking for different sources for high-quality images, read how to add images to the WordPress header article to get the complete list.
How to Set a Background Image or Color with Elementor
Setting up the background is easy, and you can do it from inside the Elementor visual editor.
As mentioned above, there are two ways to set up the background image. First, let’s start by assigning the appearance or color to a specific page.
Set background for specific pages
To set the background to a specific page, click on edit with Elementor and click on the settings icon in the bottom left corner.
Then, move to the Style tab and select the background type you want, classic or gradient.
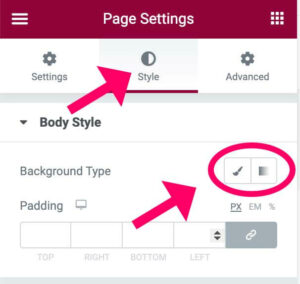
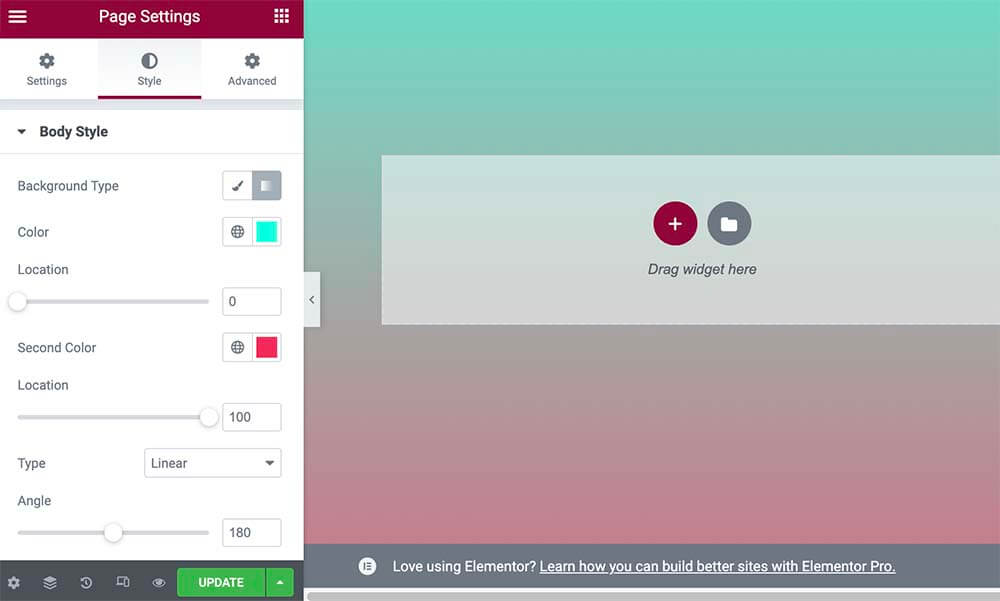
If you choose the classic type, you’ll be able to set a solid color or an image that will cover the entire page.
After choosing a background image, options related to the image settings will be added, such as position, size, etc.

However, if you choose the gradient option, you’ll assign two different colors that will blend.

When you’re happy with the results, save the changes.
This method will only affect the specific page you’re editing and not any other page.
If you want to set up a background image or color for all the pages at once, follow the steps below.
Set background to the entire website
To set a background pattern to the body tag of the entire website, one that will be applied to all the pages, follow the steps below.
Step #1: Open Elementor visual editor
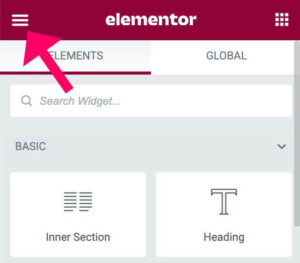
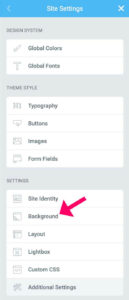
First, open the Elementor screen of any page. Then, click on the burger menu icon from the top left corner to open the global site settings.
Then, click on the Site Settings option.
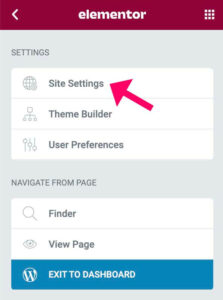
Inside the global site settings options, navigate to the Background tab.
Step #2: Choose the background type
Choose between a classic (solid color or image) to the gradient option inside the background tab.
If you choose the classic option, set up a solid color using the pallet or upload a photo to the library.
Alternatively, you can also use a color HEX code. Read our how-to-change link color in the WordPress article to learn how to get the hex code.

However, if you choose the gradient option, set two different colors that will blend.

When done, make sure to save the changes.
Step #3: Test and verify
Once saved, navigate to a different page and verify that the new background also appears.
Related Articles
- Make a transparent header with Elementor.
- How to remove page title with Elementor.
- Create a user registration form using Elementor.
- Create timeline content with Elementor.
Conclusion
This tutorial taught you how to set a background image to a specific page or the entire website with Elementor.
Leave us a comment and tell us which method you used and where you got your images.
Also, make sure to subscribe to our YouTube channel and like our page on Facebook.


Thank you very much for the guidance. It has been very helpful.
You’re very welcome!