Elementor is one of WordPress’s best page builder plugins, enabling us to create simple or complex designs easily.
If not knowing how to add columns in Elementor prevents you from achieving your desired layout, you have come to the right place.
This article will show you how to add columns in Elementor. You can use this guide to create a simple two-column layout or a more complex multi-column grid.
Why Add Columns in Elementor
Columns play a vital role in any web design. They help to organize and separate content, making it easier for users to scan and understand. When creating a layout, use columns to control the spacing and hierarchy of your content.
You can create simple two-column designs or more complex grids with multiple columns.
Columns are a great way to create a more complex web design. They allow you to quickly lay out your content into multiple columns, making your website layout more visually appealing.
Additionally, columns can also help to improve the readability of your content. When used correctly, columns can be a powerful tool for enhancing your web design.
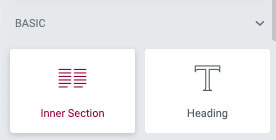
Add Columns with the Inner Section Widget
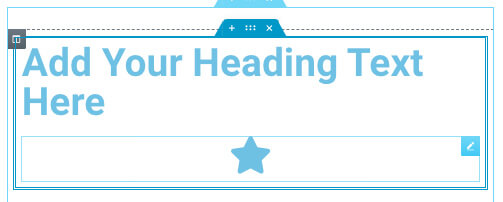
The Inner Section is a default Elementor widget that we can use to add columns to a section.
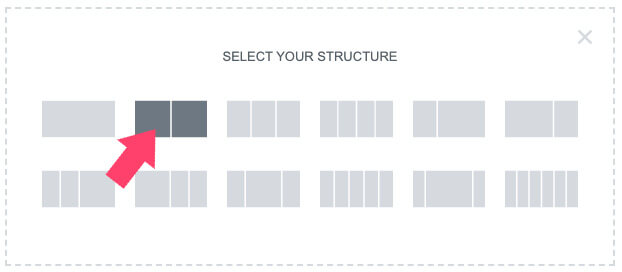
First, click on the edit with Elementor button to open the visual editor screen. Then, drag the inner section widget into your desired screen.
The new inner section will contain two equal columns, one next to the other. You can adjust the column width by dragging the spine left or right.

Please note: you can only drag the inner section once to a parent section but not into another inner area widget.
However, if you want to nest columns inside another column, choose a layout with columns and then drag the inner section into it.
Stacking up layers of nested div tags to create a columns structure is not ideal and will use valuable browser resources to generate. To follow best practices, it will be better to use the container widget instead for more complex layouts.
Add Columns to Existing Section
If you already have the section in place and creating it from the start doesn’t applicable to you, it will be simpler to duplicate the current column to create a new one.
To add a new column in Elementor, follow these steps:
-
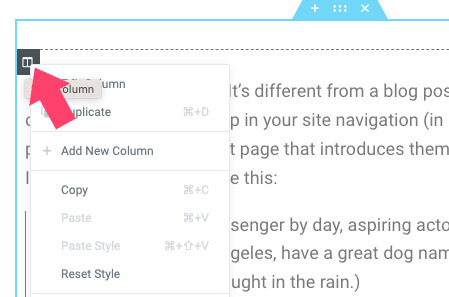
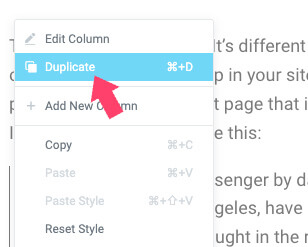
Right-click on the edit column icon of the existing column.

-
Click on the Duplicate option to create a new column.

-
Delete any of the new content and widgets of the new column.

-
Drag your desired widgets into the new column.
You can use the steps above multiple times to add many columns as you need.
Elementor announced to release of the container widget that we can use to create column layouts more efficiently. Although it’s not fully released yet, we will learn how to use it next.
Create Columns with the Elementor Container Widget
Currently, the Elementor flexbox container widget is in its beta version and just final stages before being officially released.
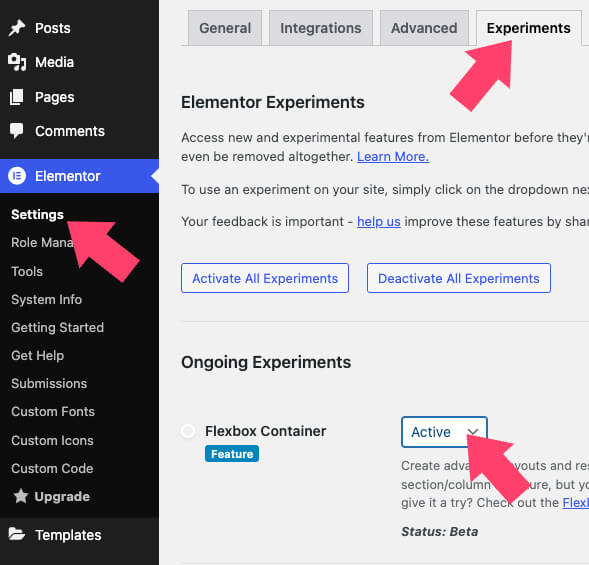
Therefore, if you want to access this feature, you’ll need to enable it through the Elementor dashboard.
To enable the container widget, navigate Elementor -> Settings and the Experiments tab. Then, change the Flexbox Container option to Active, scroll down and save the changes.
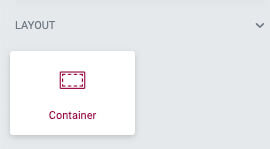
Once saved, load the Elementor editor and drag the new Container section into one of the sections.
The new container area is marked with a blue border, slightly darker than the section’s blue color.
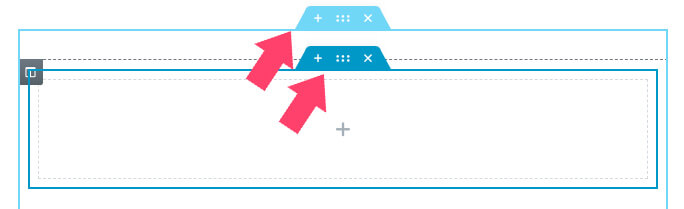
Start populating the container widget with content by dragging widgets into it.
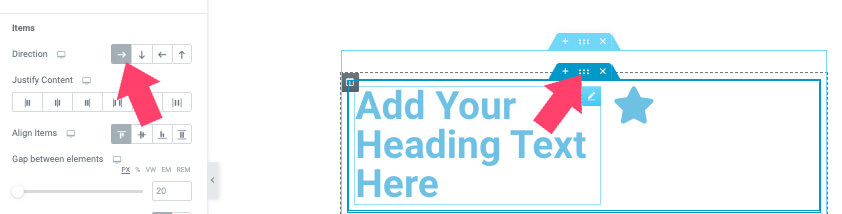
By default, the widgets inside the container block will be positioned one under another in a single column.
To change the layout and display it in multiple columns, click on the container’s settings icon and change the Direction option to Row – horizontal.
Once changed, the widgets inside the container block will be positioned sideways in multiple columns layout.
If you want to reorder the columns in the container block, open the navigator tool and drag the widgets up or down based on your needs.
Save the changes and test your website from multiple screen sizes.
Conclusion
Adding columns to your elements in Elementor is a quick and easy process that will help you create beautiful, responsive designs.
Columns are a great way to improve the readability of your content and create more complex web designs.
This article showed you how to add columns in Elementor in multiple ways.
Leave us a comment and tell us which method you used to achieve this task.
Also, make sure to subscribe to our YouTube channel and like our page on Facebook.