
Building an email list for your website is one of the essential things that every business must do to sustain communication with its audiences.
Mailchimp is an excellent email marketing service for collecting leads and communicating with visitors. So, if you don’t have an account, create one now.
This article will teach how to integrate Elementor with Mailchimp to collect email addresses quickly.
What is Mailchimp
Mailchimp is a fantastic service that helps you create, send, and track emails.
It’s perfect for bloggers and anyone with an online business who needs a reliable way to keep in touch with their audience.
With an account, you can easily upload your contact lists, design beautiful emails, set up automated campaigns, and measure the success of your efforts.
Mailchimp integrates seamlessly with other popular applications like WooCommerce and Contact Form 7, meaning it’s easy to use no matter which tools you’re already invested in.
Integrating Elementor With Mailchimp
With a subscriber list, you directly communicate with your followers without being dependent on social media or other channels.
With Elementor Pro, we can create a lead capture form to add subscribers to our Mailchimp account.
Then, all subscribers will join your mailing list and get your messages weekly (or however you set it up).
To connect between Elementor and Mailchimp, we will first generate a Mailchimp API key and enter it into Elementor.
Step #1: Generate a Mailchimp API Key
If you haven’t already, create an account in Mailchimp. It’s free and easy! All you need is a name, company name, and password. You can also input your website URL if you want to use that as your landing page. Once done, click create my free account.
From inside your account, let’s create a Mailchimp API key. An API key is a code that opens a communication channel between apps.
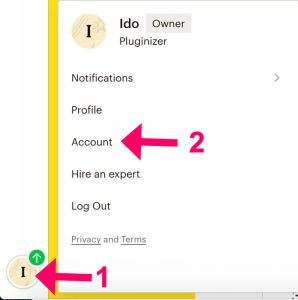
Log in to your Mailchimp account, click on the user icon in the bottom left corner, and navigate to Account.
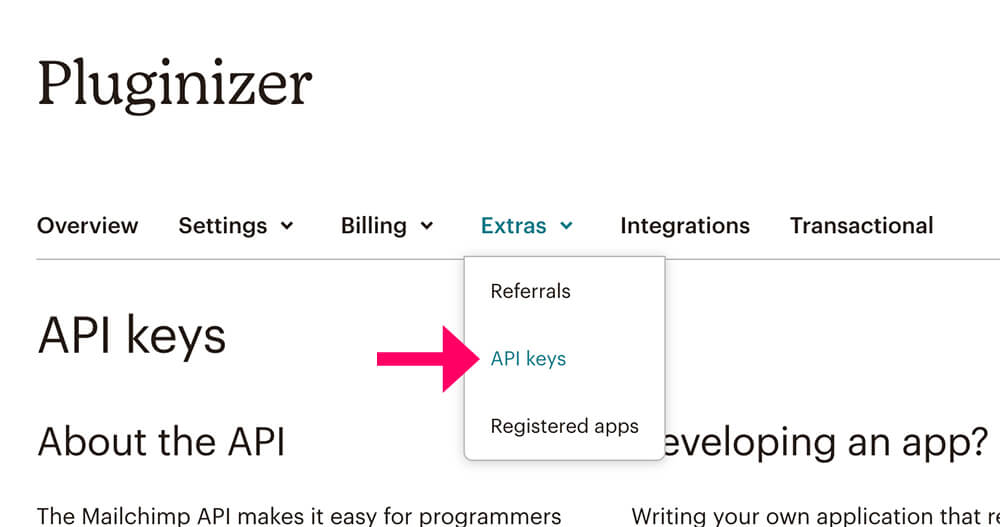
Then, click on the Extras tab at the top and enter the API keys option.
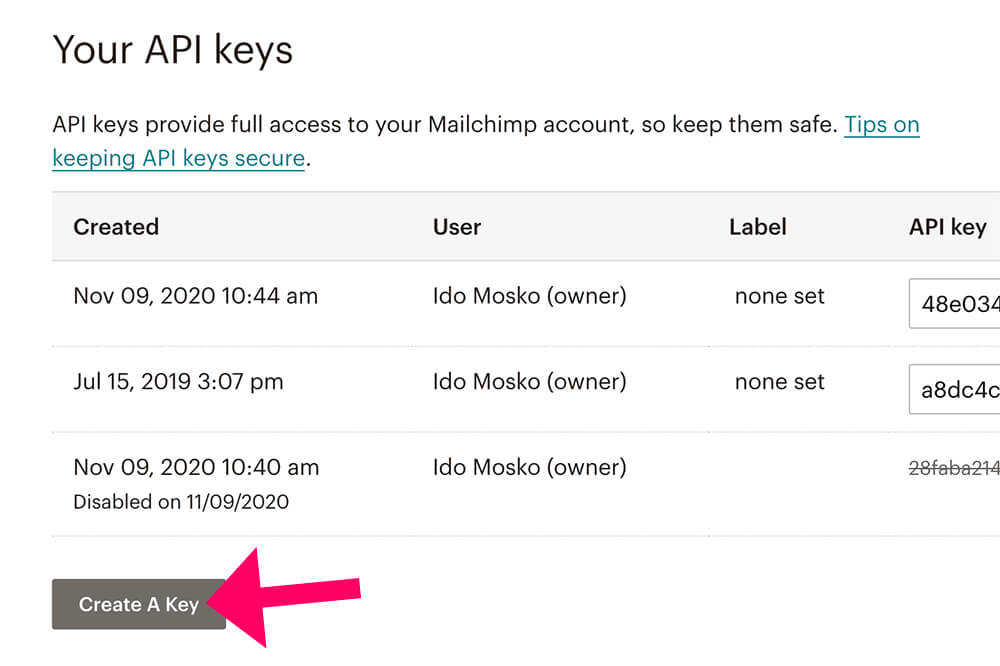
Inside the API screen, click on the Create A Key button and wait for Mailchimp to create the key for you.
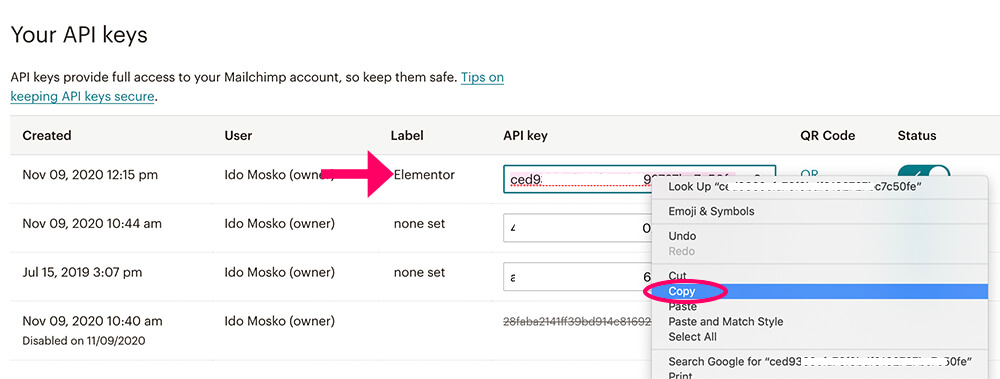
Once Mailchimp creates the key, change its name and call it Elementor.
Copy the key and move on to the Elementor settings screen of your WordPress website.
Step #2: Paste the API key in Elementor
Once we have the API key, we can move forward and use it with Elementor.
From your WordPress website, navigate Elementor -> Settings and then into the Integration tab.
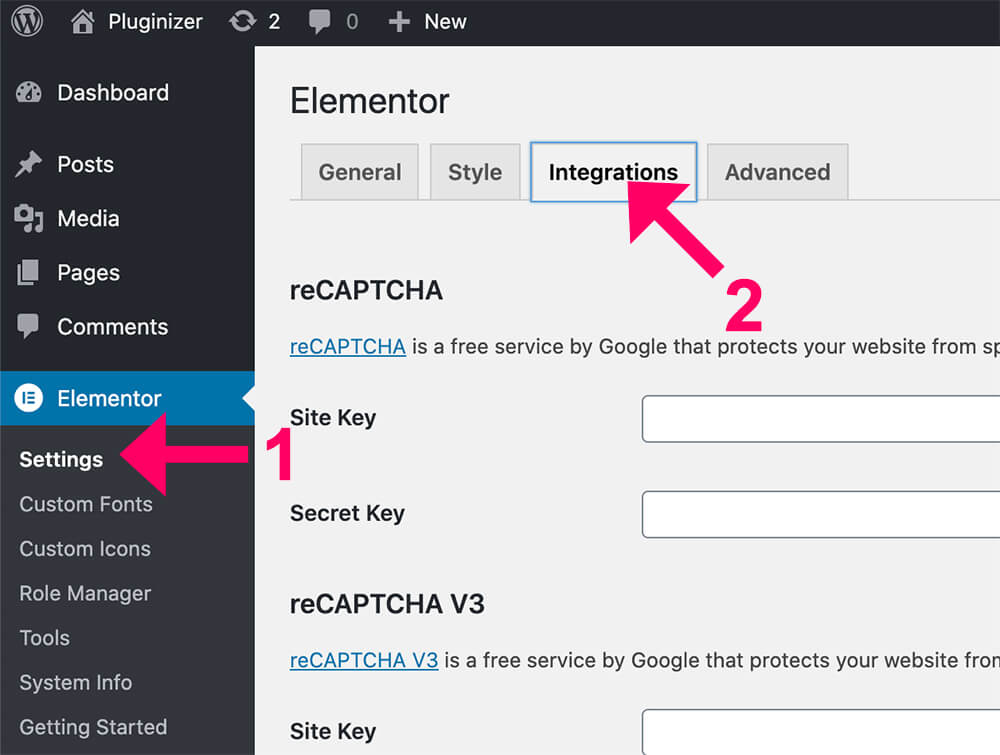
Scroll down to the Mailchimp section and paste the code you copied on the last step.
Once pasting the code, click the Validate API Key button to verify that both apps connect and communicate.
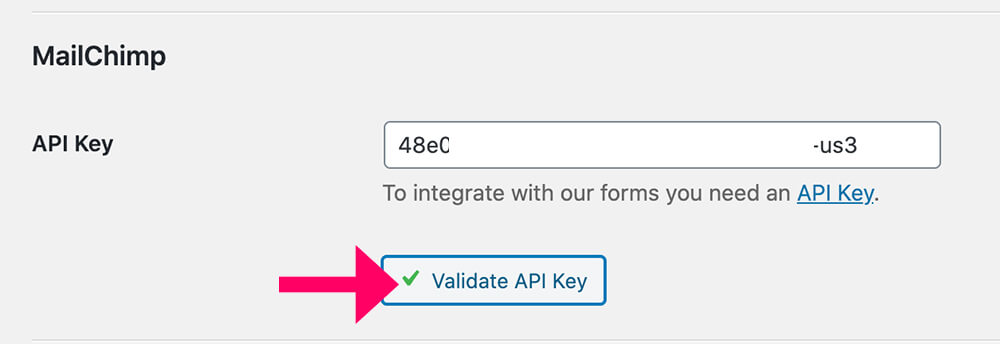
Then, scroll to the bottom of the page and click on the Save Changes button.

Step #3: Connect a Form to Mailchimp
Once validating that both apps are integrated, we’ll need to edit the Elementor form to capture leads and transfer them into Mailchimp.
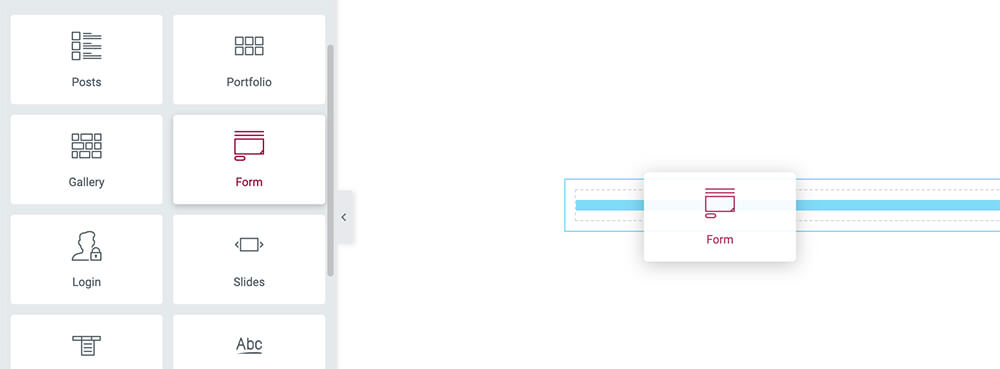
Open the Elementor edit screen and drag the form widget to your desired section.
The form will default contain three fields: name, email, and message.
Because it’s a lead capture form to collect emails, we will delete the message field and keep the other two.
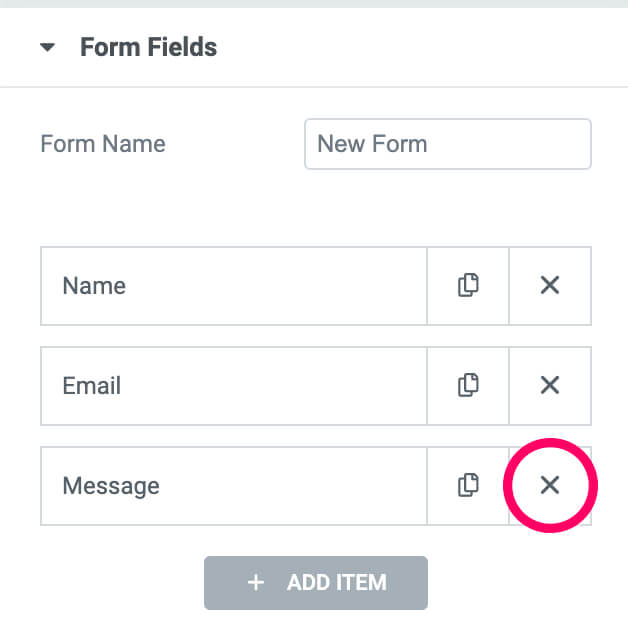
You can delete the name field, but I recommend you leave it as is and collect the subscribers’ names.
Then, expand the Actions After Submit tab, delete the email, and choose the Mailchimp option instead.
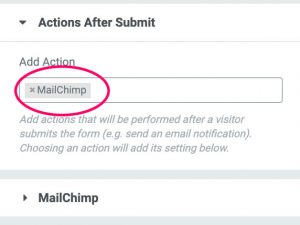
Once you do it, a new Mailchimp tab will be added below the action. Click on it to expand it.
Elementor will use the key you entered in the last section and load all the Mailchimp lists of your account.
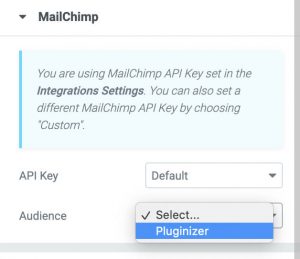
Once you select a list, you can segment the subscribers by groups or tags and even enable the double opt-in feature.
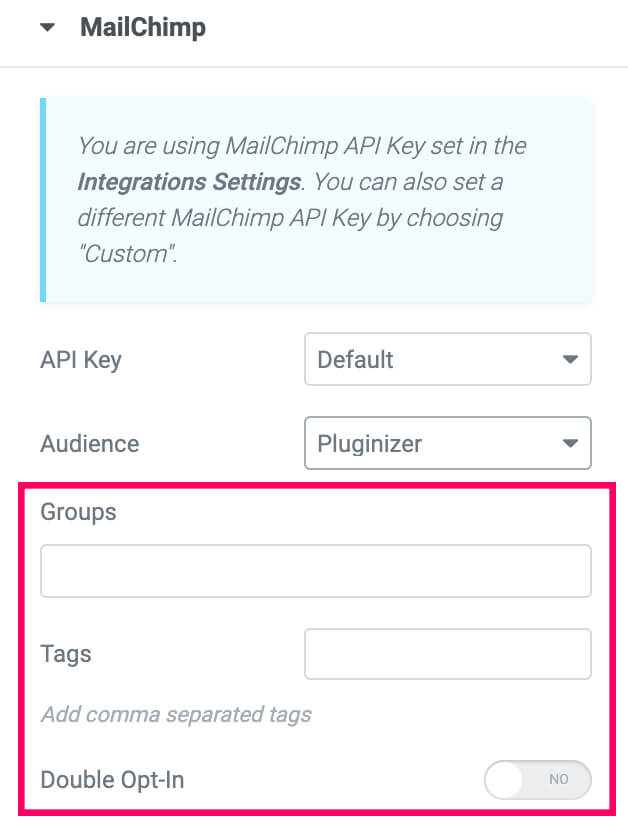
If, for example, this lead capture form is displayed on the purchase confirmation page, you can set a customer tag and differentiate between non-customers subscribers and customer subscribers.
Subscribers who use the purchase confirmation form are automatically tagged as customers. On the other hand, customers who used a different form will not have this tag.
You will market to different groups, promotions, and offers.
Field mapping
Matching the form fields to Mailchimp fields in the field mapping section is mandatory.
Because the communication between the subscribers and us will happen using emails, the email field is required, and it must match the form email field.
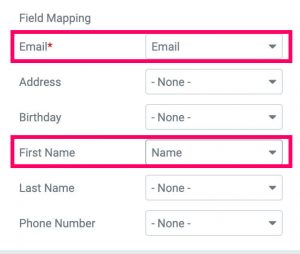
If you kept the default name field of the form, assign it to the first name option for message personalization.
When done, click Update at the bottom left corner and move forward to the next step to test the form.
Step #4: Test the Integration
When both apps integrate, it’s a good idea to run some tests and verify that it’s working correctly.
Visit your website, fill out the lead capture form with your name and email, and submit it.
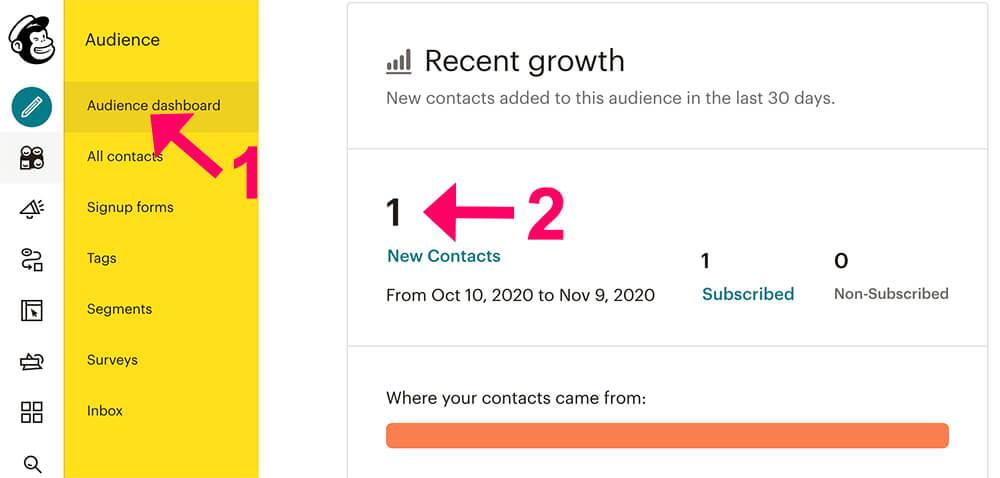
Inside your Mailchimp account, navigate to the Audience dashboard option and verify that the last submission was successfully transferred.
If you successfully integrated Elementor with Mailchimp, you’ll see the new subscriber added to the current growth section.
Great, your new subscriber is on your Mailchimp list and will start getting emails and content from your business.
Conclusion
In this article, you learned how to integrate Elementor with Mailchimp to collect email leads easily.
Every website should adopt an email marketing campaign strategy to stay in business for the long run. If you don’t have one, please consider it a top priority. It will pay off.
Leave a comment and let us know if you have any questions regarding the process.
Also, make sure to subscribe to our YouTube channel and like our page on Facebook.