
MailChimp is one of the best tools for email marketers who want to increase their conversion rate. But it’s even more potent with the Contact Form 7 extension.
Contact Form 7 is easy to set up and use. But don’t be fooled by its simplicity. It’s versatile enough to be configured precisely for your needs. In addition, it offers a wealth of features that give you the flexibility to engage with users on multiple levels.
Marketers who learn how to integrate Contact Form 7 with MailChimp have the potential to upgrade their sales funnels and efficiently manage a large group of subscribers.
Below, we’ll go over the features that make Contact Form 7 so valuable to marketers and provide a guide for integrating it with MailChimp.
Advantages of Using Contact Form 7 With MailChimp
Contact Form 7 allows you to add subscribers to your MailChimp lists efficiently and provides the following benefits:
- Contact Form 7 enables you to automate the addition and tagging of new contacts. No more manual contact inputs are needed.
- Add users to your automated email marketing campaigns.
- Need a subscription form to match your website’s theme? No problem. Contact Form 7’s design can be customized to fit different aesthetics.
- Form fields are entirely customizable. In addition, all data can be sent to MailChimp for further use.
- Sign-up forms are more versatile with Contact Form 7. Show them anywhere you want using the Contact Form 7/MailChimp shortcode.
Key Features
- Free and easy to use
- It suits the needs of marketing professionals for all business sizes
- Supports customizable fields
- Unlimited contact forms
- Use a unique MailChimp API key for each contact form
- Use a unique MailChimp mailing list for each contact form
- Add an opt-in checkbox to give users a chance to opt-in or opt-out
- The single opt-in option doesn’t send confirmation emails to subscribers
- The double opt-in option sends confirmation emails to subscribers
- Regular updates
- Allowing users to upload files
Premium Features
- Set GDPR for your contact list
- Tag existing MailChimp subscribers
- Group existing MailChimp subscribers
- Unlimited MailChimp custom fields
- Mailchimp email verification
- Unsubscribe feature
- Archive function
- Permanent delete feature
- Unlimited MailChimp tags and groups
- Support for birthdays, language, and text/html
- Support for MailChimp categories, segments, and interests
Getting Started
If you’re ready to integrate the Contact Form 7 extension with MailChimp, follow the steps in the guide below to use the extension.
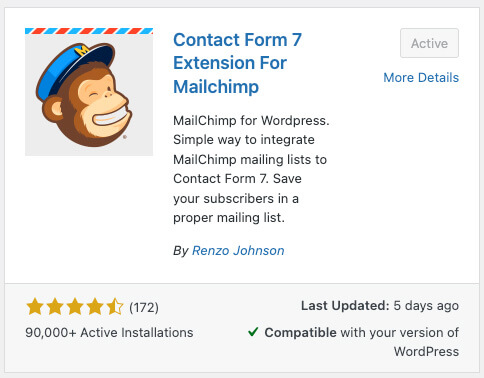
- Make sure that you’ve signed up for a MailChimp account and installed the plugin “Contact Form 7 MailChimp Extension.”

- On the left-hand side, go to the Contact tab and create a new contact form.
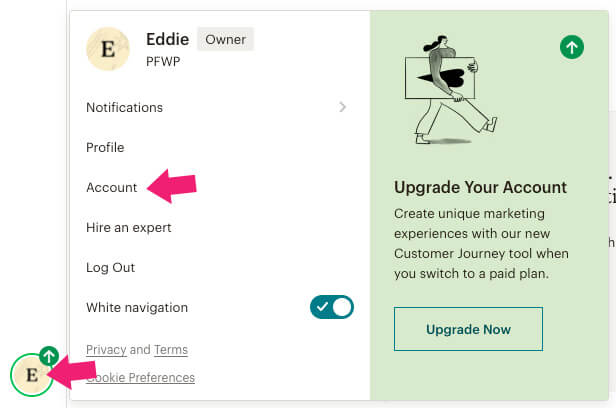
- Inside your MailChimp account, click on your name from the bottom left side of the screen and click on Account.

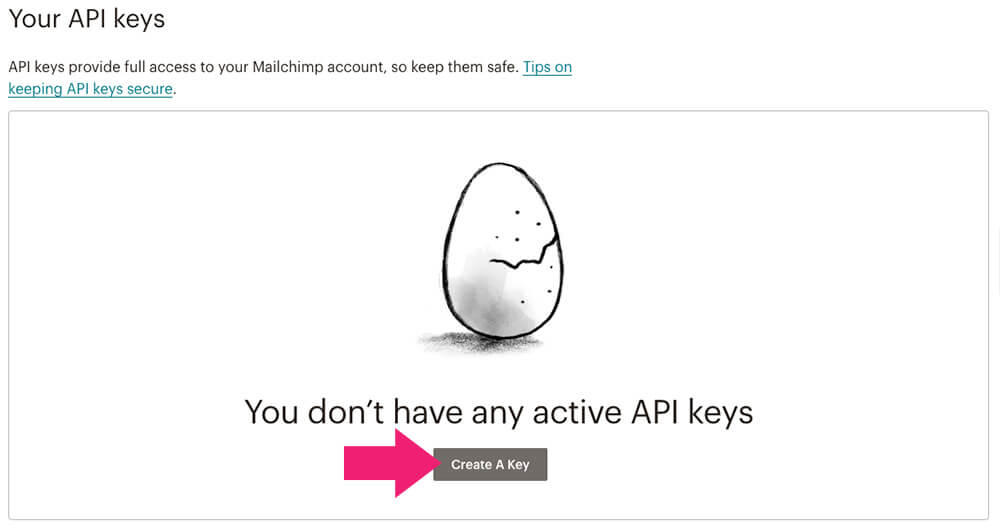
- Click on Extras, then select API keys.

- Click on the Create a Key button.

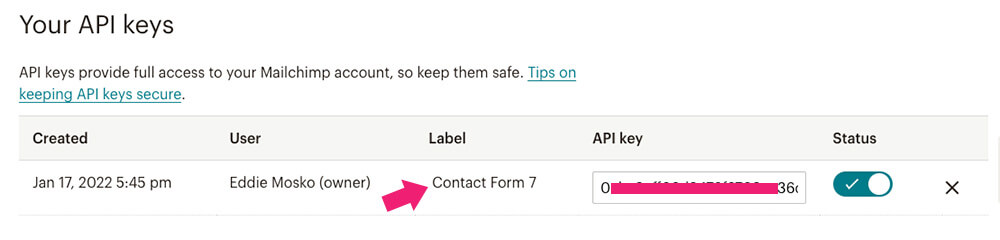
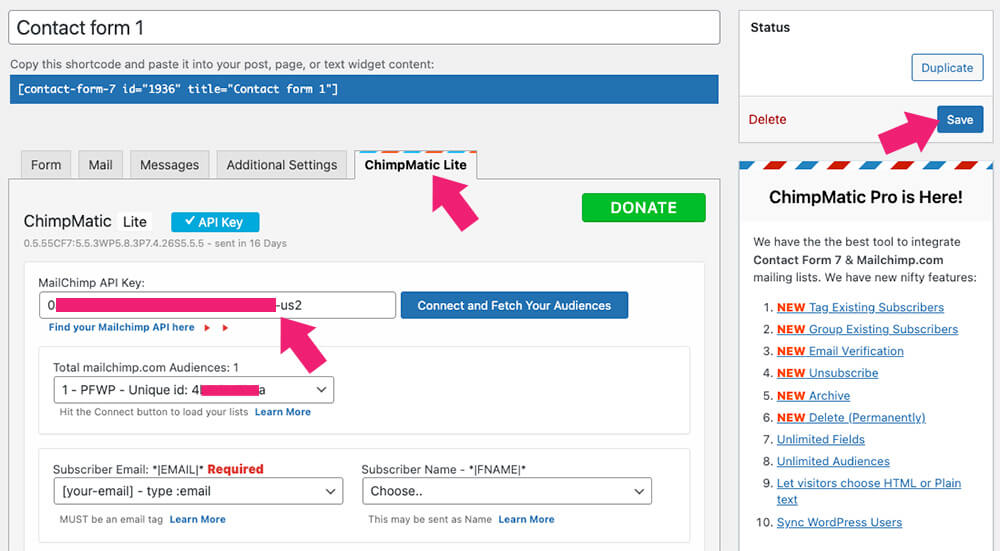
- Label and copy your API key. We will need to use it in the next step.

- and paste it into the MailChimp API Key field in the Contact Form 7 extension.


Using Contact Form 7 with MailChimp for WordPress (MC4WP)
Another common way to integrate Contact Form 7 is through the popular MailChimp for WordPress (MC4WP) plugin. If you use this plugin to manage your website, follow the steps below.
-
First, make sure your MailChimp account is connected to your WordPress website. If it already is connected, skip ahead to step 5.
-
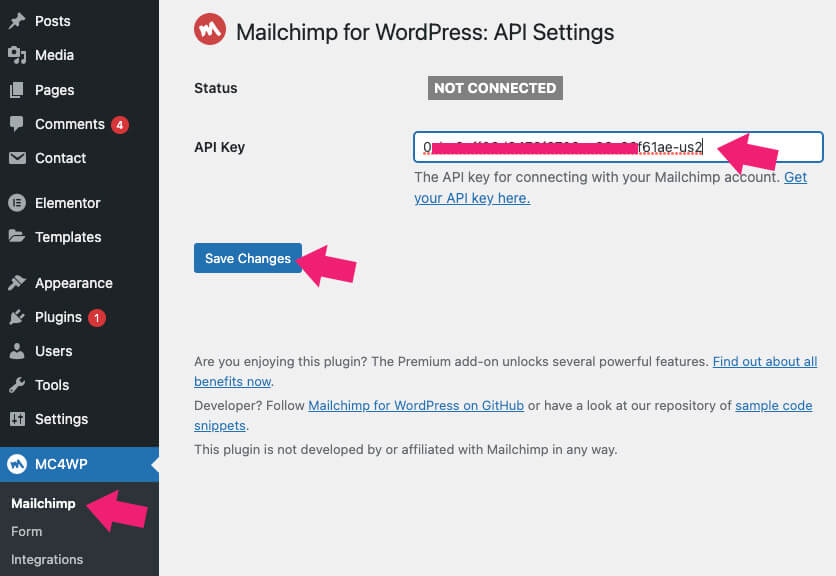
In the MC4WP menu, click MailChimp.
-
Enter your API Key copied from your MailChimp account in the text field.
-
Click Save Changes. You’ll see a green box showing a Connected status if it’s operational.


-
Then, go back to the MC4WP menu and click Integrations.
-
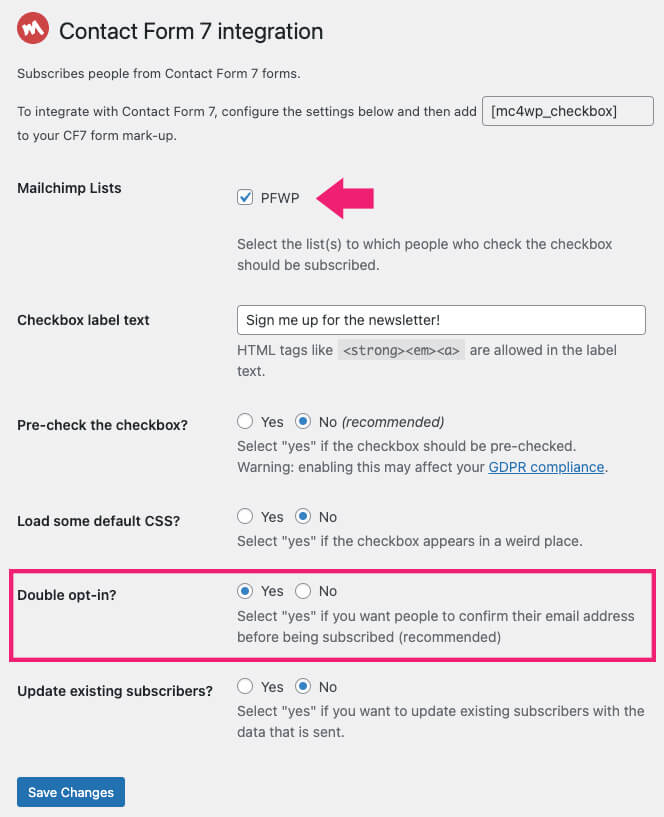
Select Contact Form 7.

-
In the MailChimp Lists section, choose the lists where you’ll add subscribers with Contact Form 7.
-
Once you’ve made your selections, click Save Changes.


Create a Contact Form
Follow these steps to create a new contact form:
- Go to Contact and click Add New.
- Add the individual fields you want subscribers to enter when subscribing to your MailChimp list. Make sure that you add the prefix mc4wp before the name of each field and write the field name in uppercase letters.
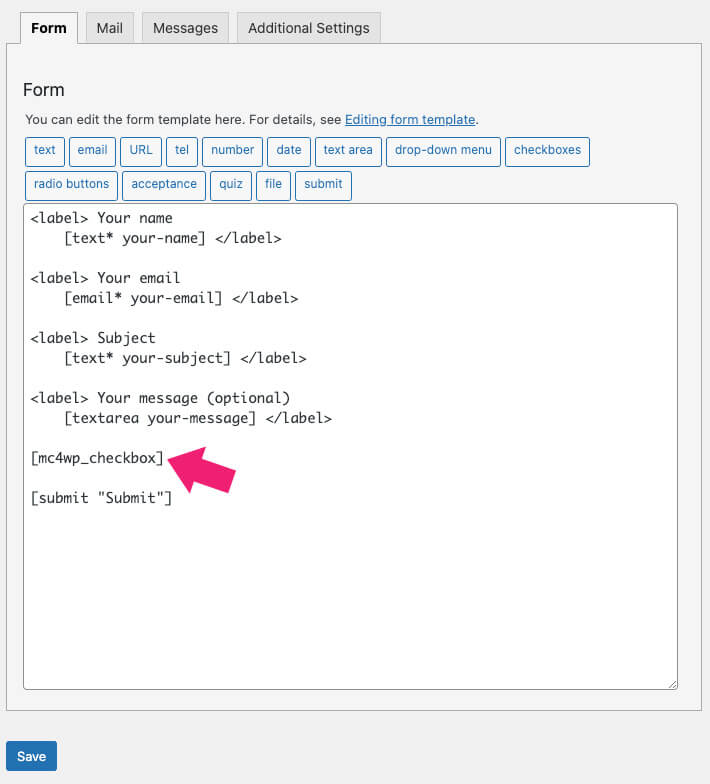
- If you want to add a checkbox, input the
[mc4wp_checkbox]tag in the form. When users select this checkbox, their data is sent to your MailChimp account. If you want to omit the checkbox and add all the users who submit the form as subscribers, add the following line to the form:<input type="hidden" name="mc4wp-subscribe" value="1" />
- Click Save.
Contact Form 7 is one of many plugins that can integrate with MailChimp. If you’re using Elementor, read our article on integrating Elementor with MailChimp.
Frequently Asked Questions About Integrating Contact Form 7 with MailChimp
If you need help solving any specific issues integrating MailChimp and the Contact Form 7 extension, visit this dedicated wordpress.org forum. You can browse various support threads to see if your problem has been solved in the past. Or, you can sign up to submit a new support topic.
Perhaps you have multiple subscriber lists. In this case, you might need to add subscribers from different forms to various MailChimp lists. Here’s how.
In the MC4WP menu, select MailChimp and scroll down until you see the ID of the list you want to send the data to. You’ll need to add this ID to the Form with the following HTML code snippet. <input name="_mc4wp_lists[]" type="hidden" value="<list id>" />
First, go to the MC4WP menu and select Form. Next, click on Settings and scroll down to the Subscriber tags box. Add the desired tags for subscribers through the contact form in the text field. Then, click Save Changes.
Conclusion
In this article, you learned how to integrate Contact Form 7 to MailChimp in two different ways.
Leave us a comment and know which plugin you chose to achieve this task.
Also, make sure to subscribe to our YouTube channel and like our page on Facebook.