Contact Form 7 is one of the most popular WordPress form plugins, with thousands of users worldwide.
This article will guide you through integrating Contact Form 7 with PayPal to accept payments via forms.
With CF7, you can only set one price for each form. If you have products with variable prices, consider using a different plugin, such as Easy Digital Downloads or WooCommerce.
Integrate Contact Form 7 With PayPal
It’s a good idea to integrate the two when a customer needs to make a payment after submitting a form.
A good example is when your business has a product or service that requires clients to answer questions in a dynamically generated form.
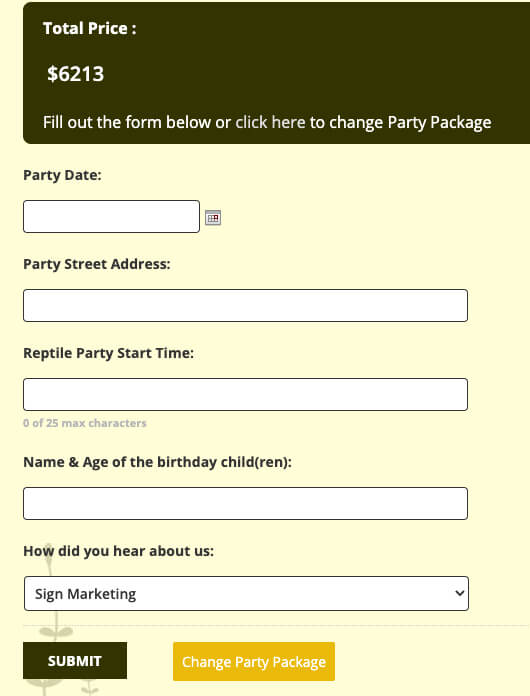
This kid’s Reptile Parties website enables visitors to book a party and set a payment after submitting their order form. That way, they will receive all the necessary information to plan the party, as well as the customers’ payment details.
We can accomplish this in two different ways: the first is by using an add-on plugin, and the second is by creating a PayPal button.
Let’s start with the first way, by using a plugin.
Integrate With a Plugin
In this way, we will use an add-on plugin to integrate your desired form with PayPal.
Step #1: Install the plugin
From your WordPress dashboard, navigate to Plugins -> Add New. Search for Contact Form 7 – PayPal & Stripe Add-on, install, and activate it.

Once installed, please proceed to the plugin dashboard to configure it.
Step #2: Set up the plugin
After activating the plugin, navigate to PayPal & Stripe Settings under the Contact tab.
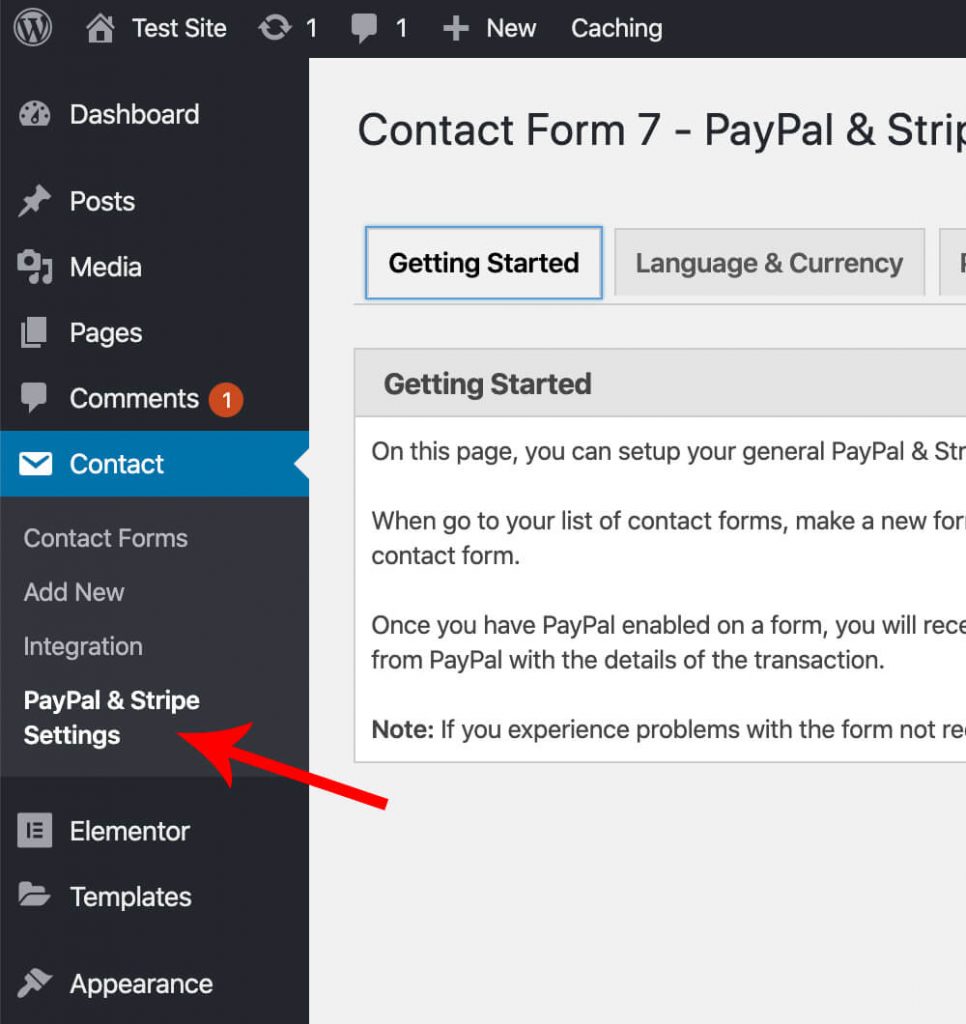
On this screen, you’ll find several tabs where you can set up the plugin.
- Language & Currency – Set and change the currency used for charging.
- PayPal – Enter your PayPal email address or your Merchant account ID. You can find your Merchant account ID in your PayPal account under ‘Profile’ -> ‘My business info’. Alternatively, you can use your PayPal email address for simplicity.
- Other – Set a PayPal Cancel and Return URL. For example, you can create a new page and call it ‘Incomplete Payment’, and paste its URL in the Cancel URL field. When a customer clicks on ‘Cancel and return to merchant account’ in PayPal, they will be redirected to that page.
If the customer isn’t redirected to PayPal after submission, change the Redirect Method to Method 1 and try resubmitting the form again.
When done, click on the ‘Save Settings’ Button.
Step #3: Enable PayPal
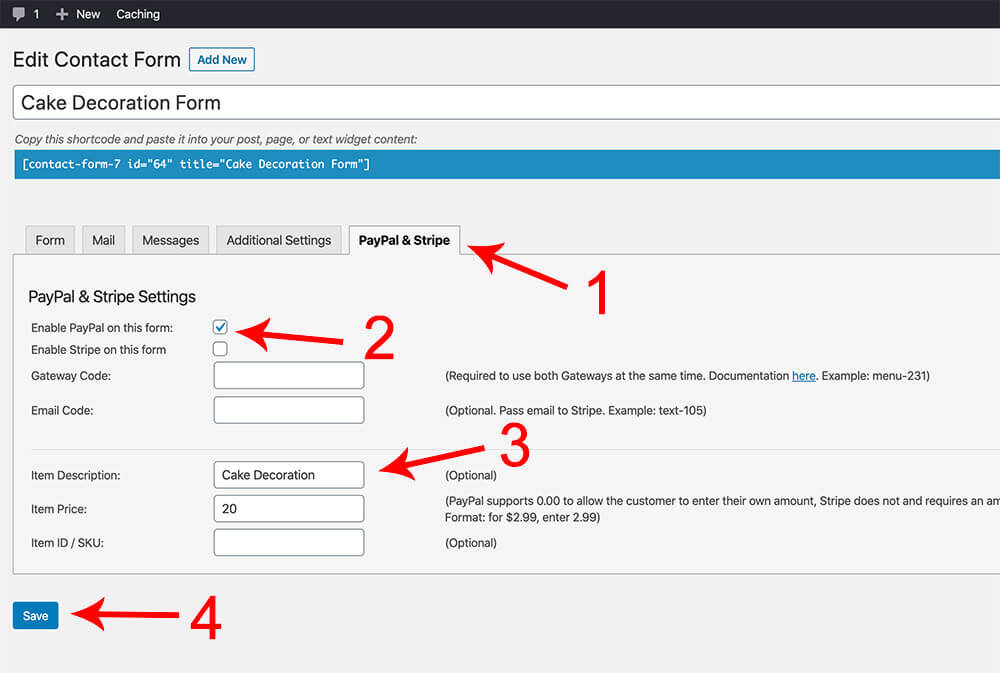
At this step, navigate to the form you would like to integrate with PayPal (Contact tab> Contact Forms> Edit form). Inside the form options, navigate to the PayPal & Stripe tab.
Check the ‘Enable PayPal’ box on this form, enter the item description and amount, and click ‘Save’.
Step #4: Test the form
Once the form is ready, please fill it out and submit it. Then, you will be redirected to PayPal to complete the payment.
If you are not being redirected, change the Redirect Method under the PayPal & Stripe settings tab, and resubmit the form.
If you would like to integrate the two without using a plugin, move on to read the section below.
Integrate Without a Plugin
Using this method, we will integrate CF7 with PayPal without the need for a plugin.

Create the Button in PayPal
First, we will need to create a PayPal link with a specified price amount by making a button within the PayPal dashboard.
Log in to your PayPal account and navigate to Tools> All Tools.
On the left sidebar, click “Integrate PayPal” and then “Buttons.”
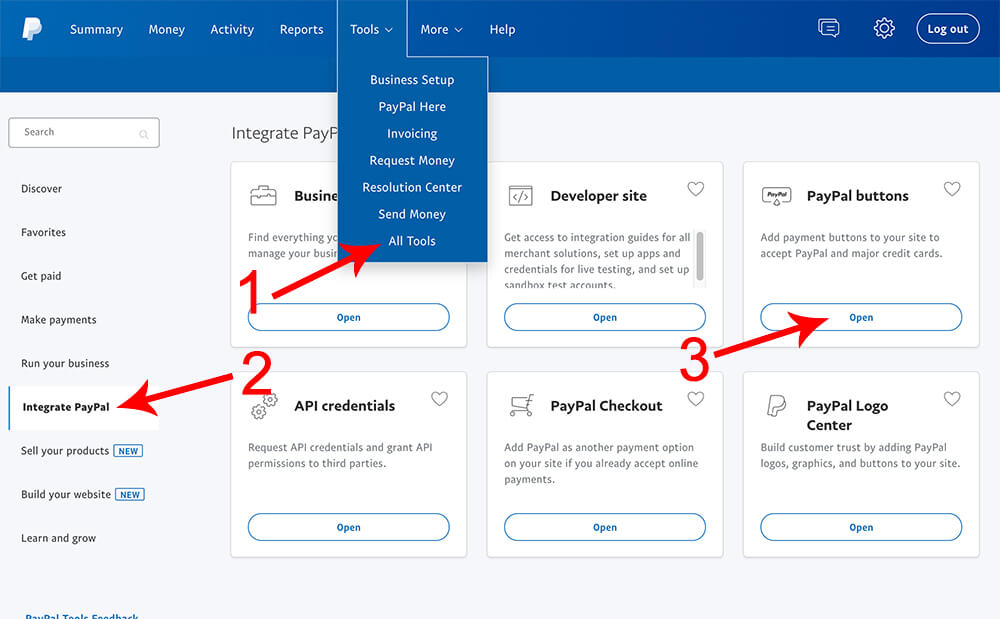
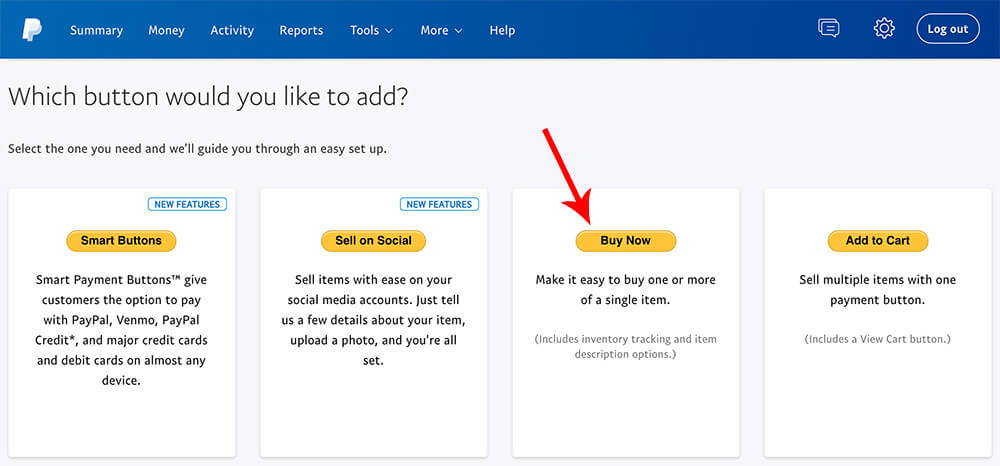
Here you’ll have a few buttons to choose from. Since we will use the button link only, without displaying the Button on our website, choose a simple button like ‘Buy Now’.
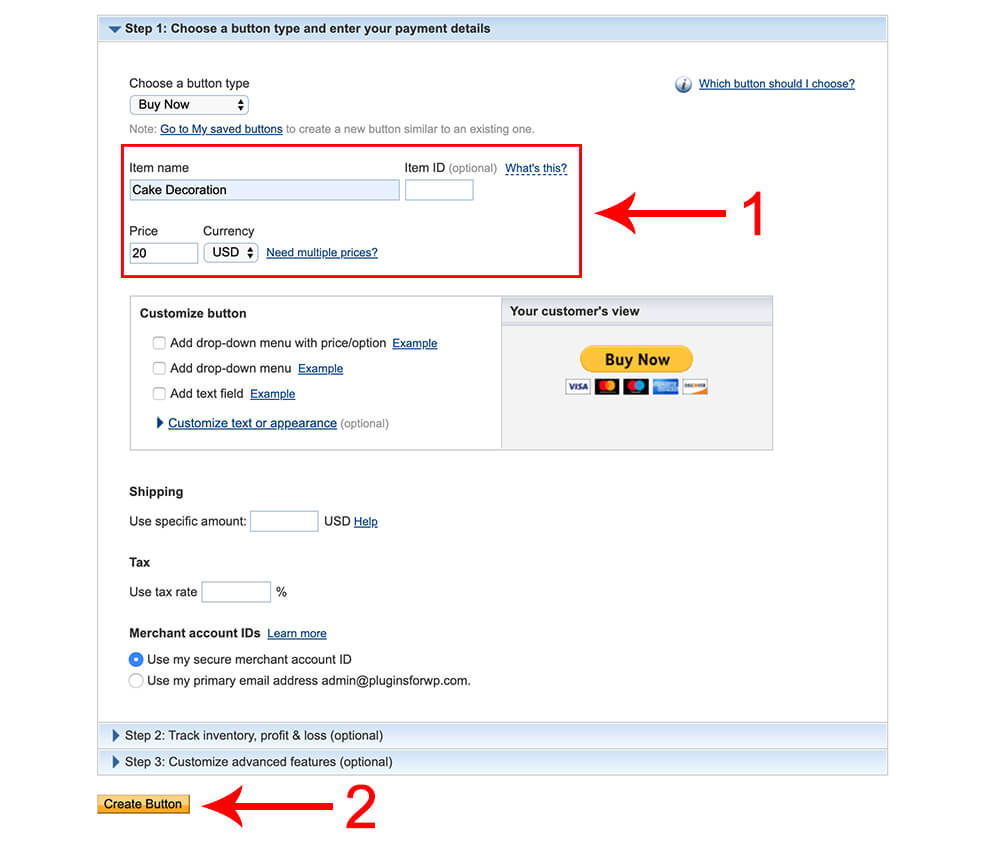
Fill in the item name field and the price (choose the right currency for you).
You also have the option to add a shipping cost (if the product is physical) and a tax rate.
In steps 2 and 3, set advanced options such as track inventory, profit & loss and etc. Both steps (2 and 3) are optional and we won’t get into it in this tutorial.
Once done, click the Create Button.
On the next screen, you’ll have the button URL under the Email tab. We will use it in a second.
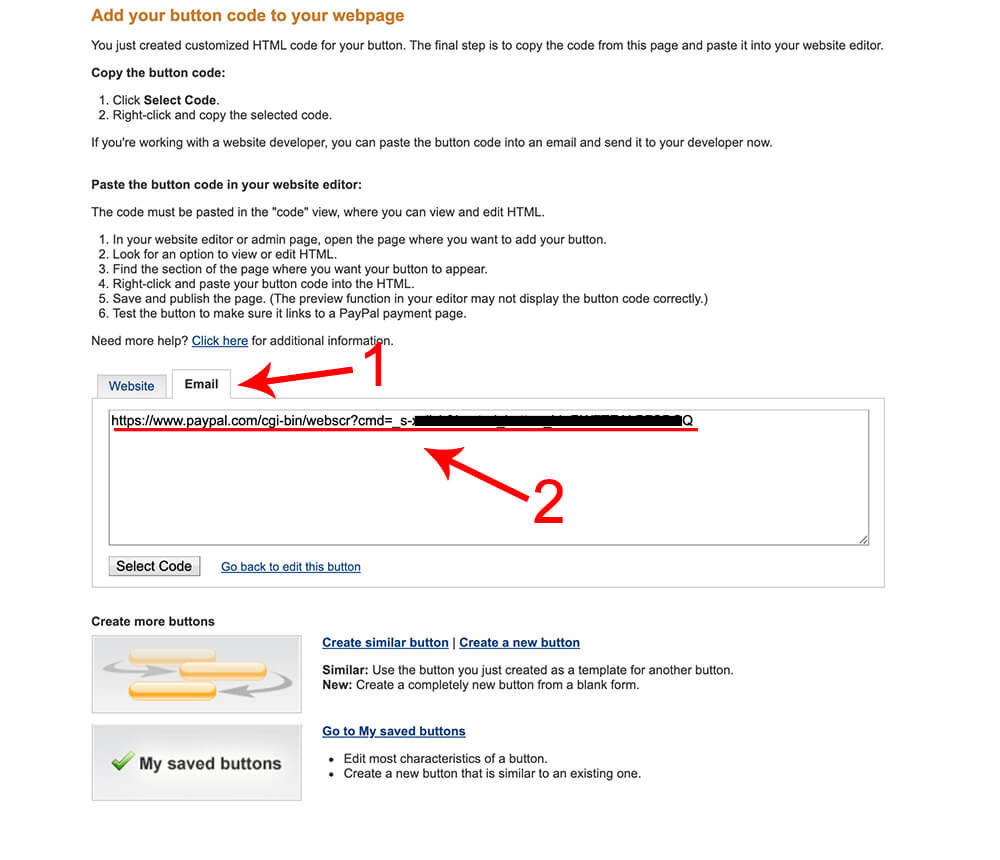
Once the button link is ready, we can proceed and use a function to connect them.
Use the function
The function below will redirect the user to PayPal after clicking on the submit Button.
Paste the code below at the bottom of the functions.php file of your child theme or a site-specific plugin. If you haven’t used a child theme yet, read our article on how to create a child theme.
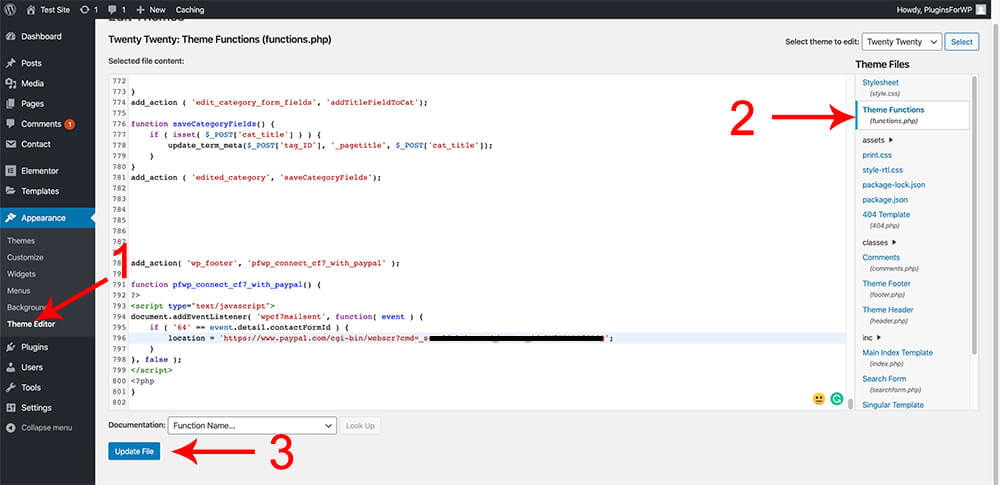
From your WordPress dashboard, navigate to Appearance -> Theme Editor and click on the functions.php file from the right sidebar.
Now, scroll to the bottom and paste this code.
add_action( 'wp_footer', 'pfwp_connect_cf7_with_paypal' );

function pfwp_connect_cf7_with_paypal() {
?>
<script type="text/javascript">
document.addEventListener( 'wpcf7mailsent', function( event ) {
    if ( 'FORM ID HERE' == event.detail.contactFormId ) {
        location = 'LINK HERE';
    }
}, false );
</script>
<?php
}
Change the Form ID HERE with the actual ID of the form (you can find it in the form shortcode).
[contact-form-7 id="64" title="Cake Decoration Form"]Replace the Link Here with the actual link of the PayPal button (the one we created a moment ago). When done, save the changes.
Now, navigate to the page with that contact form.
Please fill out the form and submit it. If you set it up correctly, you’ll be redirected to PayPal, and you’ll see the button price and description.
Conclusion
In this article, you learned two different ways to integrate the Contact Form 7 plugin with PayPal to accept payments from customers.
You may also be interested in how to integrate reCAPTCHA with Contact Form 7 to prevent spam comments.
Leave us a comment down below and let us know which one of the methods you used to achieve it.
Also, make sure to subscribe to our YouTube channel and like our page on Facebook.