It’s a well-known fact that to run a successful business. You’ll need to understand your website’s data.
Google Analytics is the most powerful data tool that you can use to collect relevant information about your website and visitors.
In this article, you’ll learn how to add Google Analytics to Elementor.
What is Google Analytics
Google Analytics is an online data measuring tool that will track visitors’ and customers’ behaviors on your website.
Some of the many things you can track are:
- Visitors’ location.
- Bounce rate.
- Time spent on the website.
- Conversions rate.
- Much else.
When using the collected data correctly, you’ll be able to improve your site conversion and reach more customers.
For example, if you analyzed that most of your visitors are dropping out on your cart page, you should look into it and improve it. Even a small change can increase the revenue enormously.

When you deeply realize that knowledge is power, you’ll conclude that installing Google Analytics on your website is not only a recommendation but a must.
How to Add Google Analytics to Elementor
Adding the Google Analytics code into Elementor is a straightforward process.
Initially, it’s a two-step process. First, we will need to copy the Google Analytics code and paste it into Elementor.
Let’s start by getting our tracking code first.
Step #1: Copy the Google Analytics Code
After signing up and registering your website with GA, you’ll get the tracking code that you’ll need to paste on every page that you would like to track.
To find the tracking code, navigate to Admin -> Data streams and click on your website name.
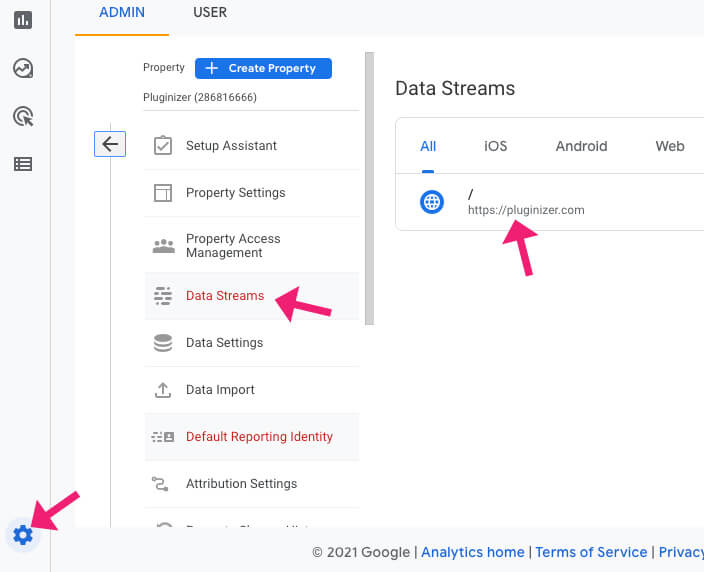
Then, click on the Global site tag option to reveal your code and copy it to your clipboard.
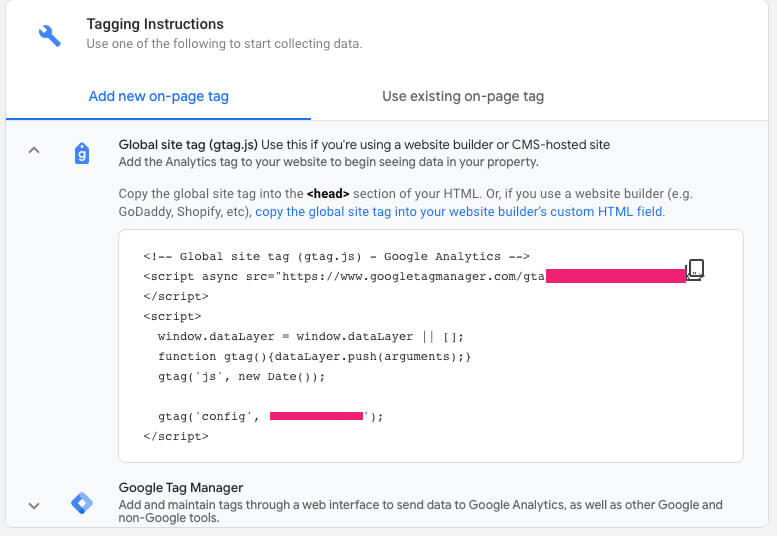
Once you copy the code, we can move forward to the next step and paste it into Elementor.
Step #2: Add the Code to Elementor
After we get the GA code, we can paste it on every page that we would like to track.
Here is when the pro version of Elementor comes in handy. When using the free version, you’ll need to paste the code manually on every desired page, while with the pro version, paste it once and trigger it for all pages.
If you’re using the free version, edit your desired page with Elementor and drag the HTML widget to the bottom of the page.
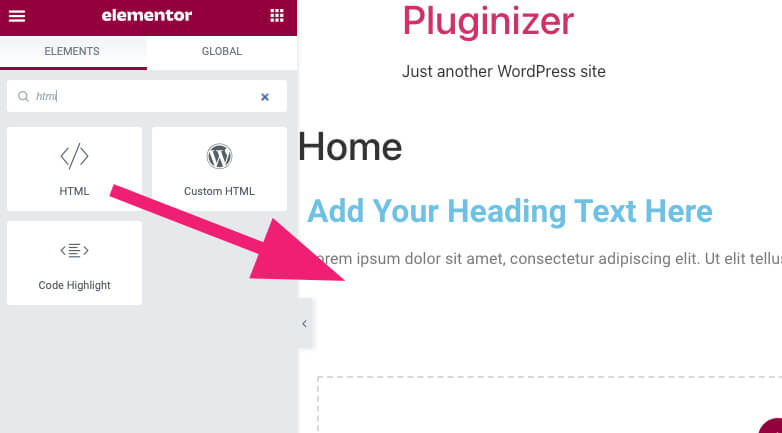
Then, paste the Google Analytics code inside the HTML widget box on the left and save your changes.
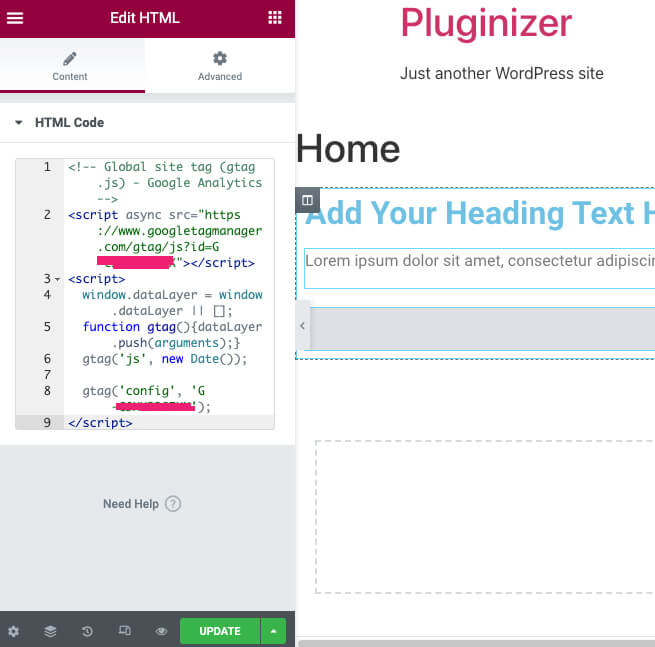
Once pasted, move on to the last step to test the integration.
On the other hand, if you’re using Elementor pro, navigate to Elementor -> custom code and click on add new.

Give the new code a name. In our case, I will call it Google Analytics Tracking Code. Then, paste the code inside the box and click Publish.
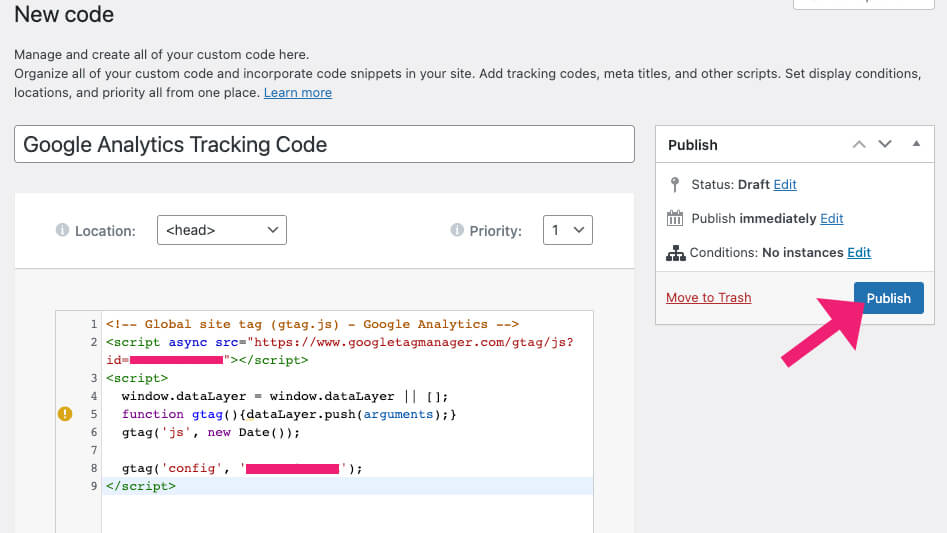
Elementor will ask you which pages you would like to fire the Google Analytics tag on the next screen. You can select specific pages or keep them as-is for the entire website.
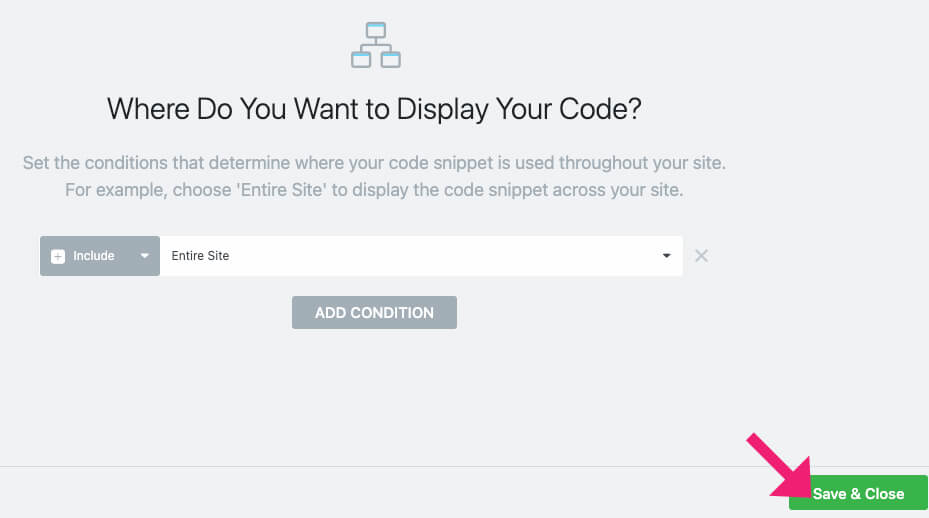
Once published, Google Analytics will immediately start tracking the activity on your website and gather the information.
Step #3: Test the Integration
Once integrating between apps, it’s always a bright idea to run tests and verify that the connection is working correctly.
Visit your website from an incognito window on a page that will fire the tag.
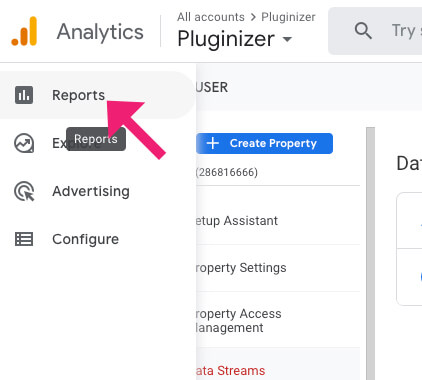
Then, navigate back to your Google Analytics dashboard and click on Reports.
If you installed the code successfully, you should see a visitor and its location under the real-time tab.
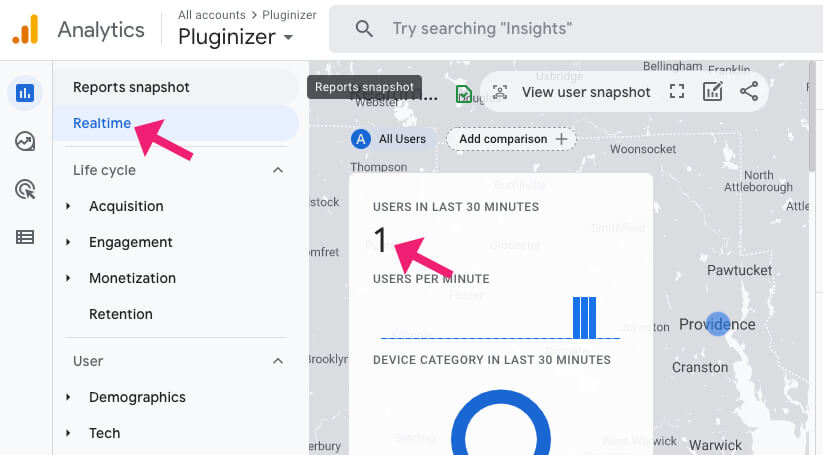
If you see the visitor, you pasted the tag in the right place, and everything is working as expected.
Conclusion
Data is one of the most important assets of every business, and collecting it should be a top priority.
In this article, you learned how to add Google Analytics to the Elementor page builder.
If you would like to add the analytics reports to your website’s dashboard, check out the best Google Analytics plugins for WordPress.
Please leave us a comment down below if you have any questions.
Also, make sure to subscribe to our YouTube channel and like our page on Facebook.


Thank you. This simplified the process a ton 🙂
Our pleasure, we are happy to help!
Thanks for posting this. It was helpful.
I tried and I received the yellow warning notice.
I see the same yellow warning shows up in your screenshot when you pasted the GA script – i.e. “define “dataLayer””
What did you do to get rid of it or is this something not to worry about?
Thanks for your help with this.
There is nothing to worry about. It should work perfectly fine.