Content restriction is one of the most efficient ways to encourage visitors to take action.
WordPress and Elementor make it easy to restrict sections or pages to only be accessible with a password or after logging in.
This article will teach you how to restrict content with the Elementor page builder plugin.
Why Restrict Content?
As mentioned above, restricted content will prompt users to act; therefore, it’s a strategy that many websites use.
Some of the reasons to restrict content are:
- Membership – content only visible to members, will force visitors to purchase a membership plan to access it.
- Signup – restricting the content to logged-in users will increase the signup rate of your site. Visitors will have to register an account to view the locked content.
- Opt-in – An extensive email list is a goal that every website should pursue. Locked content or downloadable files will strengthen the need of your visitors to opt-in to your email list.
- Share – when the viewers must share the content before accessing it, it will increase your website’s click rate and exposure.
There are many more reasons to protect the content, which was just a major shortlist.
Now that you know the significant advantages of restricting content let’s move on and learn how to do it.
How to Restrict Content with Elementor
There are a couple of ways to restrict pages or content with Elementor. The first uses the native WordPress method, and the second uses an extension.
In this tutorial, I will show you both ways, and let’s start with the first way, password-protecting a page with the default WordPress option.
Protect Elementor page with a password
This method will work with any WordPress page, whether you built it with Elementor or other page builders.
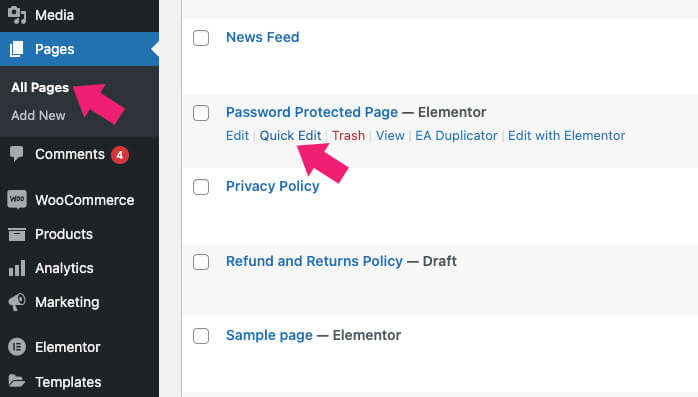
First, navigate to Pages -> All Pages and hover your mouse’s cursor on the page you want to restrict.
Then, click on the Quick Edit link below the page title.
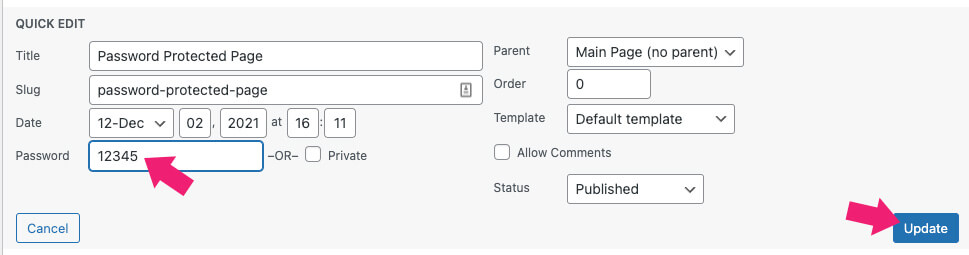
Set your desired password inside the password field and click update.
Once updated, visit the locked page (use an incognito window) and verify that you can only access the page with the password.

You completed the task if you only needed to protect the page with a password. However, if you want to restrict specific sections of Elementor, keep reading.
Restrict sections with the Essential Addons extension
Essential Addon is an extension that will expand the functionality of Elementor and enrich it with many extra widgets.
One of the many added ones is the Restrict Content widget, which locks its content based on the condition you’ll set.

Follow the steps below and learn how to use the widget.
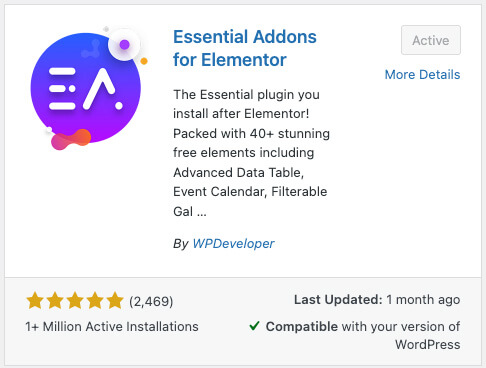
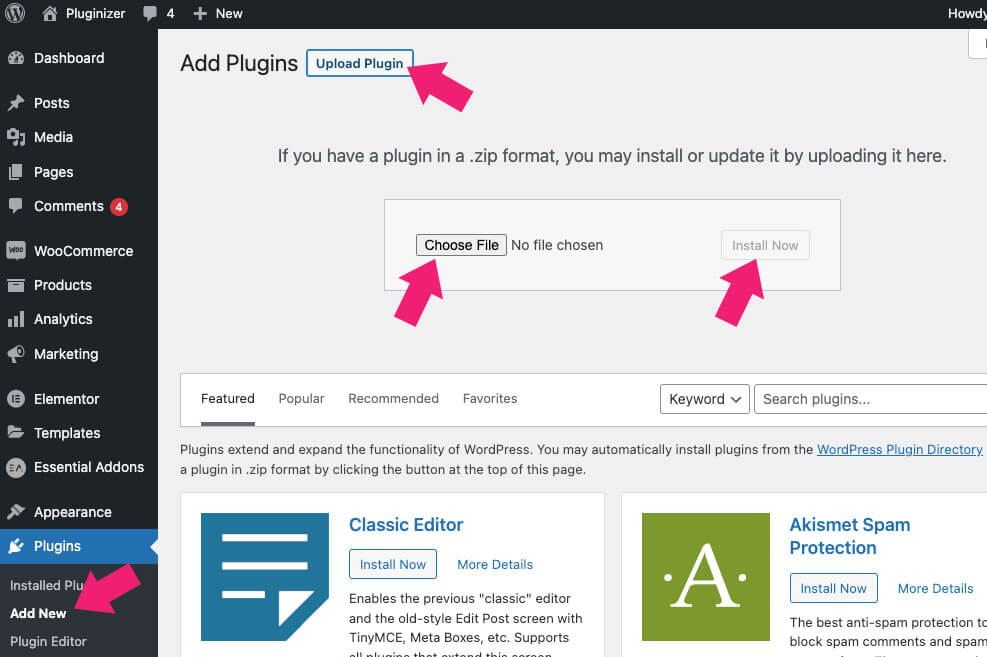
Step #1: Download the Essential Addons plugin
The first step is to install and activate the free version of the Essential Addons for Elementor plugin.
To do that, search for the plugin in the Plugins -> Add New screen. Once you find it, please install and activate it.
Because the content restriction widget is part of the pro version, you’ll need to purchase the pro plugin from the official website for the total price or from us for only $4.99.
After downloading the pro version, navigate to Plugins -> Add New -> Upload Plugin, upload the zip file, and activate it.
Once the pro version is active, you can start using the restricted content widget and all the other ones.
Step #2: use the restrict content widget
From inside the Elementor screen, drag the EA restrict content widget to your desired location on the right.

Enter the content you would like to restrict under the protected content tab. Alternatively, you can use a template from the content type drop-down menu instead.
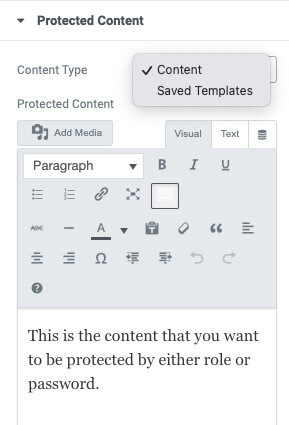
Once you have entered the content, move on to set the protection type.
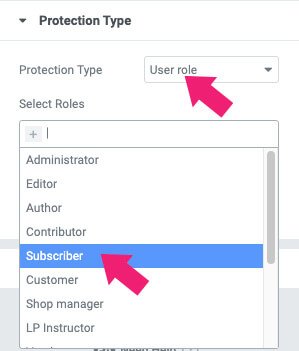
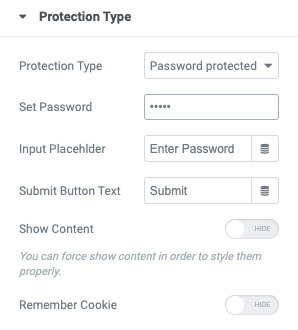
Step #3: set the protection type
There are two protection types that you can use. The first is by user role, and the second is a password.
For example, if you want to show the content only to logged-in users, set the protection type to user role, and select the subscriber role.
On the other hand, choose the password option and generate your password if you want to protect the content with a password.
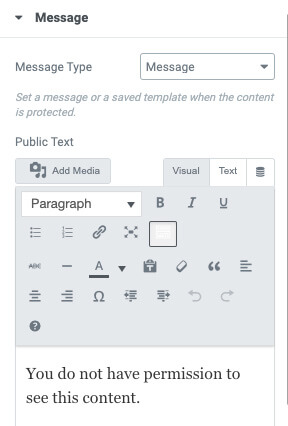
Once you enter the content and set the protection type, move on to the message tab and enter the message you would like to display to visitors who can’t access the section.
Make sure to save the changes and visit the page from an incognito window to verify it’s working as expected.
Essential Addons is only one extension for Elementor out of many. Some other plugins that can restrict content for Elementor are PowerPack and The Plus Addons.
Conclusion
In this article, you learned how to restrict content with Elementor in two ways.
Leave us a comment and let us know your methods to achieve this task.
Also, make sure to subscribe to our YouTube channel and like our page on Facebook.