
In this post, we will take an in-depth look at the Ninja Tables Pro WordPress plugin and see if it lives up to the hype as being one of the best table plugins for WordPress.
We will look at the features, ease of use, pricing, and support to see if Ninja Tables is the right plugin.
In this article, we will walk through and review the Ninja Tables Pro plugin for WordPress.
What is the Ninja Tables Pro Plugin?
The Ninja Tables Pro Plugin is a WordPress plugin that allows you to create beautiful, responsive tables for your website.
Whether you need to display data from a spreadsheet or create a directory of products or services, Ninja Tables Pro makes it easy with its drag-and-drop interface.
Here are some of the many tables that you can create:
- Job positions
- Amazon product listing
- WooCommerce product list
- Product specification
- WP Posts
- League points
- Cryptocurrency
- Movie review
- Pricing
- Much more
The unlimited table styles we can create with the Ninja Table Pro plugin make it the most versatile and robust table plugin for WordPress.
Free and Premium Key Features
Ninja Tables Pro has many great features that set this plugin apart from other WordPress table plugins.
You can get the Ninja Tables Pro plugin from the official website (for a minimum of $49), or from us for only $4.99.
Some of the amazing features that are included in the free and the premium versions are:
- Insert media to table cells
- Responsive to any screen size
- Can integrate with WooCommerce
- Easy-to-use drag-and-drop editor
- Unlimited colors
- Restrict user roles
- Connect and integrate with Google sheets
- Hover animation effect
- Add CSS classes
That was just a tiny part of the many features of the Ninja Tables Pro plugin.
How to Use Ninja Tables Pro
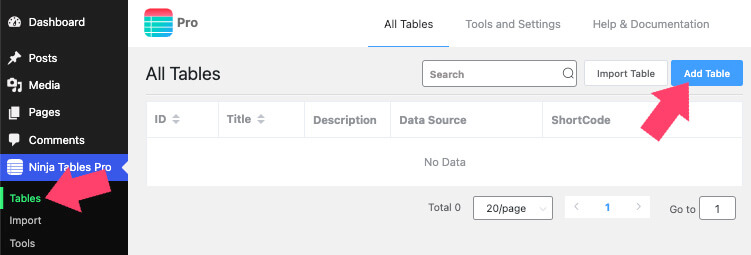
Ninja Tables Pro is straightforward to use. First, install and activate the plugin on your WordPress site. Once started, you can create tables by going to Ninja Tables > Add New Table in your WordPress dashboard.
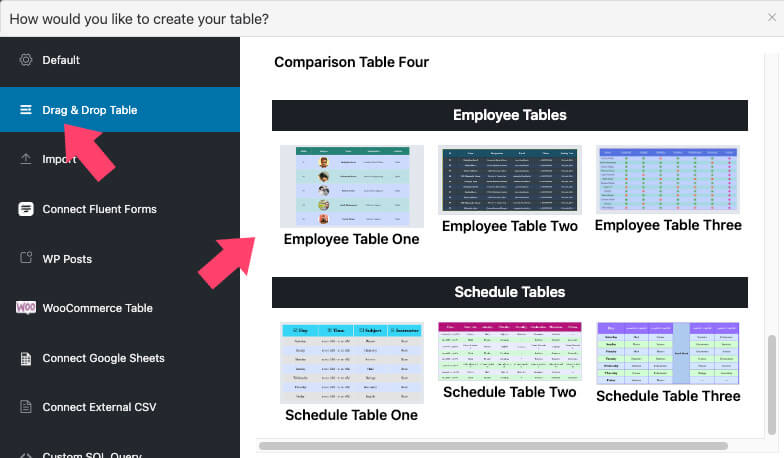
Then, you’ll be able to give your table a name and choose from one of three layouts: Data Table, Product Table, or Directory Table. Once you’ve selected a layout, it’s time to add data to your table.
This can be done manually by entering data into the fields provided or importing data from a CSV file. If you’re importing data from a CSV file, click on the Import CSV button and select the file from your computer. Once imported, your data will be displayed in the table fields.
Alternatively, you can choose one of the many premade table templates and use it as a starting point. Once loaded, customize the table by adding or removing columns and rows.
First, we will need to delete the default populated values of the cells and enter our own. Therefore, click on any table’s cells, and enter your custom value.

Now that your data is entered (or imported), it’s time to customize the look of your table. With Ninja Tables Pro, you can change font size and color, column widths, background colors, and more. In addition, you can add borders and shadows to give your table a more polished look.
Add Elements to Table
Inside the table editor screen, you can use elements or style any part of the table, including columns and cells.
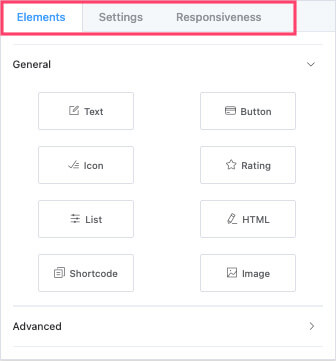
On the left side of the screen, you’ll have the workstation with three tabs: Elements, Settings, and Responsiveness.
So, to add an element to the table, drag your desired one from the left sidebar to any table cell.
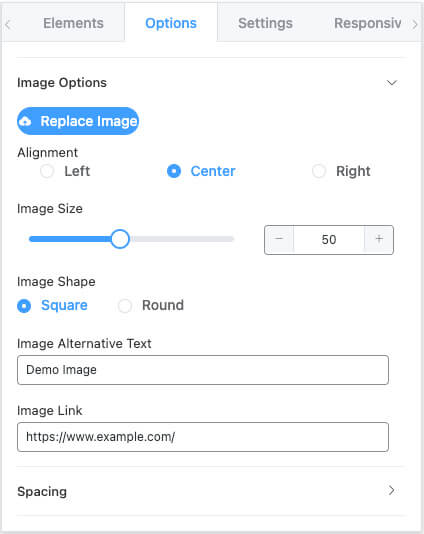
Once positioned, the element will be populated with the default placeholder content. You can then move on to the Options tab to change any aspect of the working part.

For example, if we added an image widget, navigate to the settings tab to select which image to display, its position, width, etc.
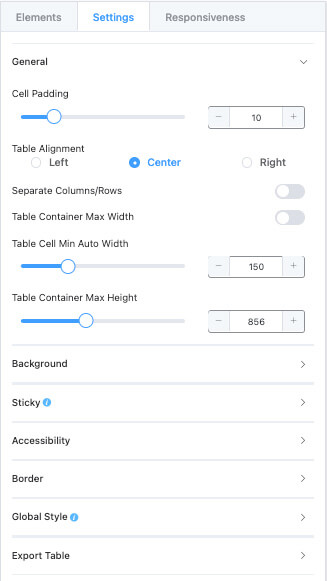
If you didn’t select any widget or cell, use the settings tab to customize the table’s overall look, like align, background colors, padding and margin values, border color, etc.
Lastly, move on to the Responsiveness tab to determine how to display the table on mobile devices.
By default, the table will adjust and look good on any screen size, and I recommend you keep it that way.
However, toggle the Enable Responsive Table feature off if you want to disable the responsive part.
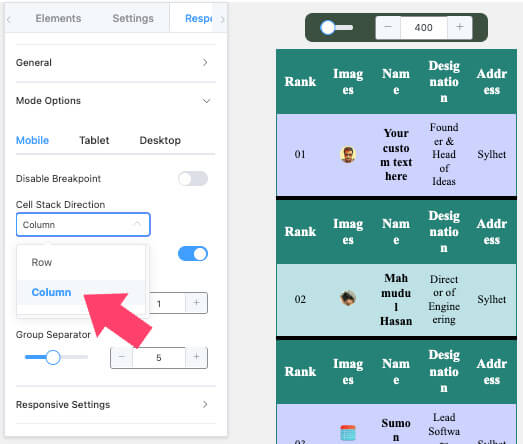
You can also expand the Mode Options tab to view how your table looks on different screen sizes. In addition, you can also change custom behaviors and look for every screen size specifically.
Because the space is limited, the cell stack direction will be set to Row on mobile view. You can change it to match the desktop view by choosing the Column option under the Cell Stack Direction drop-down menu.
Once you go through the many different styling options this plugin offers, save it, and move on to publish the table on your WordPress website.
Publish the Table
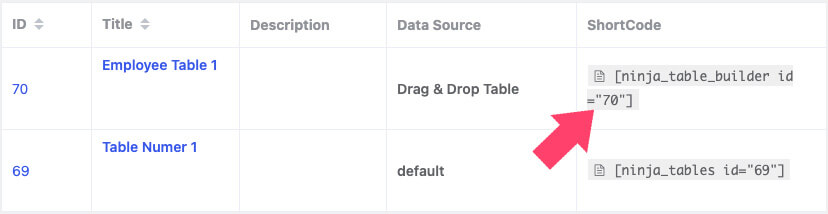
Each table will have a unique shortcode that we can use to display the table on every page, post, or custom post type.
You can copy the table shortcode from the left of the save button or next to the table name in the Ninja Tables Pro -> Tables screen.
Once you copy the shortcode, edit your desired page and add a shortcode block to the content.
Then, paste the table shortcode and click publish to make the changes public.

Visit the page once again and ensure the table was published successfully and you’re satisfied with how it looks.
If you want to change the table, open the table editor screen, adjust, and resave it. There is no need to replace the shortcode because it will get updated with the latest changes.
Frequently Asked Questions About the Ninja Tables Pro Plugin
Yes, you can use the HTML or Shortcode Elementor widget to display the table, just as we showed you in the create tables with Elementor tutorial.
You can use the Image element to add custom images to each table cell.
Yes, click the Manage Cells button, choose multiple cells, rows, or columns by holding the shift key, and click on merge.
Under the Table Configuration tab, you can conditionally display any row or column inside the Conditional Formatting screen.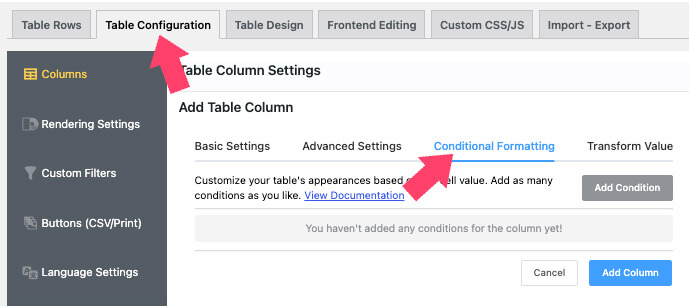
Conclusion
Ninja Tables Pro is a great WordPress plugin with a lot to offer regarding features and functionality.
The plugin is easy to use and comes with excellent documentation and support. The pricing is fair, and a free version is available if you want to try it before buying.
Ninja Tables Pro is an excellent option for a powerful WordPress table plugin.
Also, make sure to subscribe to our YouTube channel and like our page on Facebook.