When running an eCommerce store, it will be helpful to know how to change your shop’s currency to the same one your customers use in their country.
A simple change like that will improve the checkout user experience process of your site and will help you immensely.
In this article, you’ll learn how to change the currency in WooCommerce websites.
Why Changing the Currency
In a free market, when anyone can open an online shop, the ones who’ll emphasize improving the user experience of their checkout process will benefit the most.
With the increasing number of WordPress users, it’s known to all that there are multiple WooCommerce stores in every country.
Most stores will only display their prices in USD currency (the WooCommerce default) and, as a result, will miss the target and lose potential customers.
Changing the currency can help your store in a few ways:
- It will save your customers valuable time to convert the currency themselves. Think about your customers in the United Kingdom. For example, when they’re matching your store’s prices with the prices in their country, they’ll need to calculate the exchange rate to check its worthwhileness. Leaving it to them can make room for mistakes that may prevent them from purchasing through your website.
- Changes in the US dollar’s value may paint an inaccurate picture of the product’s value. The foreign bank of your customers will convert the USD amount of the sale to match its currency. If a customer naively thinks that the dollar value is less than what he was charged, there is a higher chance for him to return the product and ask for his money.
- Displaying the currency of your customers’ location will give the impression that your store is based in their country. For many people, that alone will make them more comfortable purchasing from your store, thinking that the items will arrive faster and they can enjoy support in their language.
Now that we understand the importance of displaying the correct currency, let’s find out how to do it.
Method #1: Change Currency from the WooCommerce Dashboard
This is the most straightforward way to change the WooCommerce currency because it doesn’t require installing any plugin or using custom functions.
However, WooCommerce can only display one currency; therefore, this method is only useable when selling in a specific country.
To change the default currency of WooCommerce, follow these steps:
-
Login into the WooCommerce dashboard and navigate to the settings screen.
-
Scroll to the bottom of the general tab to the currency options section.
-
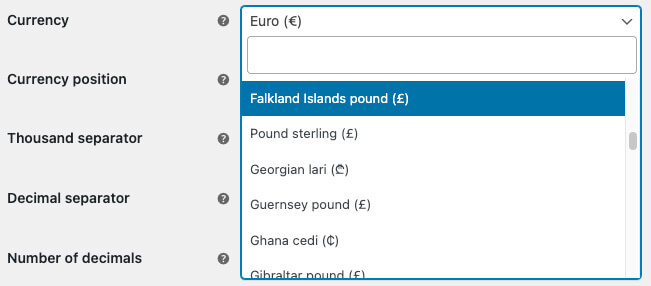
Choose your preferred currency from the currency drop-down list.
-
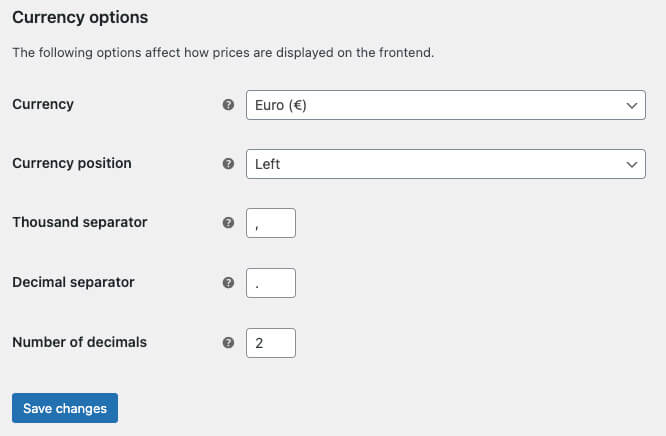
Change other currency options such as position, separators, and number of decimals.
-
Save the changes.
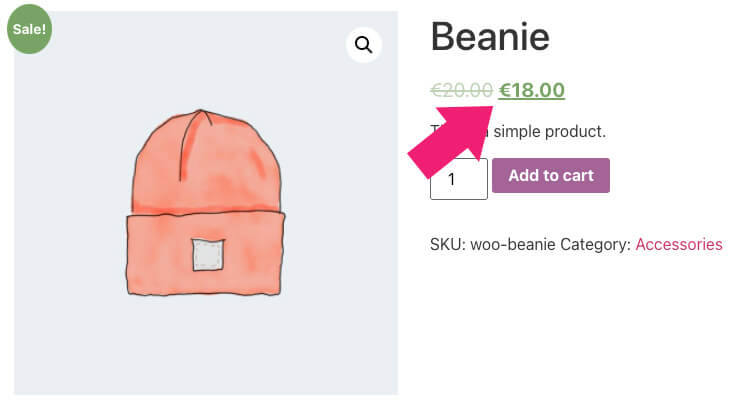
Once saved, visit one of your product’s pages and verify that the prices are now displayed in the chosen currency.
As mentioned above, this simple method is beneficial when you only want to display a single currency.
On the other hand, if you want to display multiple currencies and let your customers switch between them, you’ll need to use a plugin.
Method #2: Use a WooCommerce Currency Plugin
With a currency switcher plugin, you can let your customers change the displayed values to their preferred ones.
Therefore, that’s a better way to go when selling products worldwide because it will adjust automatically based on the customers’ location.
Multiple WooCommerce plugins will help you change currency, and in this tutorial, we will explore two of them.
WooCommerce Currency Converter Plugin
The WooCommerce Currency Converter is a simple plugin that will add an extra widget to your website.
The widget will automatically convert and dynamically display the correct exchange rate based on the product’s price.
Please note: that the conversions are updated daily based on the current exchange rate but may not be entirely accurate. Therefore, they should be used for informational purposes only.
You can get the WooCommerce Currency Converter from the official website or us for only $4.99.
After installing and activating the plugin on your website, navigate to Appearance -> Widgets and drag the new WooCommerce currency converter widget into your desired position.

You can expand the widget dashboard to customize its settings. For example, you can add currencies based on their code or even add a reset button.
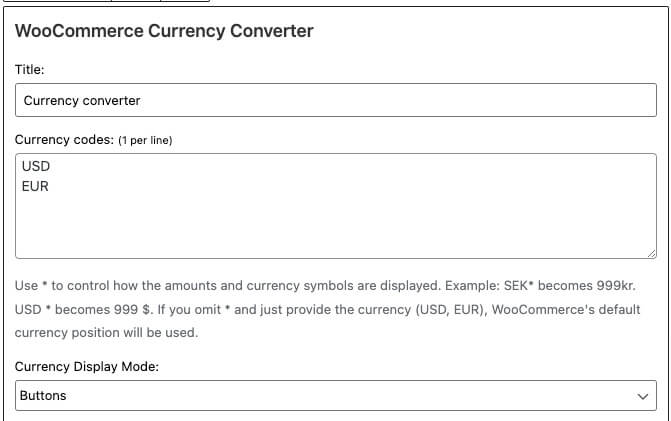
Once saved, visit your product pages and test the converter plugin by clicking on a currency and ensuring it displays the correct amount.
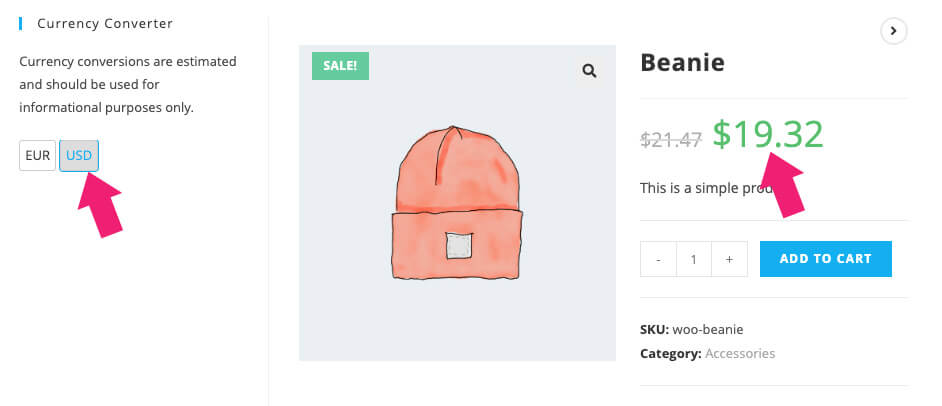
Because nowadays, most WordPress users use page builder plugins, like Elementor, you can also execute the plugin with a shortcode.
Navigate into one of your product pages and add the [woocommerce_currency_converter] shortcode inside the code editor.
Similar to the widget, you can also populate the shortcode with additional currency codes you would like to display. To do that, enter the currency codes, separated by a comma, inside the currency codes parameter, like so:
[woocommerce_currency_converter currency_codes="AUD, USD, GBP, EUR"]If you are working with template files instead, you can display the shortcode with a PHP function like so:
<?php echo do_shortcode( '[woocommerce_currency_converter] ' ); ?>Although the plugin will display different currencies, the checkout will still use your default store’s currency.
We will need to use a different plugin if you want to enable your customers to purchase in their currency of choice.
Multi Currency for WooCommerce
The Curcy Multi Currency for WooCommerce plugin is the ultimate solution to transform your eCommerce shop into a worldwide success by reaching more customers.
The plugin will not only convert the currency but also enable checkout with the selected exchange rate. Moreover, you can change the default display currency based on your customer’s location.
For example, a visitor from India will see the product prices in rupee while Americans will see it in dollars.
First, from your WordPress dashboard, navigate to Plugins -> Add New and install the Curcy plugin.
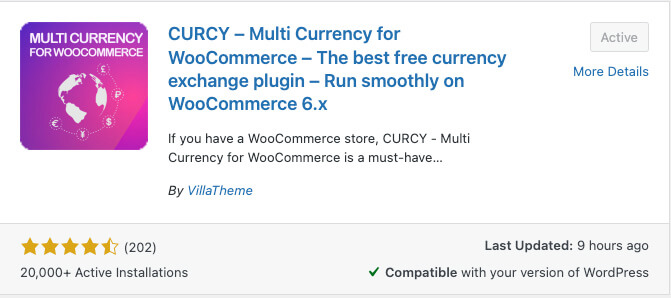
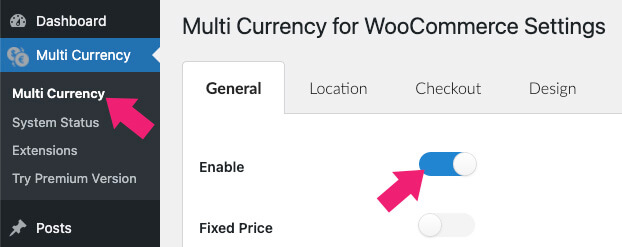
Once activated, navigate Multi Currency -> General and toggle the enable option.
At the bottom of the page, under the currency options section, you’ll see the default currency pulled from your WooCommerce settings page.
Click on the add currency button and select the desired currency.

Once added, you can set the exchange rate manually or click on the update rate button on the right side. The plugin will automatically pull the current exchange rate and populate the field’s value.

Finally, change the currency price switcher option to flag, code, or price, and save the changes.

Then, visit your product’s pages and test the switcher by clicking on the flag icon under the displayed price. After selecting a different currency, it will show you the value of the products with their new price.
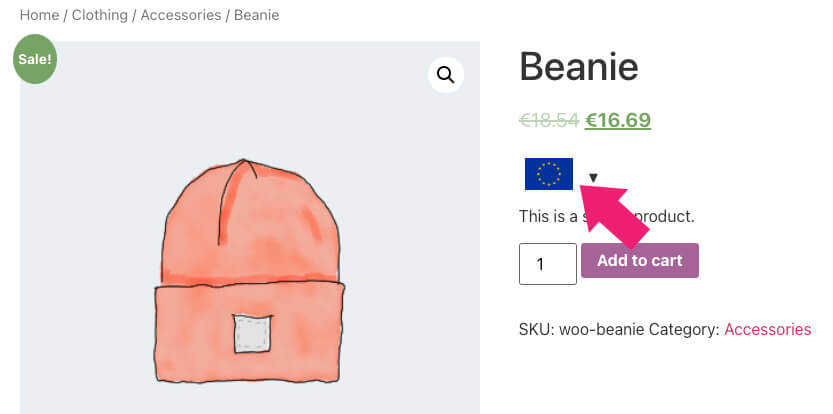
This plugin’s handy feature is the option to dynamically display the correct currency based on the user’s location.
To enable that, navigate to the location tab, choose the auto-detect currency option, and toggle the currency by country to on.
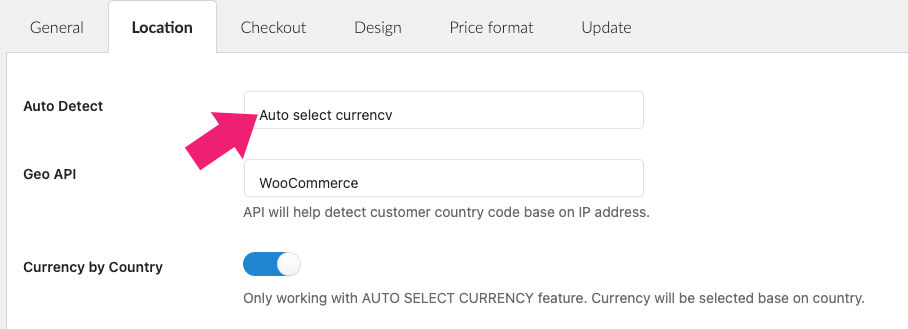
Then, match the currency to the countries using it, and save the changes.

As a result, all customers from the selected countries will automatically be presented with their local currencies.
The free version of the Curcy plugin is limited to only two currencies. To add more, consider getting the pro version. You can get it from its official page or us for only $4.99.
Using a plugin to change the currency in WooCommerce may be more than what you need. If you only want to add or change currency symbols, you can do it with code snippets.
Add Custom Currencies and Symbols in WooCommerce
Code snippets and functions are a great way to complete small tasks without using dedicated plugins.
WooCommerce, a popular eCommerce plugin, comes with many functions we can use to perform different tasks. The codes below are carefully coded by their team of developers and handed to you to use by creating a custom site snippet or pasting them inside the functions.php file of your active child theme file.
Note: please backup your website before editing core files.
The function below will add a custom currency:
/**
 * Custom currency and currency symbol
 */
add_filter( 'woocommerce_currencies', 'add_my_currency' );

function add_my_currency( $currencies ) {
     $currencies['ABC'] = __( 'Currency name', 'woocommerce' );
     return $currencies;
}

add_filter('woocommerce_currency_symbol', 'add_my_currency_symbol', 10, 2);

function add_my_currency_symbol( $currency_symbol, $currency ) {
     switch( $currency ) {
          case 'ABC': $currency_symbol = '$'; break;
     }
     return $currency_symbol;
}
Feel free to visit the official documentation page for more information.
The function below will change a currency symbol:
/**
 * Change a currency symbol
 */
add_filter('woocommerce_currency_symbol', 'change_existing_currency_symbol', 10, 2);

function change_existing_currency_symbol( $currency_symbol, $currency ) {
     switch( $currency ) {
          case 'AUD': $currency_symbol = 'AUD$'; break;
     }
     return $currency_symbol;
}
Feel free to visit the official documentation page for more information.
Conclusion
This tutorial teaches you how to change the WooCommerce default currency in multiple ways.
Displaying the correct currency to your customers will enhance their user experience and improve your brand reputation.
Leave us a comment and tell us which of the methods above you used to achieve this task.
Also, make sure to subscribe to our YouTube channel and like our page on Facebook.

