There is a formula to price your products or services to maximize conversions. The pricing of a product can make or break a deal from happening.
Overcharging will send your customers to look for better prices on your competitor’s sites, while undercharging may not reflect the actual value of the products.
Therefore, there is a fine line that you’ll need to walk on to price your products just right. Meanwhile, letting your customers name their prices may be a clever idea to collect that data.
In this article, I will show you how to name your price in WooCommerce with three different plugins.
Why Let Customers Name Their Price
There are many reasons why to let your customers name their prices. Here are the main ones:
- New businesses often struggle to find the right price for their products. Customers who name their prices can provide valuable data on the price.
- Some people interested in your products or services won’t be able to afford them. When you let them set the price, you may get less than expected but serve the community well.
- Charging even a small amount is better than giving it for free. For example, if you placed a large order from a factory and the merchandise arrived defective, charge at least the minimum amount to cover the loss.
- Once visitors have already become customers, it will be easier to sell them more in the future. Moreover, their payment method was saved, and their following checkout process will be much quicker.
- When running a donation, any amount can help the cause. Setting a minimum amount to donate may prevent people from participating. Therefore, it will be a bright idea to name the price they would like to donate.
There are many additional reasons, but I’m sure you got the point by now.
In the following sections, we will explore three of the best name your price plugins for WooCommerce.
1. WooCommerce Name Your Price
Get the plugin: official website ($49) || or from us ($4.99)
Once you activate the plugin on your website, it’s effortless and straightforward.
First, navigate to WooCommerce -> Settings and into the name your price tab.
You’ll be able to edit the custom text of the plugin’s fields, such as suggested minimum and maximum prices, add to cart text, etc.
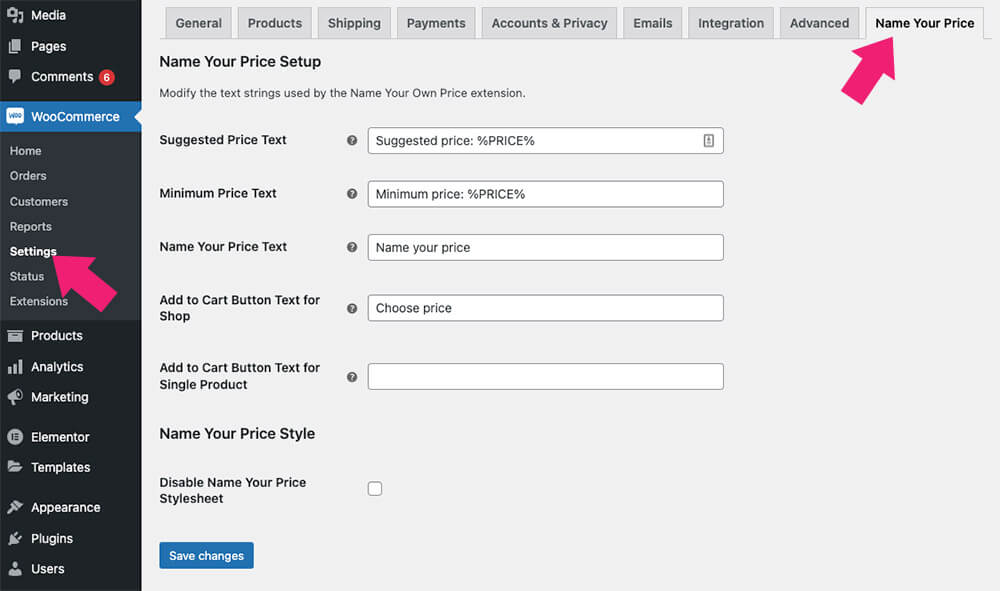
I’ll leave the fields as they are but if you modified any of them, make sure to save the changes.
Then, edit one of the products you’d like to enable the name your price option for and scroll to the product’s data section.
Enable the name of your price checkbox and enter suggested minimum and maximum prices. These fields are optional but recommended.
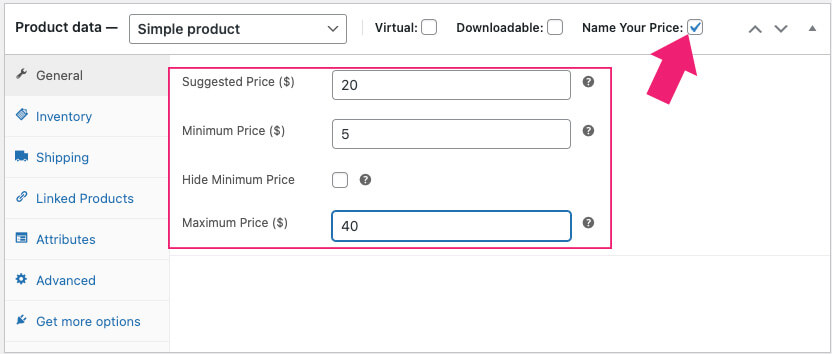
Once you set the prices, save the changes, and visit the product page.
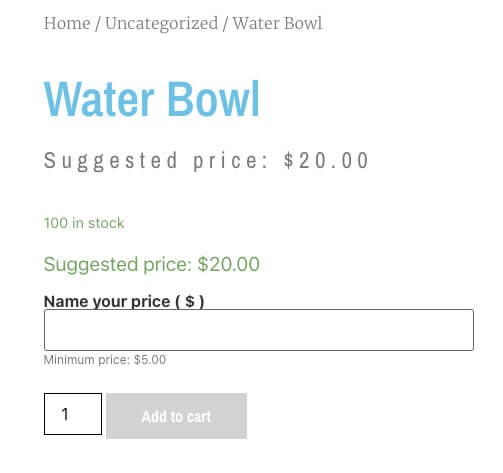
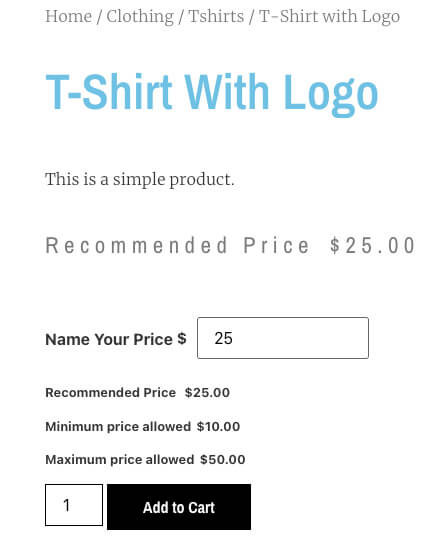
The default price was swapped with the suggested price, and an empty field was added to let your customers name their price.
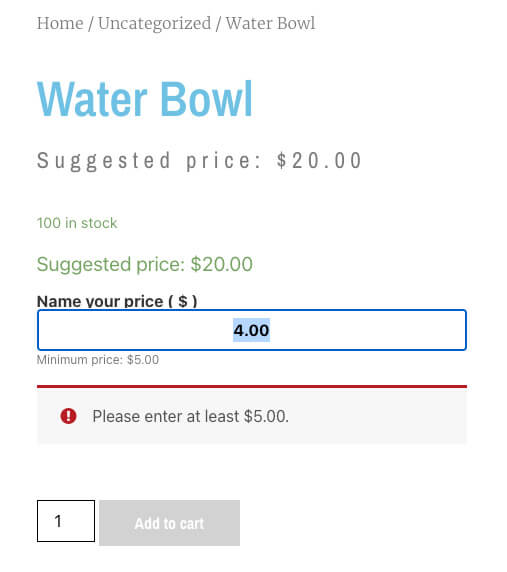
If you set a minimum or maximum price, test the end ranges and verify that they respect the conditions.
Finally, ensure that the cart’s price matches the price you entered on the product’s page.
2. WooCommerce Name Your Price by YITH
Get the plugin: official website ($54.99) || or from us ($4.99)
YITH is known to develop quality plugins for WooCommerce, and this plugin is no exception.
This name your price plugin by YITH is similar to the one we explored above and initially acts the same.
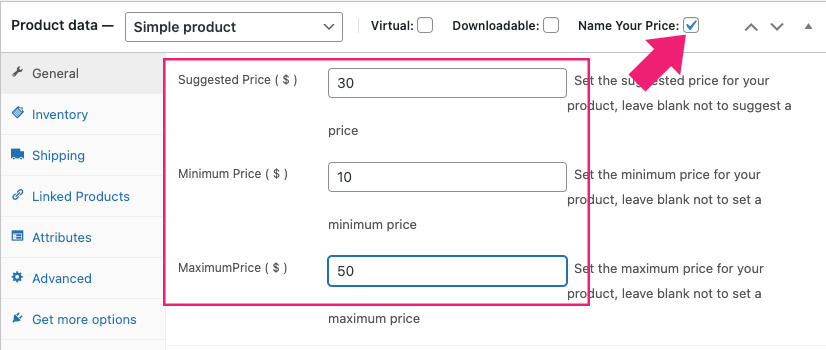
Once activated on your website, edit one of your product’s pages and enable the name of your price checkbox.
You also have the option to enter the minimum, maximum, and suggested price. Alternatively, you can leave it blank if your choice is not to.
After setting the pricing conditions for the product, make sure to save the changes, visit the page, and test it.
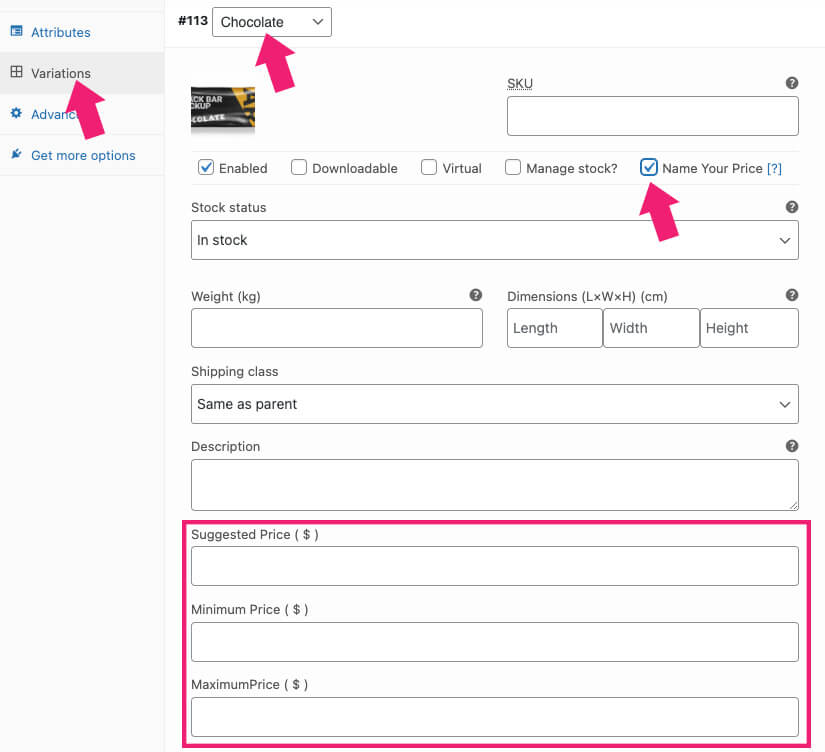
If you sell products with variables, the name of your price option will be available in each variation.
Navigate to the variations tab and expend any or the default variation. Then, you’ll be able to enable the name of your price option.
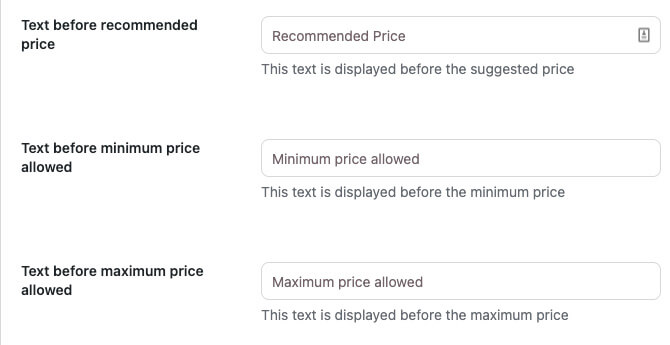
If you want to change any of the default texts of the plugin, navigate to YITH -> Name Your Price and into the general settings tab.
You can edit the shop and message labels based on your needs. Some fields to change includes the text before the recommended price, add to cart, invalid costs, etc.
A significant advantage this YITH plugin has over the others is the option to enable the available pricing functionality based on the product categories.
To do that, switch to the Active Rules tab and click on the Add rule button.

Select your desired category and set the price conditions. Ensure to enable the rule behavior checkbox and save the changes when done.
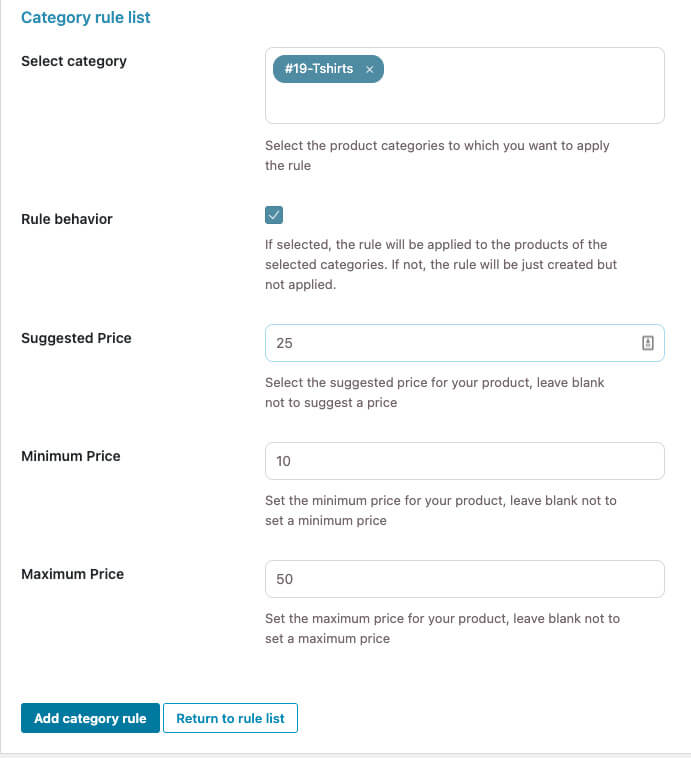
Once saved, every product under the selected category will automatically present your customers with the option to name their price.
Last, check the cart and verify that it respects the custom price we entered.
3. Name Your Price (Open Pricing) Plugin
Get the plugin: official website ($21) || or from us ($4.99)
This name your price plugin by MotifCreatives is another excellent option to enable the available pricing module.
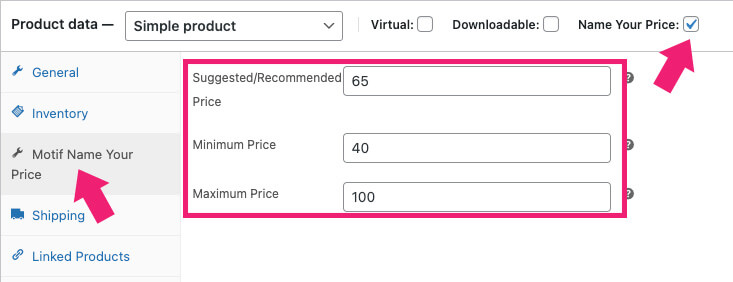
Once activated on your website, navigate into one of the WooCommerce products and enable the name of your price checkbox.
Then, click on the Motif Name Your Price tab from the left sidebar and set the minimum, maximum, and suggested prices.
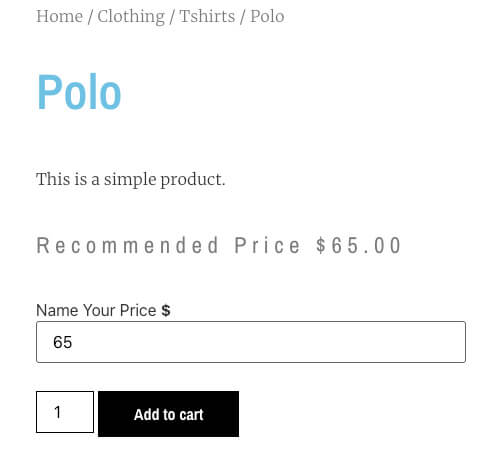
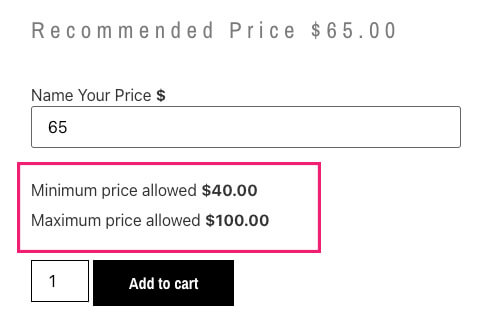
Once saved, visit the product page to see what it looks like. Only the recommended price will be displayed by default, while the minimum and maximum prices will be hidden.
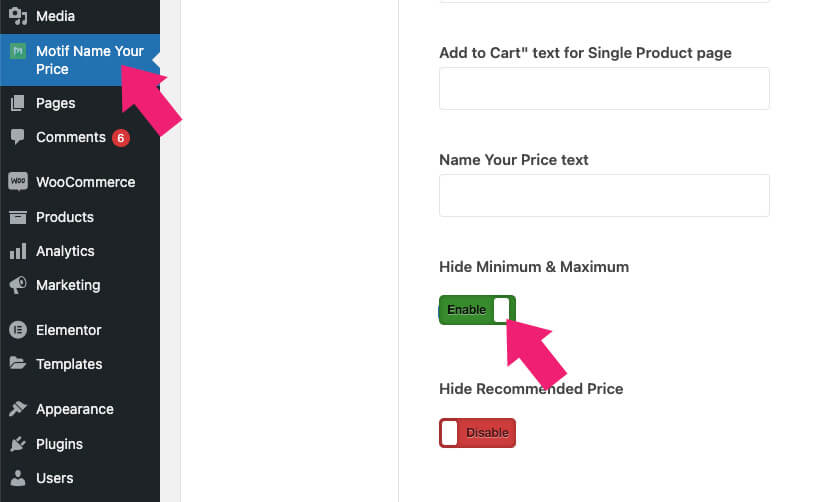
If you want to display them, open the plugin’s settings page and toggle the minimum/maximum prices.
After saving the changes, visit the product’s page once again to verify that all messages are displayed correctly.
Please run some tests and ensure everything is working as expected.
4. WooCommerce Product Options
Barn2’s WooCommerce Product Options come with various ways for users to add/create options for their products, including checkboxes, radio buttons, image buttons, text fields and so much more. One of its key features is the ‘Customer Defined Price‘ field that users can use as a Name Your Price plugin.
It allows customers to enter a custom price for a product when making a purchase on a WooCommerce store. This field can be added to any product in the store and set to be required or optional for customers to fill out.
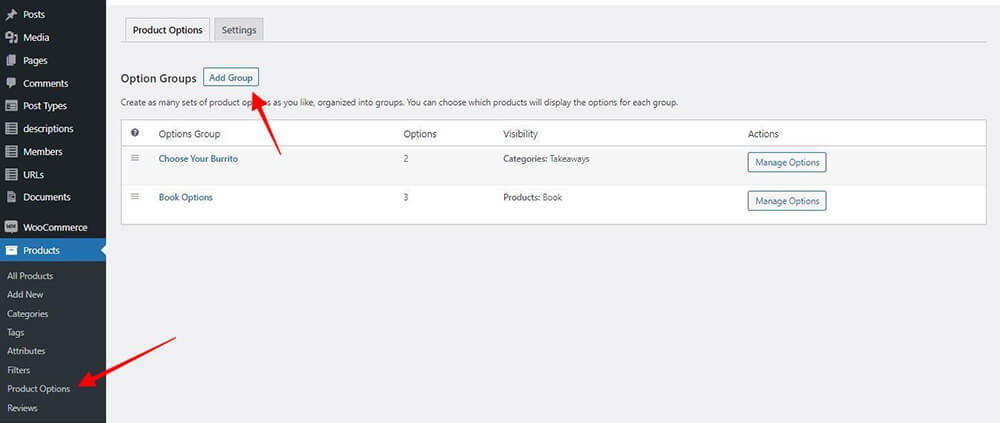
Once activated on your website, Go to Products > Product Options to create your Product Options. The plugin is easy to use, and its interface is pretty straightforward.
To start adding your options, click on Add Group. This is because you can organize your product options in groups, and each set of options can have an unlimited number of product options.
The first thing users will need to do is to name their product options group so that each is unique and easily identifiable. They can choose whether or not to display the name at the front.
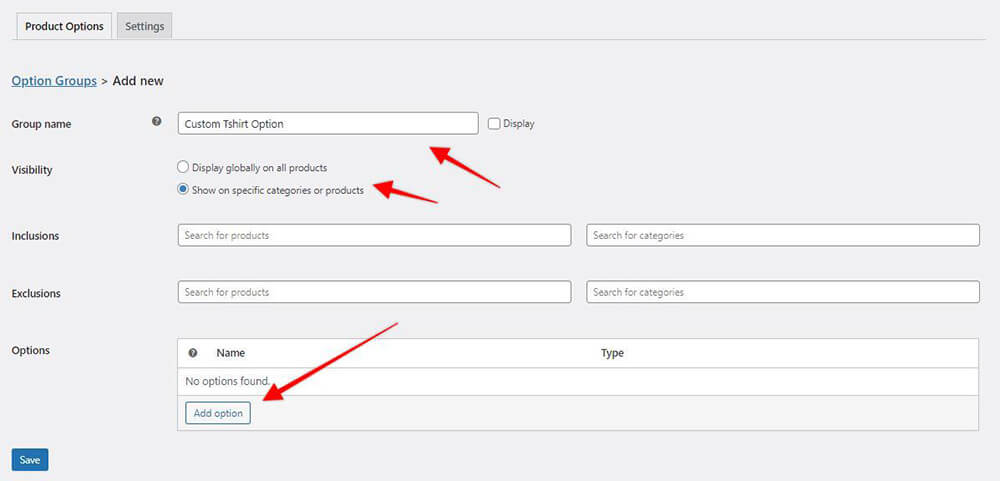
Using the visibility settings, they can control whether to display these options on all their products or to specific products and categories only. To do that, they need to enter a keyword for a product and category and then choose from the results.
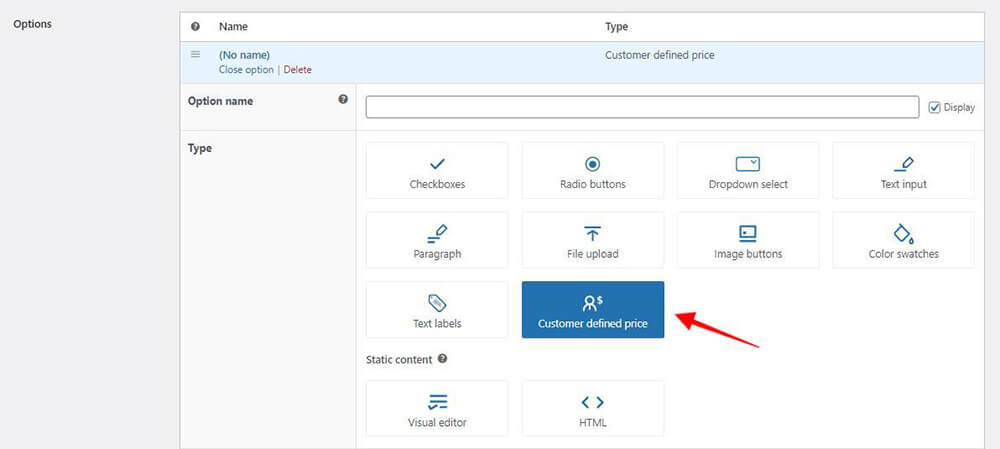
Once done, including/excluding products and categories, users can start adding/creating options. If they wish to display a field to allow customers to put in a price for a product, then they have to choose the ‘Customer Defined Price’ field.
After choosing the ‘Customer Defined Price‘ field, users can add a Label and Description. They can also choose whether to make this option a ‘Required’ field or not before checkout.
Under Advanced Settings, users can use Conditional Logic to hide/show this option depending on the term customers had selected. This is useful if users want to give customers more flexibility in how much they pay for a product/service.
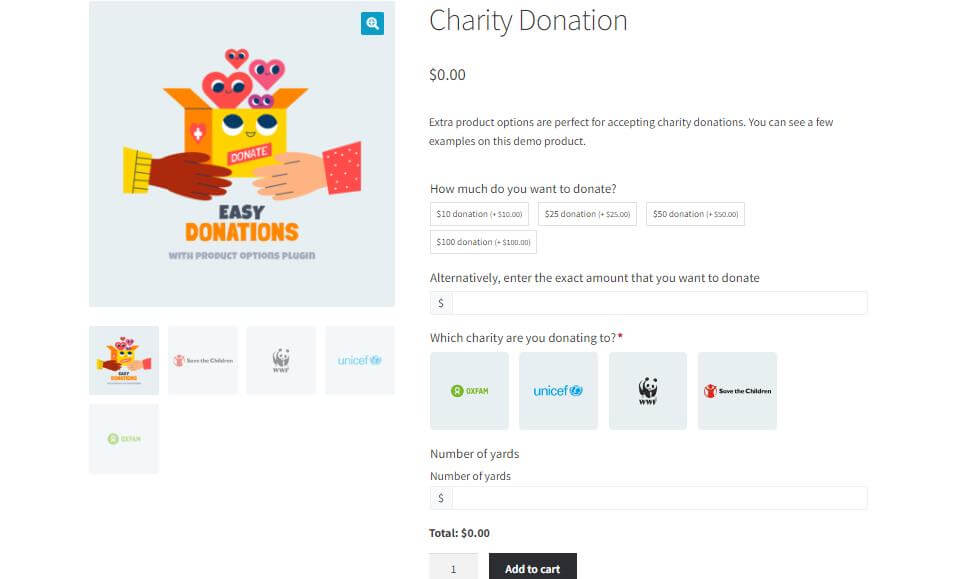
For example, a store that sells custom artwork might allow customers to name their price for a piece, or a store that sells consulting services might use the Name Your Price field to allow customers to choose the amount they want to pay for a consultation. This is also useful for websites that would like to accept donations.
Once satisfied with the option/s created, users can click on Save Changes and check their products to see if these options are displayed at the front end.
Which Name Your Price Plugin to Choose?
They are all good and initially work the same. Here are some of the pros they all have:
- Set minimum, maximum, and suggested prices for each product.
- Works with single, variables, and bundle products.
- Customize the displayed messages.
- Prevent purchases at no cost.
- Multilingual support.
The advantage YITH and Motif plugins have over the first one we explored is the option to edit the label messages for harmful and invalid prices. In addition, the name your price plugin by YITH also enables you to set the available pricing option per category, which is a huge time-saver.
However, if you’re using other WooCommerce extensions, such as subscriptions, the first plugin on this page is the one to go with because it will seemingly integrate with most of them to create a robust store.
Feel free to get our unlimited downloads package and take them all for a spin to see which one fits your needs the most.
Conclusion
This article reviewed three of the best name your price plugins for WooCommerce. In addition, we learned how to use them and in which scenarios they can be most helpful.
Leave us a comment and let us know which of the plugins above you chose for your website.
Also, make sure to subscribe to our YouTube channel and like our page on Facebook.