

The logout link is handy to add to your website. You can add it to multiple places, such as the header menu, footer menu, or sidebar.
This article will show you how to find your website’s logout link, add it to various locations, and redirect it to a specific page.
Find the Logout URL
When logged in to your website, the logout link is always accessible in the admin menu bar at the top right corner.
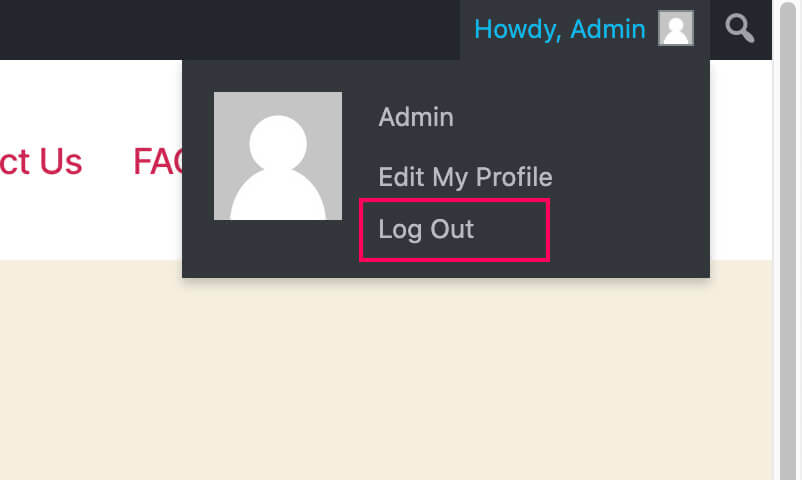
The menu bar is available to all other users or subscribers unless turned off.
They can always use that option to log out of your website.
Disabling the admin bar for non-administrators will hide the logout link of the site.
If that’s the case, you’ll need to provide another alternative for your WordPress users to log out.
The default logout URL of WordPress is:
http://example.com/wp-login.php?action=logoutNow that we know that, we can add the link above to various locations on our website.
Make sure to replace http://example.com it with your domain name.
Add Logout Link to Various Locations
This section will show you how to add the logout link to your header menu, footer menu, and sidebar.
Add Logout Link to Header
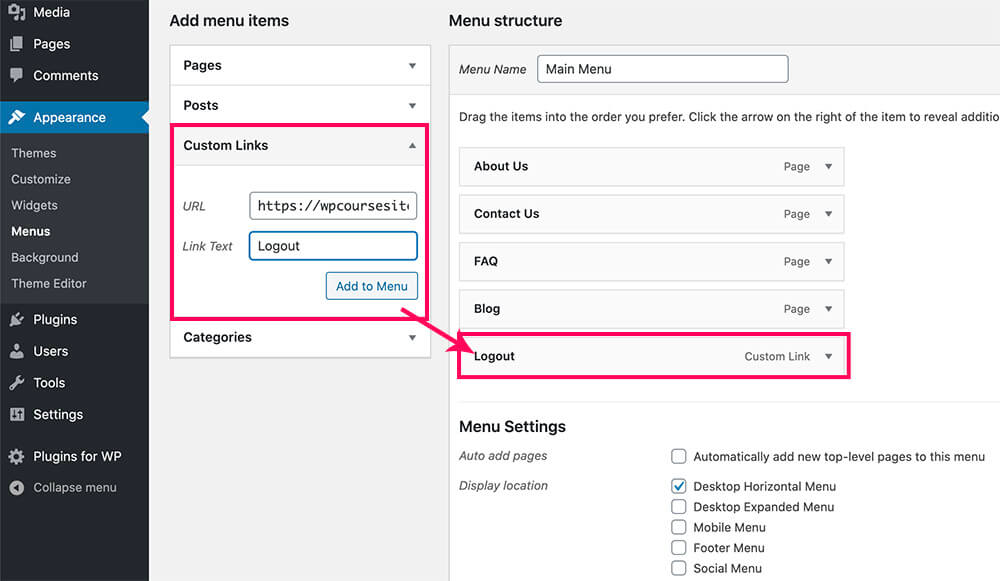
To add the logout option to the menu, we must edit the menu.
Navigate to Appearance -> Menus and select your desired header menu.
On the left side, click on Custom Links, and enter the logout link of your website (the one above) in the URL field. In the Link Text field, write ‘Logout’ and click on Add to Menu.
Great, the logout link is usually the last option on the menu, and I recommend you leave it that way.
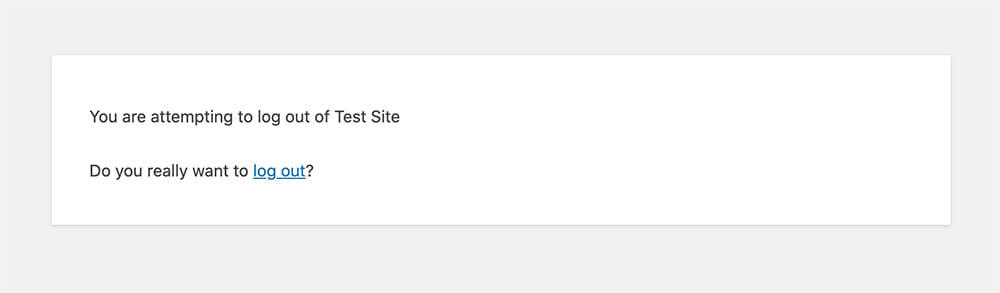
Visit your website and test your new logout link from your header menu.
Once clicked, you will see a warning page where you’ll need to click on the logout link again to log out finally.
Later in this article, I’ll show you how to skip this annoying warning page.
Add the Logout Link to Footer or Sidebar
Like landing pages, you’ll need to remove your website’s header in some cases.
If your theme supports a footer menu and you’re using it, you can edit the footer and add a logout link the same way we did with the header.
Navigate to Appearance -> Menus and target the menu of your footer.
Add the link using the Custom Links option on the left and place it at the bottom of the menu.
If your footer uses widgets instead of a menu, add the logout URL to any header, footer, or sidebar widget.
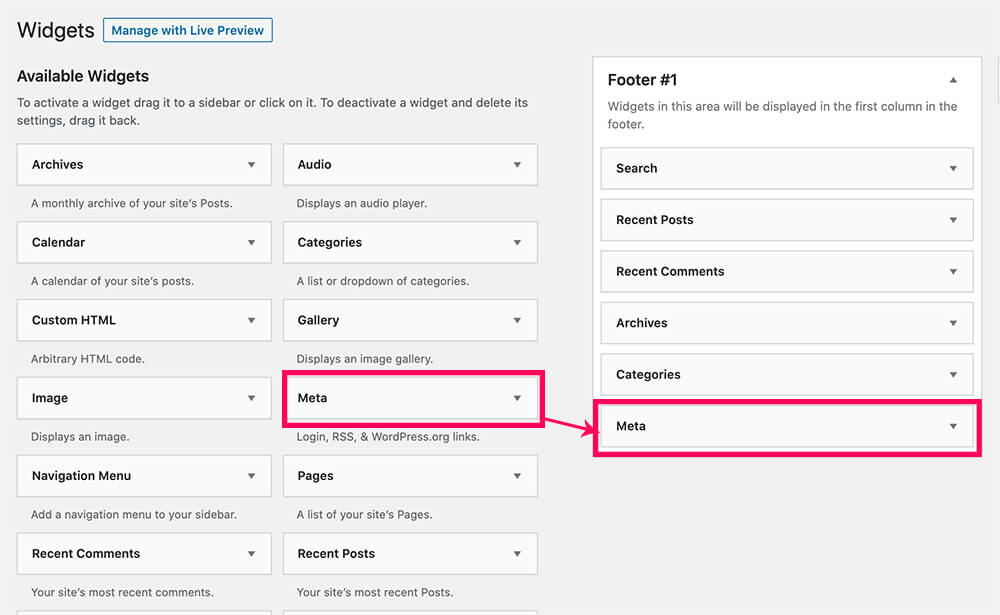
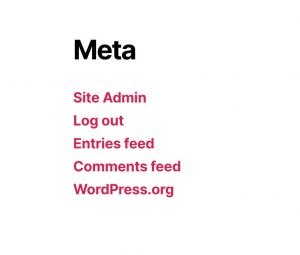
Navigate to the widgets screen (Appearance -> Widgets) and look for the Meta widget.
Drag the Meta widget from the left to the location where you want to display it.
Different themes have different options where to place the widgets. The Twenty-Twenty theme only has footer options, but other themes have many others.
After you do it, when checking out your website, you’ll see that the Meta widget is loaded with various links. If you’re happy with all the extra links, great, leave it that way. If you would only like to add a logout link, we will need to use a different widget.
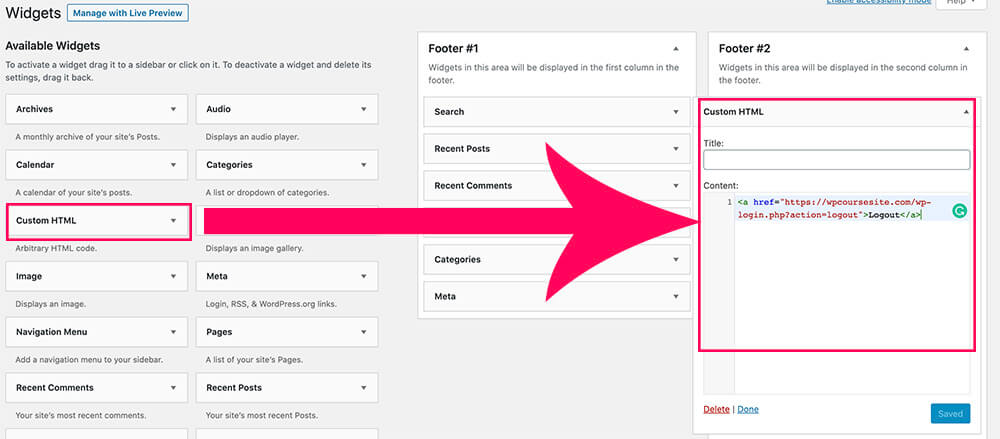
To add a logout link, we can use the Custom HTML widget.
Drag the Custom HTML widget to your desired location. This time, I’ll drag it to the second footer location.
Enter the code below into the Custom HTML box and click Save.
<a href="http://example.com/wp-login.php?action=logout">Logout</a>Make sure to replace http://example.com with your actual domain name.
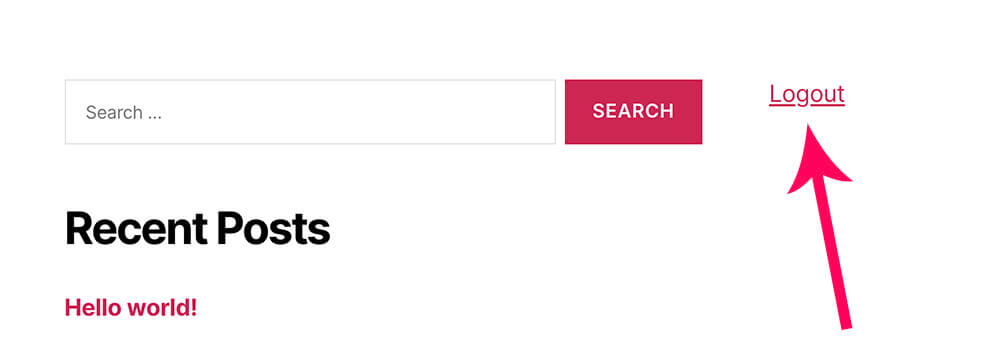
Great, now when checking out the footer, we see that the logout link was added successfully. Click on it and make sure it’s working.
Hide the Log Out Link to Logged Out Visitors
When we add the logout link to our website, we can see the link even if logged out.
Because there is no reason to display a logout link to users that aren’t logged in, we will need to hide it from them.

Although there are many plugins to display different menus to logged-in/out users conditionally, it’s simple enough to do it with CSS only.
A specific class is added to the body tag in many themes when logged in.
We need to find the logged-in added class and the menu item class we would like to hide and create the CSS rule.
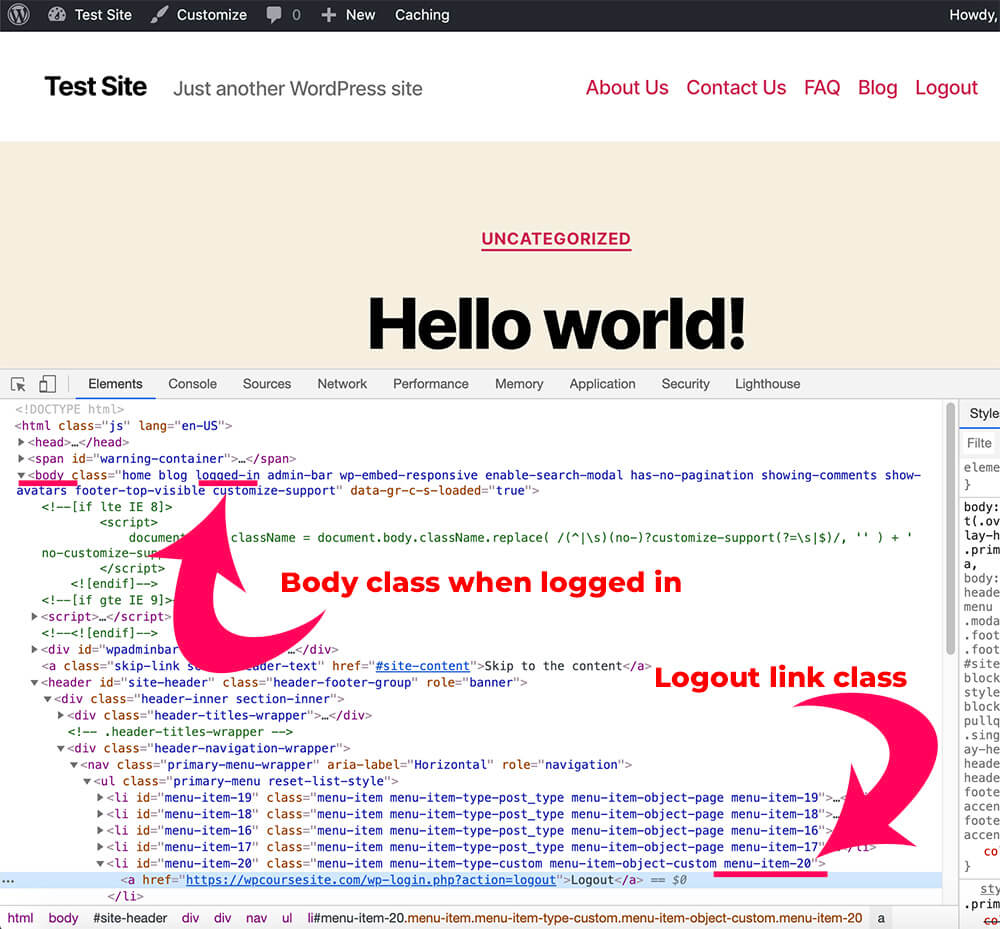
While you’re logged in to your website, click Inspect on the logout menu item that you would like to hide.
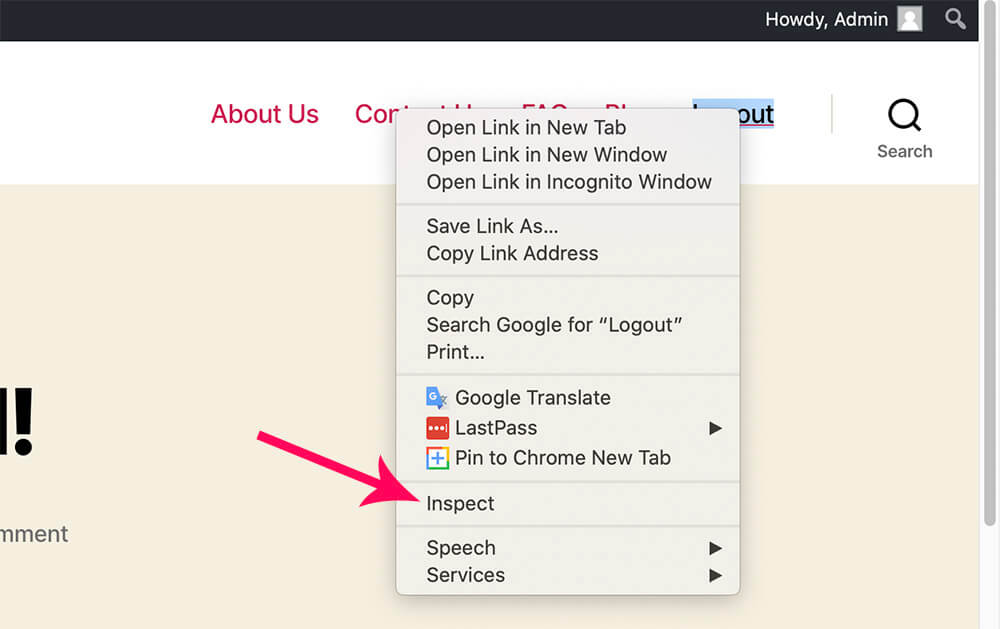
In most cases, the menu link will be nested inside a li element with a unique ID and class. We are going to target the class of the list item (li).
A few lines above it, you’ll see the body tag. Inside the body tag, you’ll see many classes. If your theme supports it, you should spot a logged-in class or something similar.
When we know both classes, we can create the CSS rule.
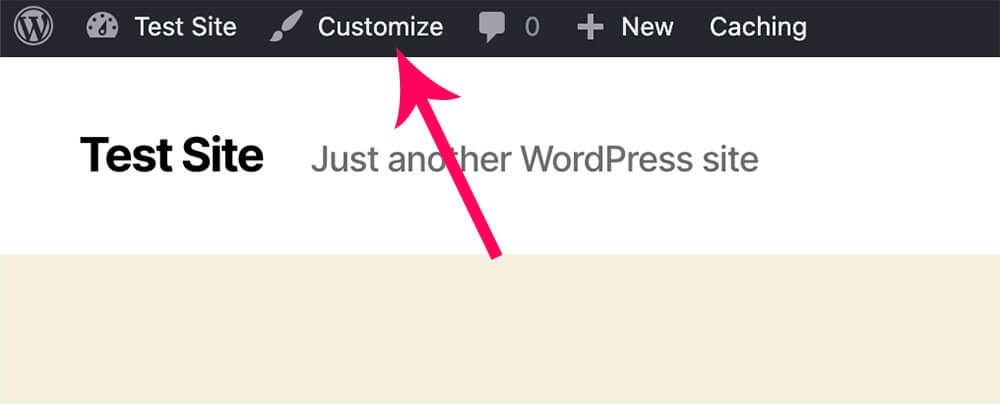
From the admin menu bar, navigate to Customize.
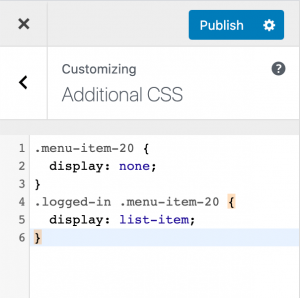
Choose the Custom CSS option and paste this code inside the Customization screen.
.menu-item-20 {
	display: none;
}
.logged-in .menu-item-20 {
	display: list-item;
}
Replace the number 20 with the actual number of your menu item and click Publish.
Great job. All you have left to do is log out of your website and make sure the logout URL is hidden.
If you couldn’t find a logged-in (or similar) class in your body tag, you can still use a plugin such as user menus to achieve similar results.
Disable Logout Warning Screen
As I showed you above, when using the logout links that we added to the main menu, footer, or sidebar, it will show us a warning screen after clicking on the link.
There is a simple way to bypass the warning screen and disable it.
To do that, we will add a function to the functions.php file of our child theme.
If you don’t have one yet, read our article and learn how to create a child theme.
Navigate to Appearance -> Theme editor.
Look for your child’s theme file from the file lists on the right.
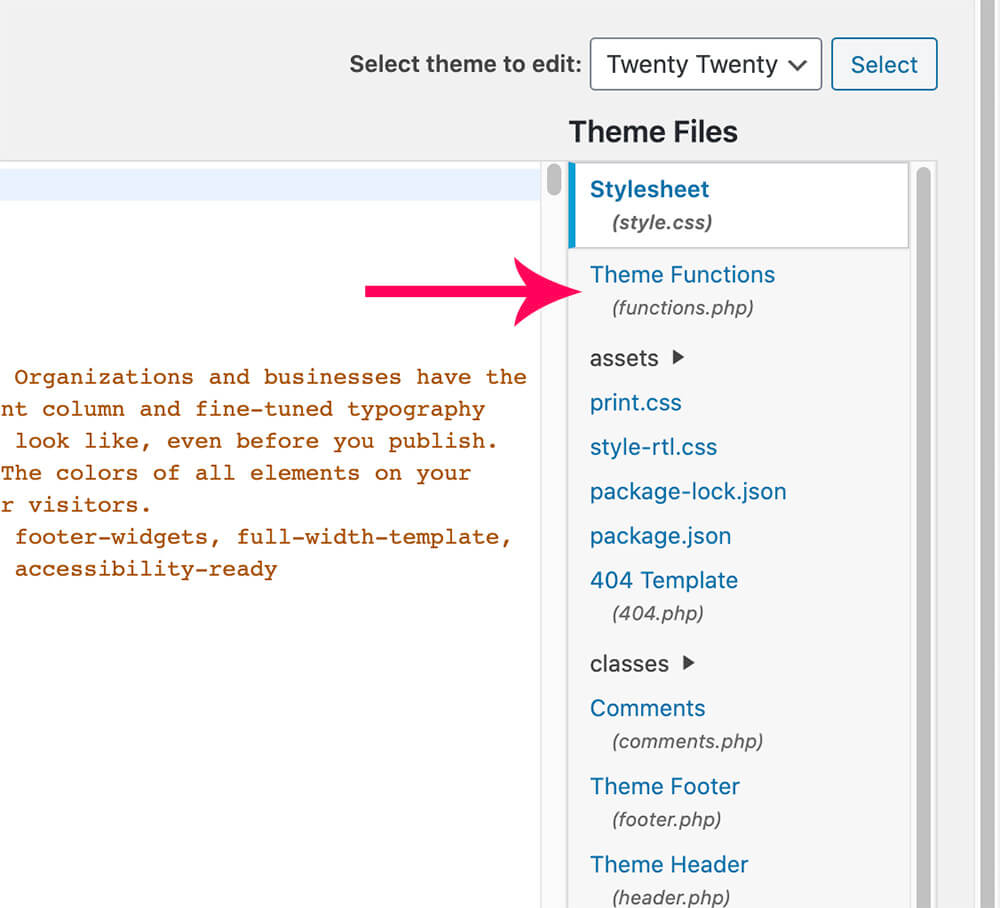
Scroll to the bottom of the file, paste this function, and click save.
add_action('check_admin_referer', 'pfwp_logout_without_confirm', 10, 2);
function pfwp_logout_without_confirm($action, $result)
{
    /**
     * Allow logout without confirmation
     */
    if ($action == "log-out" && !isset($_GET['_wpnonce'])) {
        $redirect_to = isset($_REQUEST['redirect_to']) ? $_REQUEST['redirect_to'] : get_permalink( wp_logout_url() );
        $location = str_replace('&', '&', wp_logout_url($redirect_to));
        header("Location: $location");
        die;
    }
}
After doing so, navigate back to your home page (or any other website page) and click on the logout link again.
If it were set up correctly, you wouldn’t see the warning screen.
Redirect the Logout URL
After logging out, you probably noticed that the default WordPress login screen is the first screen you’ll see.
That is not very user-friendly, and we should fix it.
Like we did above, we can also use a function to address that.
This is the ultimate function because it will skip the warning screen and redirect the user to a different page on your website.
Paste this function at the bottom of the functions.php file of your child’s theme.
add_action('check_admin_referer', 'pfwp_logout_without_confirm', 10, 2);
function pfwp_logout_without_confirm($action, $result)
{
    /**
     * Allow logout without confirmation
     */
    if ($action == "log-out" && !isset($_GET['_wpnonce'])) {
        $redirect_to = isset($_REQUEST['redirect_to']) ? $_REQUEST['redirect_to'] : get_permalink(10);
        $location = str_replace('&', '&', wp_logout_url($redirect_to));
        header("Location: $location");
        die;
    }
}
Make sure to replace the number inside get_permalink(10) with the actual ID of your desired page. We wrote an article on how to find WordPress page ID.
After entering the function, make sure to save the changes.
The last step is to test it and ensure it’s working correctly. Clicking once again on the logout link should log you out and redirect you to a different page while skipping the warning message.
If you haven’t done so yet, your next important step will be to add a login link to your menu or change the login URL to secure your website better. Just like here, it’s also easy to do and simple to follow.
Conclusion
This article taught you everything you need to know about the logout link in great detail. We also made a short video to take you through the steps, and you can find it at the top of this page.
The small websites’ tweaks make a big difference. Our first user experience, for good or bad, happens when we try to log in or out on a website.
These tweaks are so easy to make and thus are a no-brainer. We are going to do it!
Go ahead and add it to your website. After you do it, let us know what else you would like to learn to improve your website?
Also, make sure to subscribe to our YouTube channel and like our page on Facebook.


Redirect the Logout URL – logout works good, but the redirect is not working