Notes are a great way to add custom instructions to your customers’ orders.
While most products can be sold as-is, others will require special requirements before being fulfilled.
In this article, you’ll learn how to add notes to any order in WooCommerce.
Why Adding Notes to Orders
When selling products online, all the details will be displayed inside the product’s page and don’t require any further instructions.
In other cases, however, some businesses will require to add special instructions to order or product.
Here is some example of orders that will need to have additional notes:
- Digital product – you can add the serial number as a note.
- Goods delivery – when sending flowers, a customer may want to add a note to the order with a dedicated text to his loved one.
- Medic/vet – add a note to provide instructions on treating a wound or using medication.
- Prescription – add a glasses prescription to an order invoice.
Those were just a shortlist of many scenarios when we could attach notes to our order invoice.
In the next section, I will show you how to add notes to any PDF invoice of the order.
Add Note to Order in WooCommerce
Follow the steps below to add notes to any order in WooCommerce.
- From inside your WordPress dashboard, navigate to Plugins -> Add New.
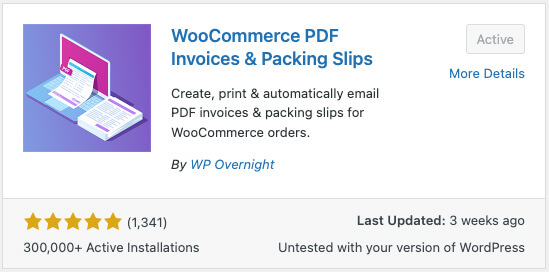
- Install and activate the WooCommerce PDF Invoices & Packing Slips plugin.
- Once activated, navigate to any order under WooCommerce -> Orders.
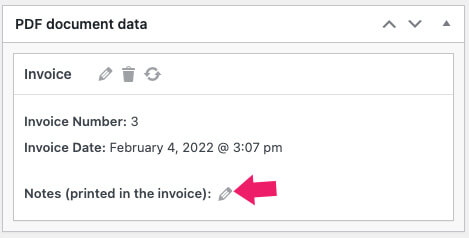
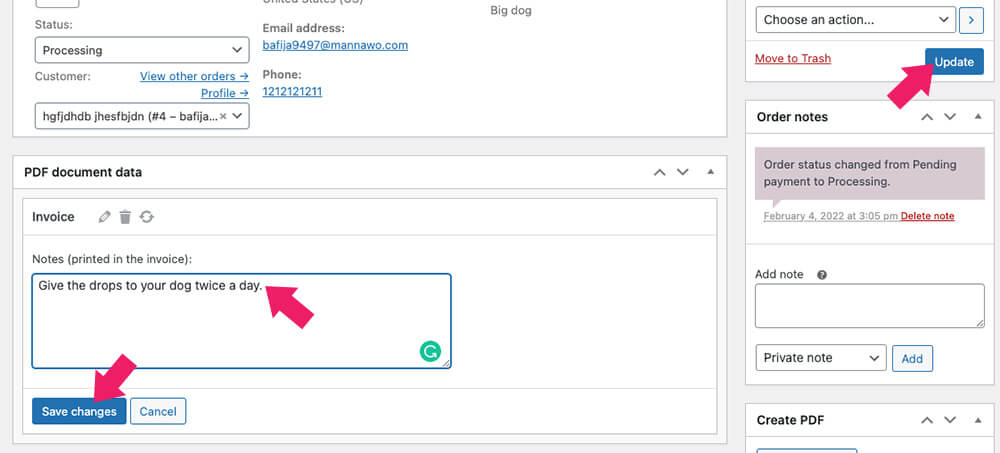
- Then, you’ll see a new box added to the admin panel called PDF document data. Click on the pencil icon to add a note.
- Once you have entered the note, save the changes and click on the update button.
Congratulation, you just added a helpful note for your customers in the order’s invoice.
The last step is to generate the PDF invoice with the special note and send it by email or the package.
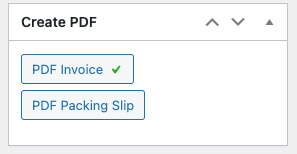
Scroll down the order page and click on the PDF Invoice inside the Create PDF box to generate the invoice.
Inside the PDF invoice or the packaging slip, you’ll see the customer and the admin notes of the current order.
The new invoice will be opened in a new window with the option to print the document or download it to your computer.
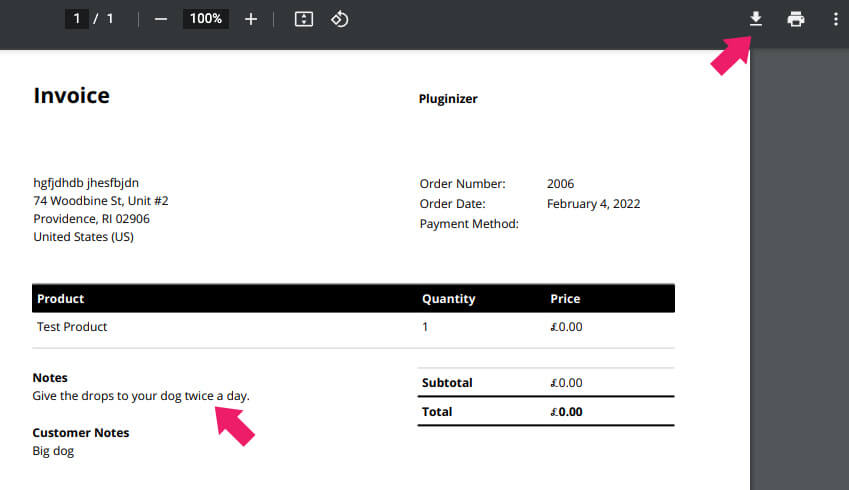
You can also create a downloadable PDF link for the convenience of your customers.
Add the Invoice to Order
Once you have generated the invoice and verified that all notes are in, we should enable your customers to download their invoices from the dashboard.
After generating the first order’s invoice, the customer’s account page will display an invoice button that they can click on to view the document.

Clicking on the invoice button will show the customer the same document that we generated in the last step, including the notes.
To prettify the document, visit the WooCommerce -> PDF invoices tab and add details about your business like description and logo.
Order Updates with Notes
The YITH WooCommerce PDF Invoices & Packing Slips is a very well-coded plugin that will enable you to add notes as order updates.
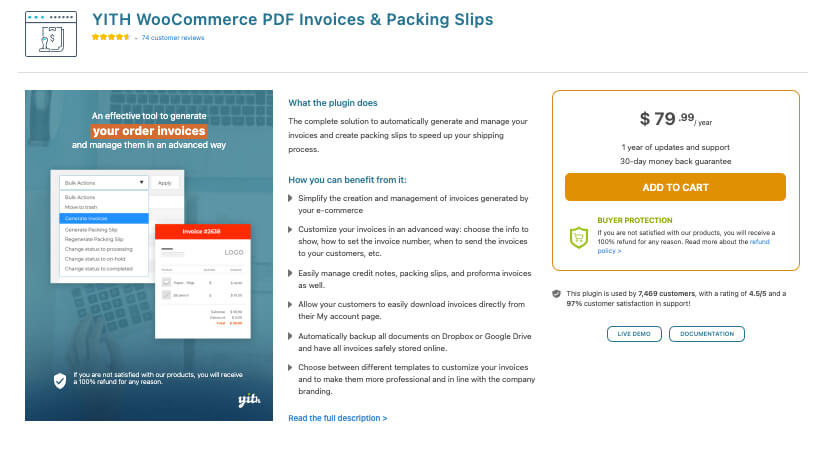
The most valuable features of the plugin is the option to display the note inside the WooCommerce view order page.
In addition to the text you entered, additional information such as the date and time will help track the order’s status.
You can get the plugin from the official YITH website for the total price or from us for only $4.99.
Once you activate the plugin, navigate to any of your store’s orders and change the note from private to customer.
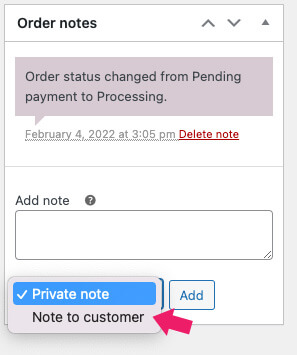
Then, enter your desired instructions in the text field and save the changes.
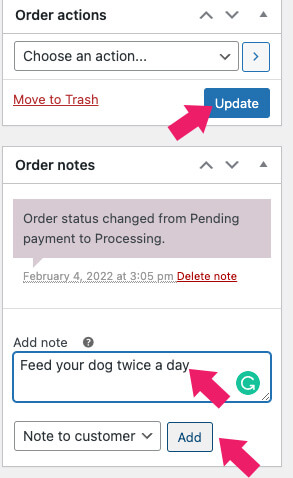
After saving the order, your customer will be able to view the notes from inside his account page by going to the orders tab and into his order number.

There, at the top of the page, they will see the latest information just below the order updates heading.
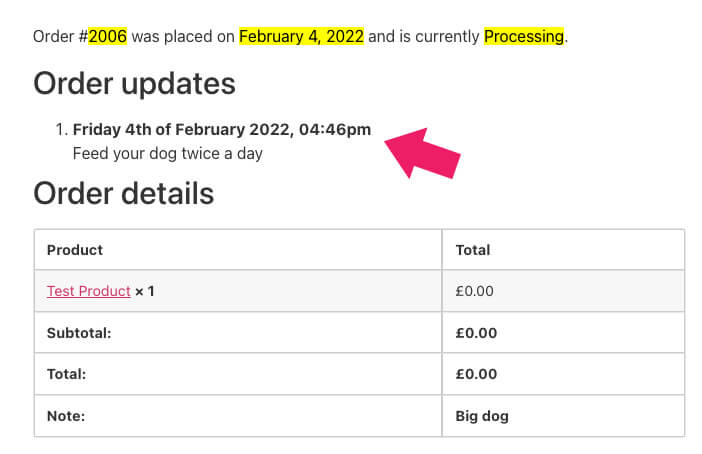
That way, you and your customers can document and view the progress of every order.
Conclusion
Order notes in WooCommerce are an effective way to communicate between the store and its customers.
This article teaches you to add order notes to WooCommerce with two different plugins.
Leave us a comment and tell us which methods you chose to achieve this task.
Also, make sure to subscribe to our YouTube channel and like our page on Facebook.


