

This tutorial will walk you through installing a fresh copy of WordPress on an Amazon Web Services (AWS) EC2 (Elastic Cloud Compute) server.
You can use this to create a development, staging, or production machine of varying sizes and configurations on AWS, everything from a test site to a production site for a business.
Step #1: Create a server on Amazon Web Services
We will run the latest Ubuntu Server as our operating system on AWS.
There are many other providers that you can deploy on and the steps for creating a server on each one are slightly different.
Once you have Secure Shell Service (SSH) access to the machine running Ubuntu that you intend to install WordPress on, the installation steps are the same.
You can also do the same thing with any other cloud provider, local Ubuntu (or derivative distribution) laptop, a local Virtual Machine (VM), or any other setup running Ubuntu.
Create a server on AWS
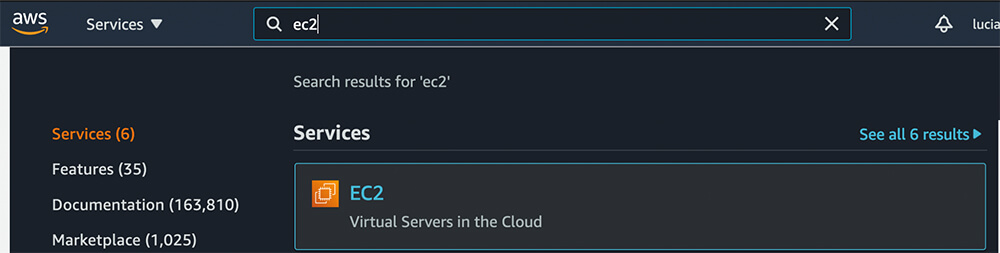
Create and sign in to your AWS account. Then use the search box at the top and type “ec2“. Then click the “EC2” link to go to Amazon’s EC2 server section. This will allow us to create a new server for your site.
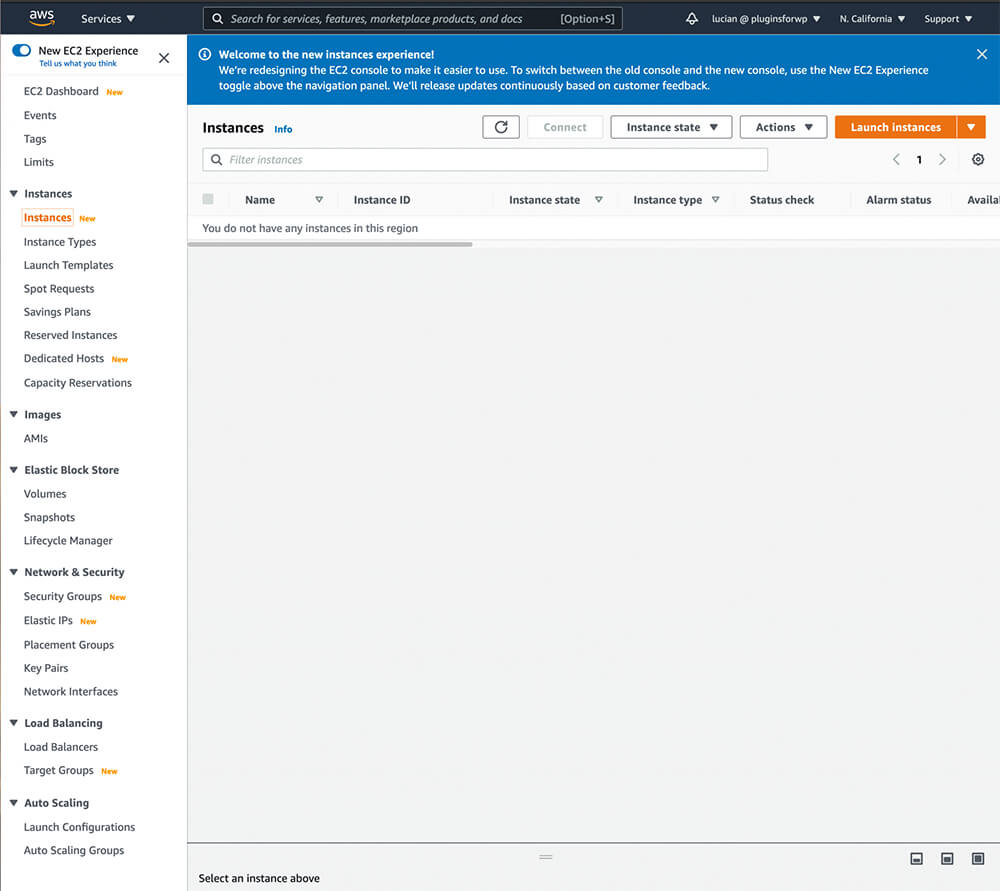
Click on the “Instances” tab on the left side. Then click the orange “Launch Instances” button in the top right corner.
Select the “Ubuntu Server 20.04 LTS” image in “64-bit (x86)” format by clicking the blue “Select” next to it.
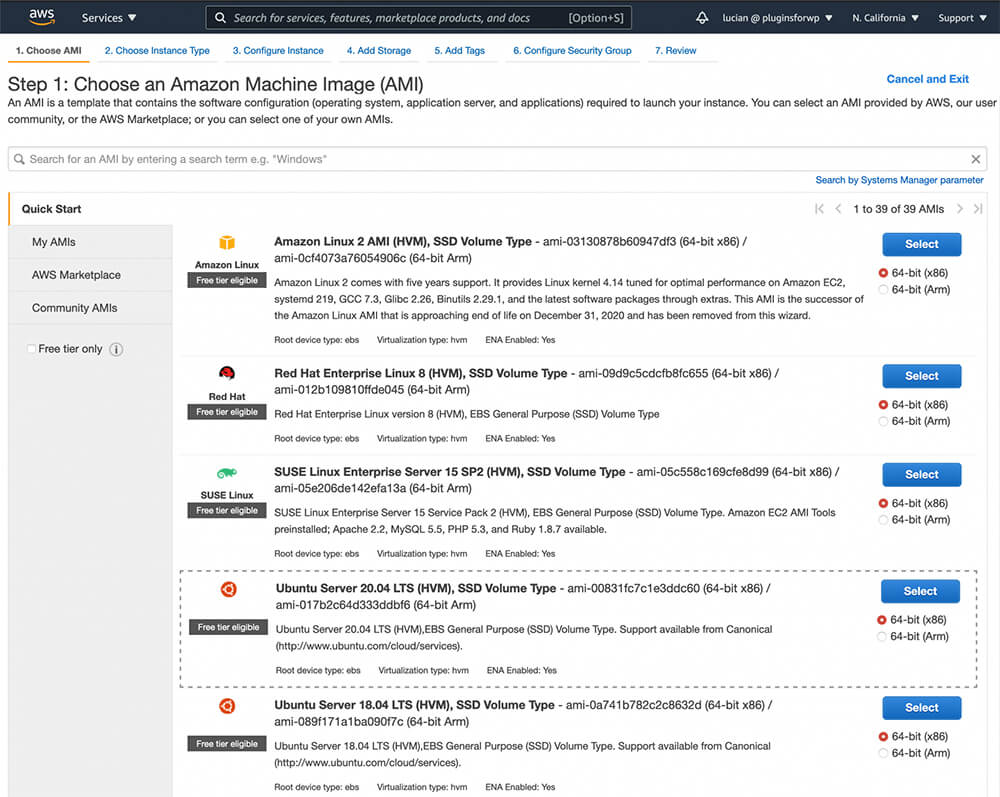
You can select the instance type and change many settings, but for a simple demo site, you can accept the default settings for everything until you get to Step 4.
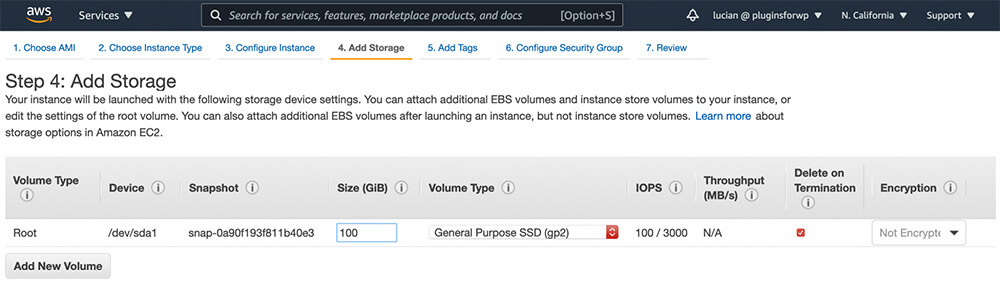
Here, add some extra storage. I added 100GB as the storage which should be fine for most sites. To stay in the free tier with new AWS accounts, add up to 30GB.
Sites that need more would do well to look into Simple Storage Service (S3), Elastic Block Storage (EBS), Elastic File System (EFS), or other more advanced AWS offerings to store large amounts of data.
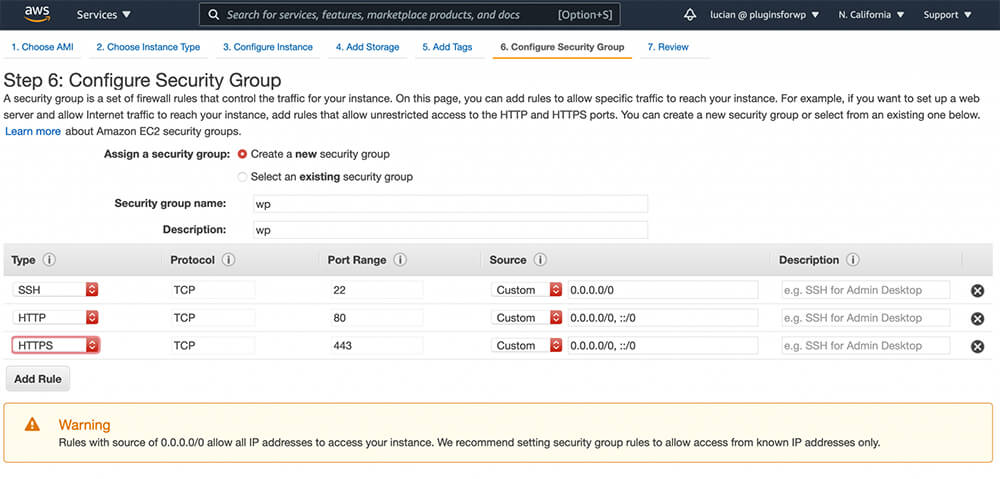
Create a new Security Group in Step 6 with the following parameters:
Here are the final settings for review.
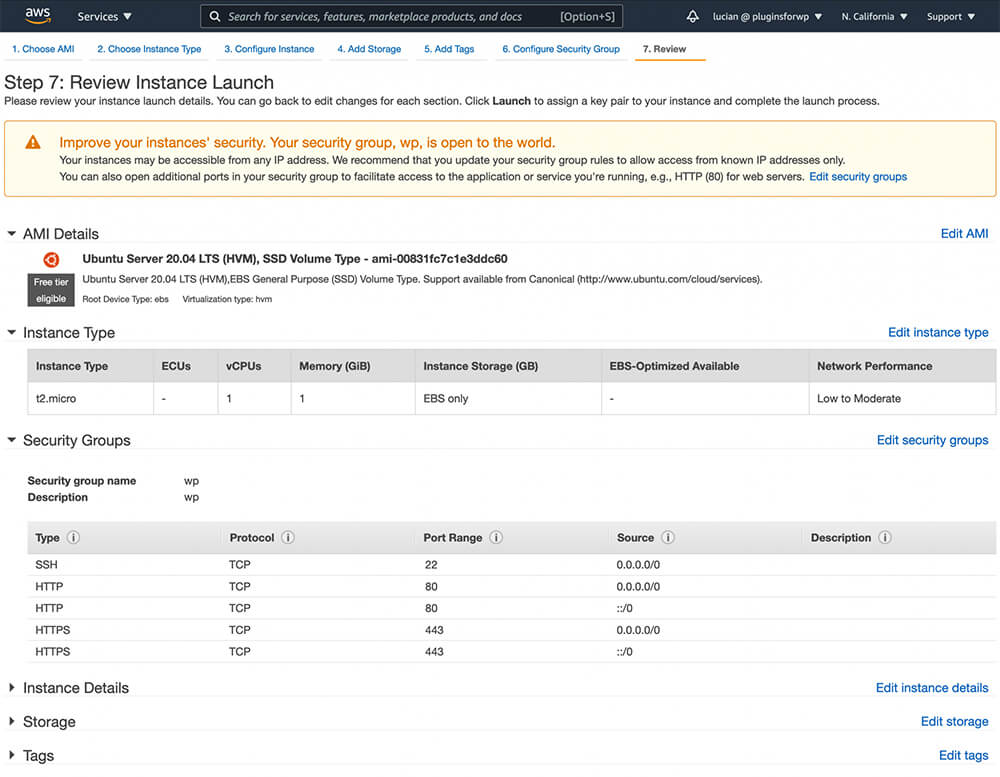
Once you are ready to launch, click “Launch” and move forward to the next step.
Create key pairs
You’ll need to select a key pair. This is the key that will allow you access to your server.
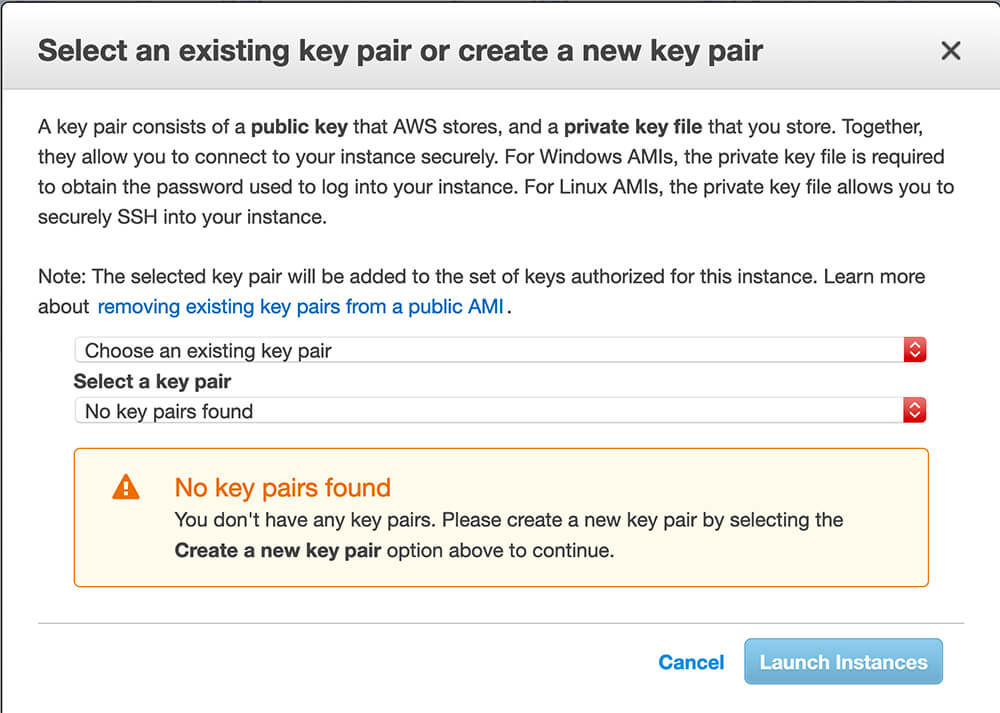
We will create a new key pair and give it a name, in this case “wp-key“:
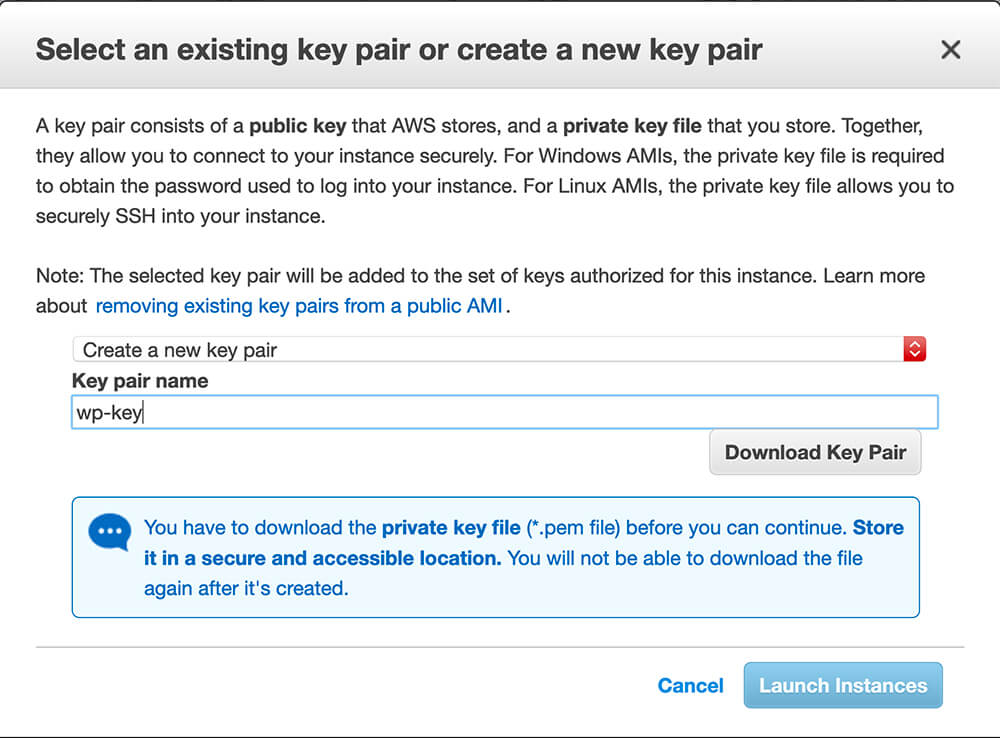
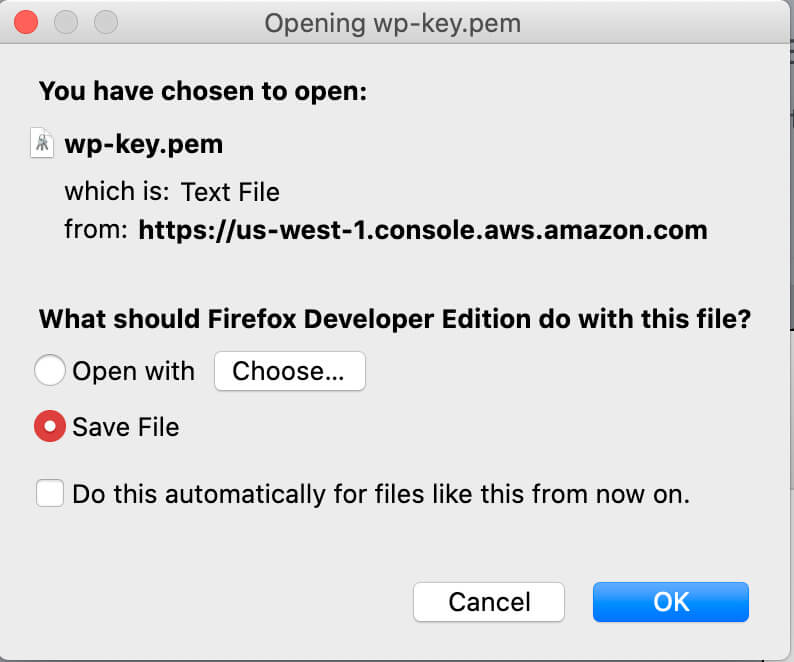
Make sure you save this key and don’t lose it! You’ll lose access to your server and anything on it without this key and have to start over from scratch! Even AWS will not be able to help you. Save it somewhere and make backups in a safe location.
Now that you’ve created a key pair, click “Launch Instances” to create the server.
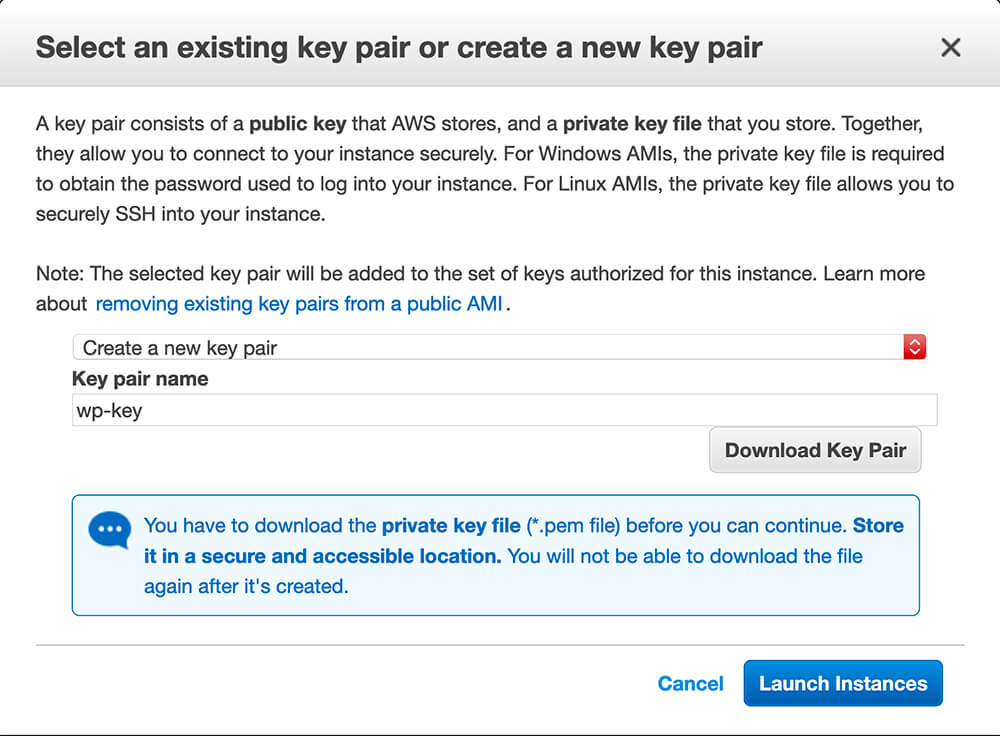
It’ll take a few minutes, but eventually, you’ll see the server as “Running” in the “Instances” tab.

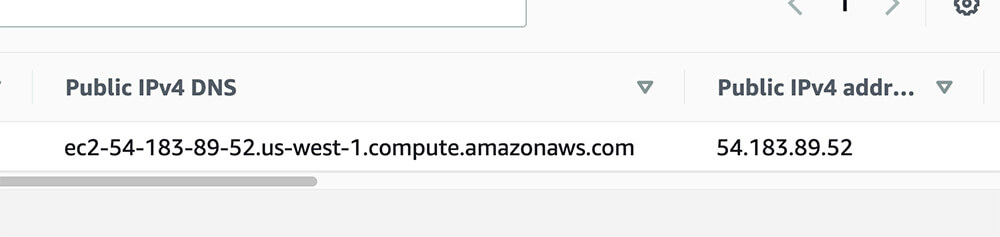
You can connect to your server with either the DNS name given to it by AWS or its public IP, if it has one (by default it does). Pick one. We will use this in Part 2 to connect to the server using SSH and install WordPress.
Step #2: Install WordPress
Now that you have a running server, we will need to connect to it.
Connect to AWS with a terminal
open up a Terminal window (Terminal app on a Mac, any Linux Terminal app like Konsole, or use the putty GUI for Windows) and ssh into your AWS server by running:
ssh -i KEY-PAIR-FILE SERVER-IP-OR-DNS-NAME
Where SERVER-IP-OR-DNS-NAME is the IP or DNS name assigned by AWS to your server and KEY-PAIR-FILE is the .pem key pair file you downloaded from AWS and saved securely somewhere. An example of this ssh command might be:
ssh -i wp-key.pem [email protected]
The first time you connect to the server from a machine, you’ll be asked if you want to continue connecting. Type “yes” and hit enter to connect.
The authenticity of host 'ec2-54-183-89-52.us-west-1.compute.amazonaws.com (54.183.89.52)' can't be established.
ECDSA key fingerprint is SHA256:FYzlGdwXH99bpLL5KwQbE9sHKaM5eaflEbje8/JaQoM.
Are you sure you want to continue connecting (yes/no/[fingerprint])?
If you get this warning:
@@@@@@@@@@@@@@@@@@@@@@@@@@@@@@@@@@@@@@@@@@@@@@@@@@@@@@@@@@@
@         WARNING: UNPROTECTED PRIVATE KEY FILE!          @
@@@@@@@@@@@@@@@@@@@@@@@@@@@@@@@@@@@@@@@@@@@@@@@@@@@@@@@@@@@
Permissions 0644 for 'wp-key.pem' are too open.
It is required that your private key files are NOT accessible by others.
This private key will be ignored.
Run this from the directory containing the .pem key before running the SSH command to change the filesystem permissions and make the key readable only by the current user.
chmod 600 wp-key.pem
You’ll get the Ubuntu welcome message similar to the one below:
Welcome to Ubuntu 20.04.1 LTS (GNU/Linux 5.4.0-1029-aws x86_64)

 * Documentation:  https://help.ubuntu.com
 * Management:     https://landscape.canonical.com
 * Support:        https://ubuntu.com/advantage

  System information as of Sat Jan  9 03:24:39 UTC 2021

  System load:  0.0               Processes:             101
  Usage of /:   1.3% of 96.88GB   Users logged in:       0
  Memory usage: 21%               IPv4 address for eth0: 172.31.15.78
  Swap usage:   0%

1 update can be installed immediately.
0 of these updates are security updates.
To see these additional updates run: apt list --upgradable


The list of available updates is more than a week old.
To check for new updates run: sudo apt update


The programs included with the Ubuntu system are free software;
the exact distribution terms for each program are described in the
individual files in /usr/share/doc/*/copyright.

Ubuntu comes with ABSOLUTELY NO WARRANTY, to the extent permitted by
applicable law.

To run a command as administrator (user "root"), use "sudo <command>".
See "man sudo_root" for details.

ubuntu@ip-172-31-15-78:~$
Run:
sudo su
to get root access.
Setup your system
Then update and upgrade all the packages on the system:

apt update && apt upgrade -y
It will take some time, but once it’s done, run this to install the Apache webserver, PHP, and other programs we will need:
apt install libapache2-mod-php mariadb-server php7.4 php7.4-mysql wget
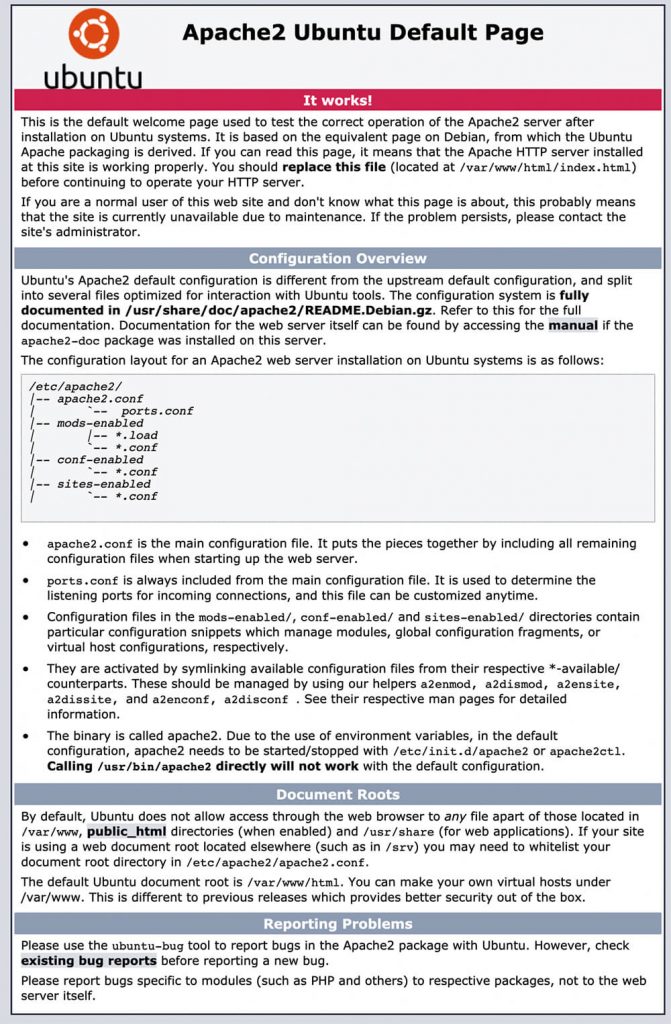
You should now be able to see the default Apache page if you visit http://your-aws-domain-name:
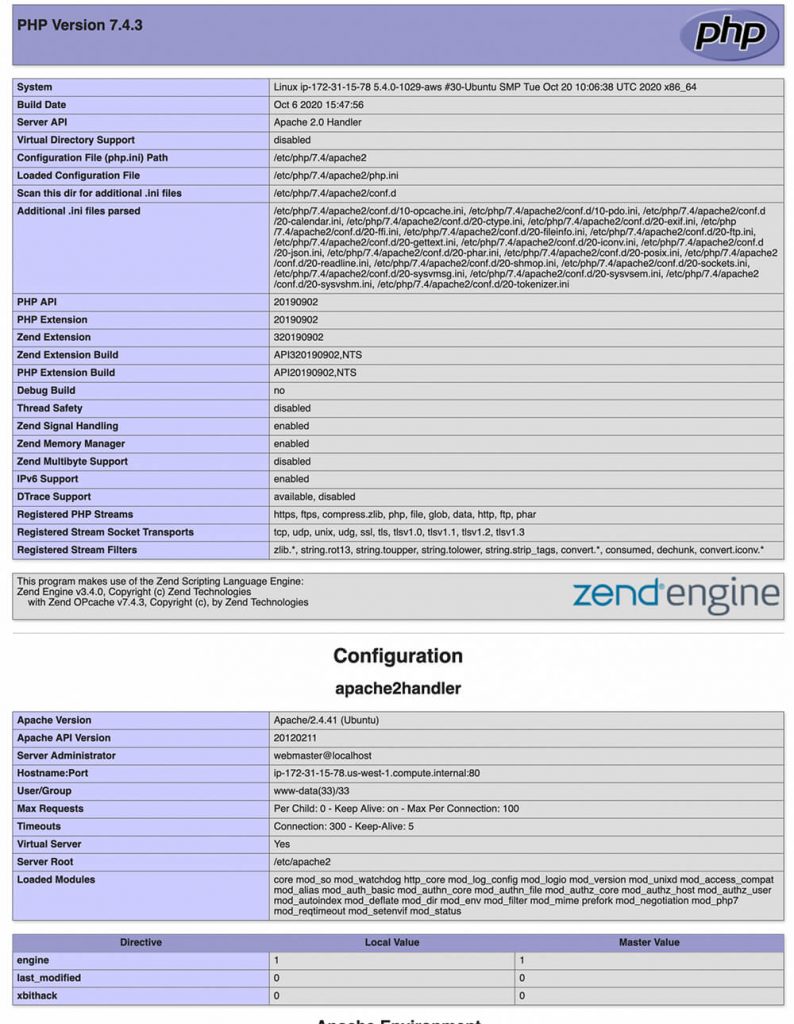
To test if you installed the PHP correctly, run the following:
cd /var/www/html
rm -f index.html
echo "<?php\n phpinfo();" > index.php
Then reload your site and you should see a similar page:
Now we have installed Linux (installed by AWS automatically for you), Apache as the web server (installed automatically when you installed PHP), PHP 7.4 as the backend web application language, and MariaDB (an open-source version of MySQL) as the database. We’ll log into MySQL (or MariaDB, the names are interchangeable) next:
mysql -uroot
This indicates logging in as the root user with no password. The first time MySQL is installed, it won’t have a password for the root user.
We will set one, then create a user to use for our WordPress database, and finally create the database itself and give all the necessary privileges to the user.
Run the following (note don’t use “PASSWORD” as your password but replace it with a secure password):
ALTER USER 'root'@'localhost' IDENTIFIED BY 'PASSWORD';
CREATE DATABASE wordpress CHARSET UTF8;
CREATE USER 'wp'@'localhost' IDENTIFIED BY 'PASSWORD';
GRANT ALL PRIVILEGES ON wp.* TO 'wp'@'localhost';
FLUSH PRIVILEGES;
Finally, exit with “exit” or Control+D. Then restart the MySQL server so that the root user now requires the password you set:
systemctl restart mysql.service
Then try to log into MySQL as root with your new password:
mysql -uroot -pNEW-PASSWORD
Now that MySQL is ready to go, the last thing to do is to download WordPress, point Apache to it, and run the WordPress installation wizard.
Once that is done, we’ll have a fully working WordPress site that can be used for development, staging, or production purposes (if you enable SSL with Certbot/Let’s Encrypt).
Install WordPress
Start by going back to our Apache HTML directory and removing our PHP test script. Then download the WordPress tar file.
cd /var/www/html
rm -f index.php
wget https://wordpress.org/latest.tar.gz
Once the download is finished, untar the file, move the files from the wordpress directory to the current one, remove the wordpress directory and remove the tar file.
Finally, make www-data, the user Apache runs under, the owner of all the files so it has the ability to create uploads and other files. This way, we don’t need to change any of the Apache webserver configurations.
tar xzvf latest.tar.gz
mv wordpress/* .
rmdir wordpress
rm -f latest.tar.gz
chown -R www-data:www-data *
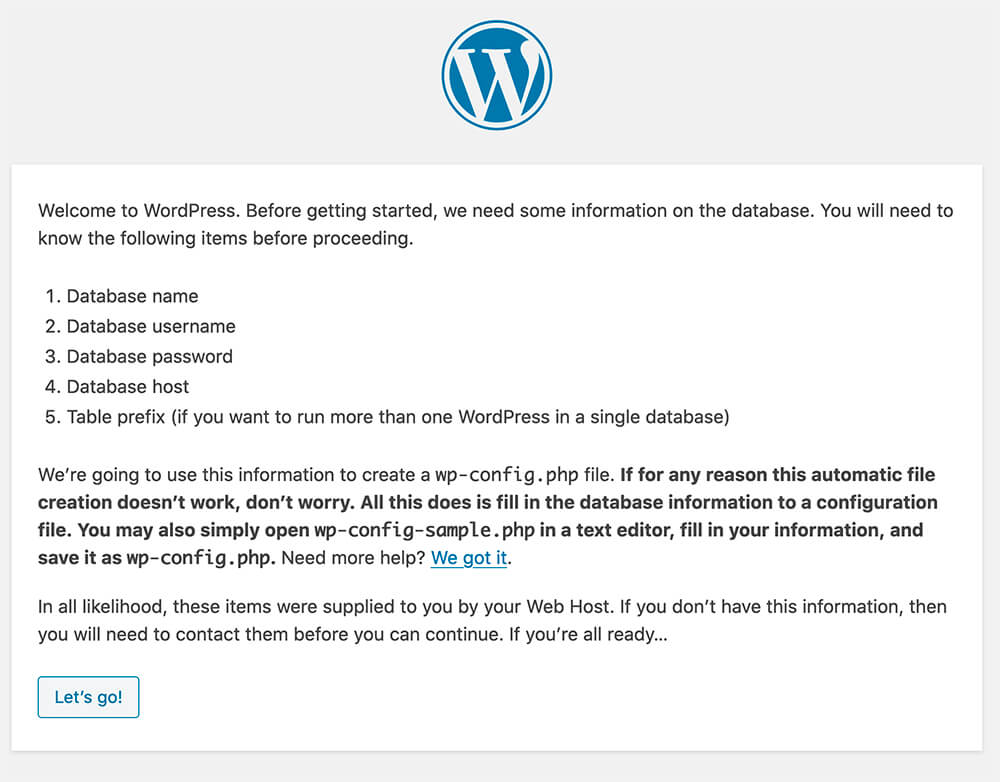
If all went according to plan, you’ll see the WordPress installation wizard when you reload your site next:
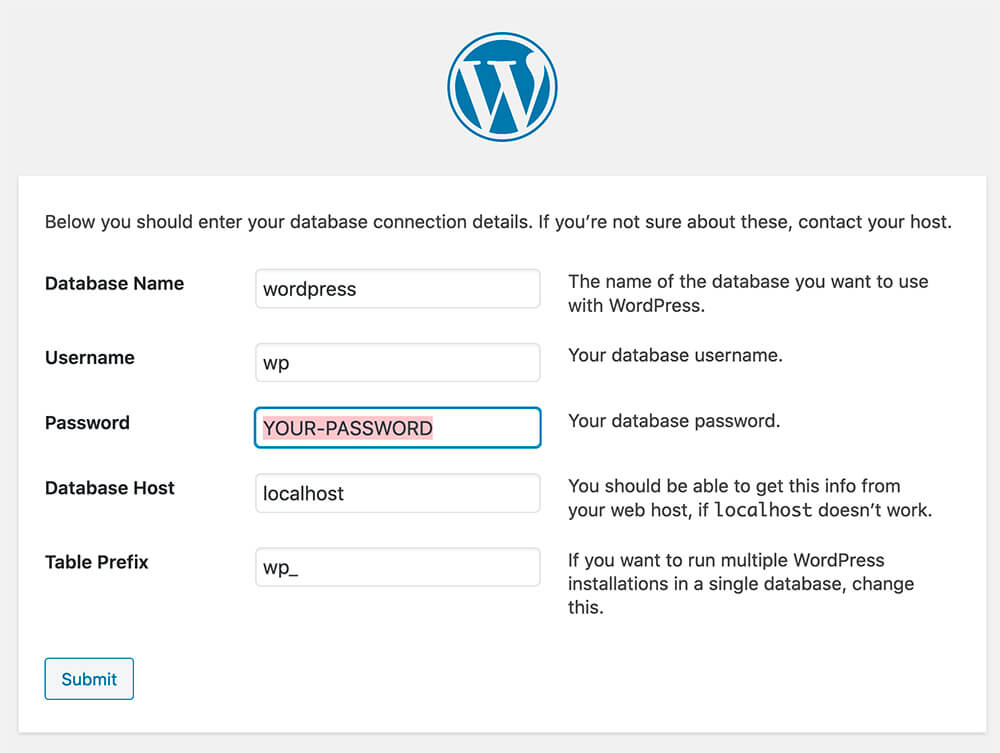
Next fill in the info for the MySQL username / password you created above into the boxes and leave the rest alone. Our database is already called “wordpress.”
On the next screen, you might be prompted to copy some PHP code into your wp-config.php file if WordPress cannot create the file itself. Copy the code onto your clipboard.
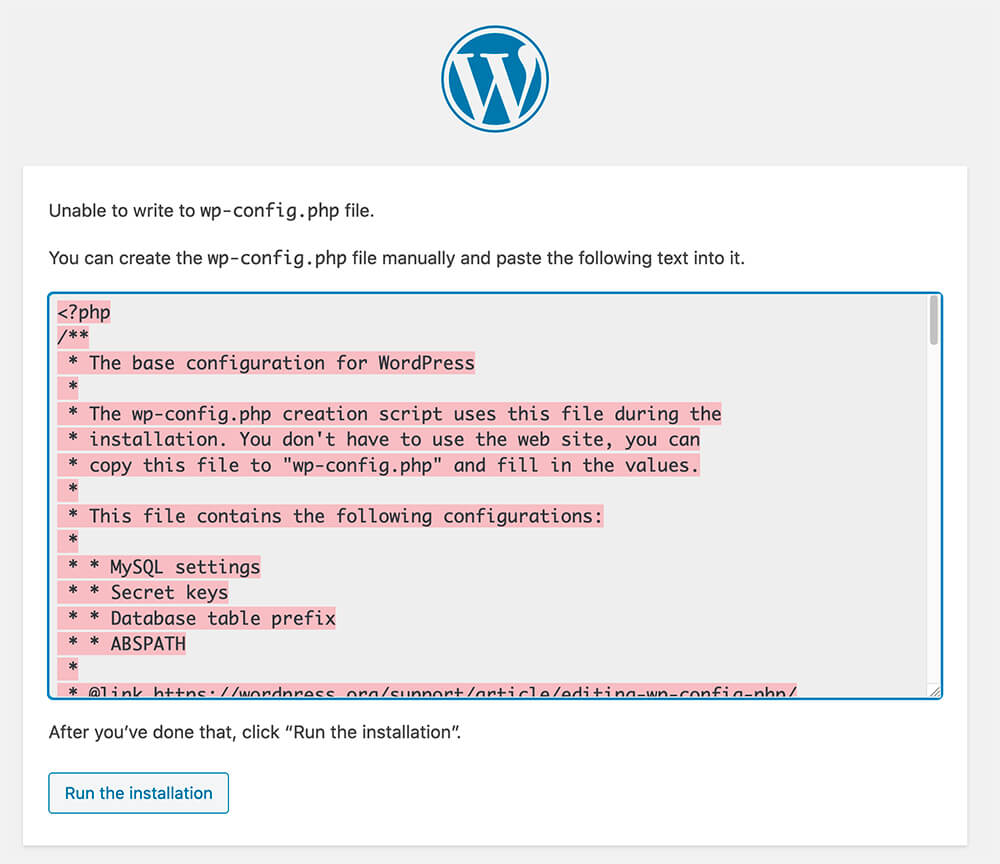
Then run:
nano wp-config.php
in your Terminal to create the WordPress configuration file. Then hit Control+O then Enter to save. Then Control+X to exit. Click the “Run Installation” button to install WordPress.
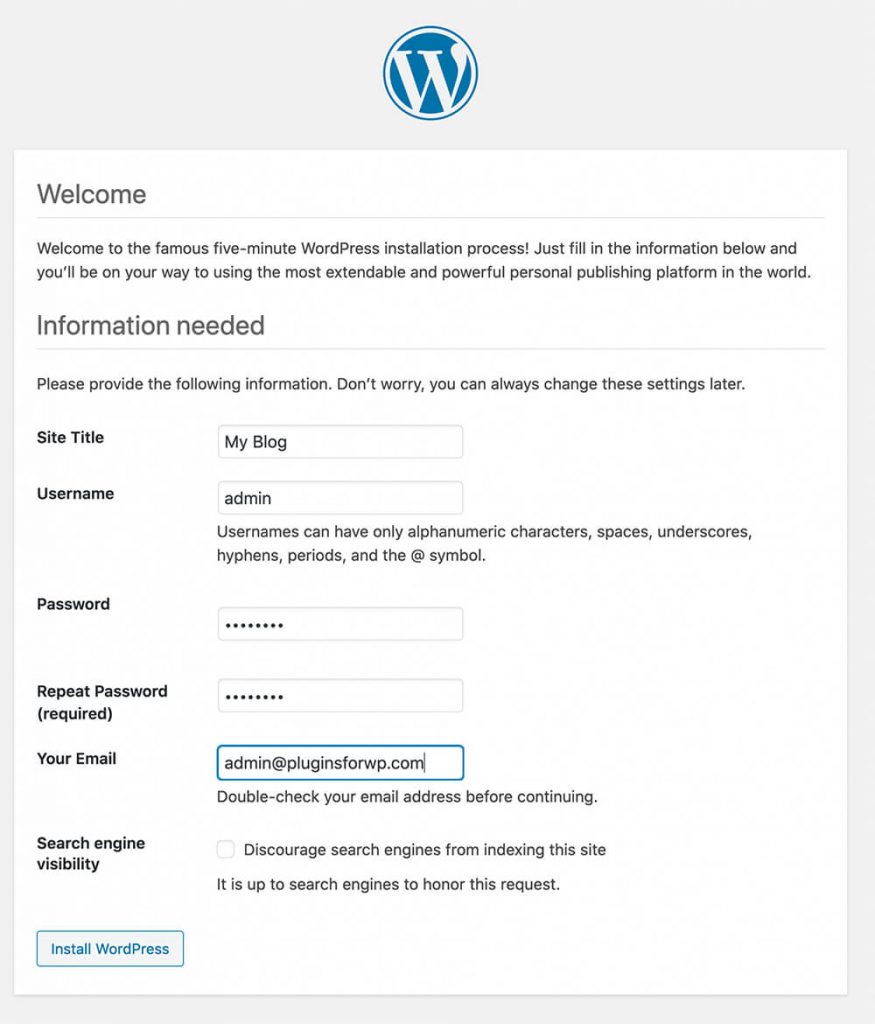
Once the installation is done, give your site a name and create an admin user. Then click “Install WordPress.”
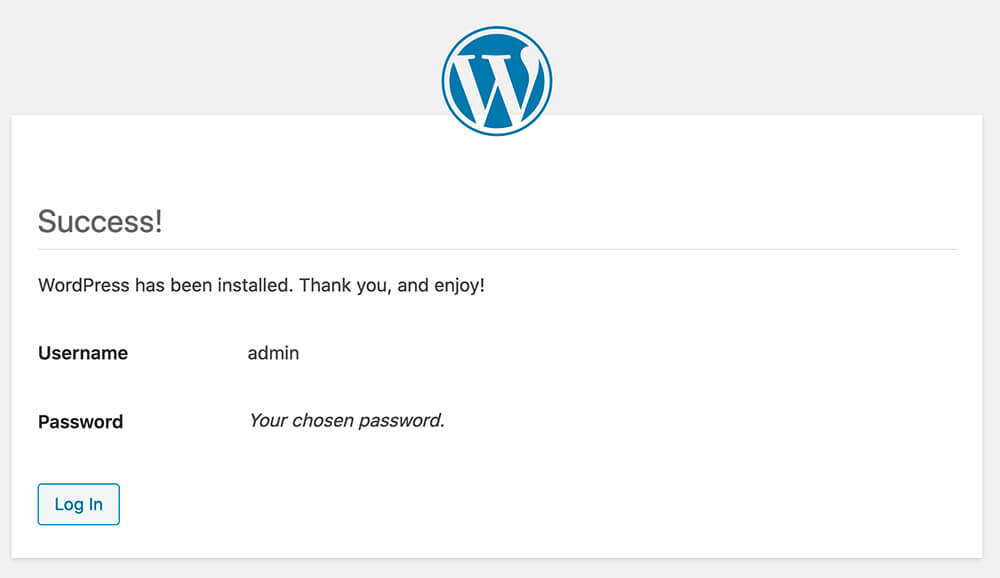
You’ll be able to view your site or log in at the /wp-admin URL. Congratulations, your new WordPress site is ready!
How To Delete An AWS Server
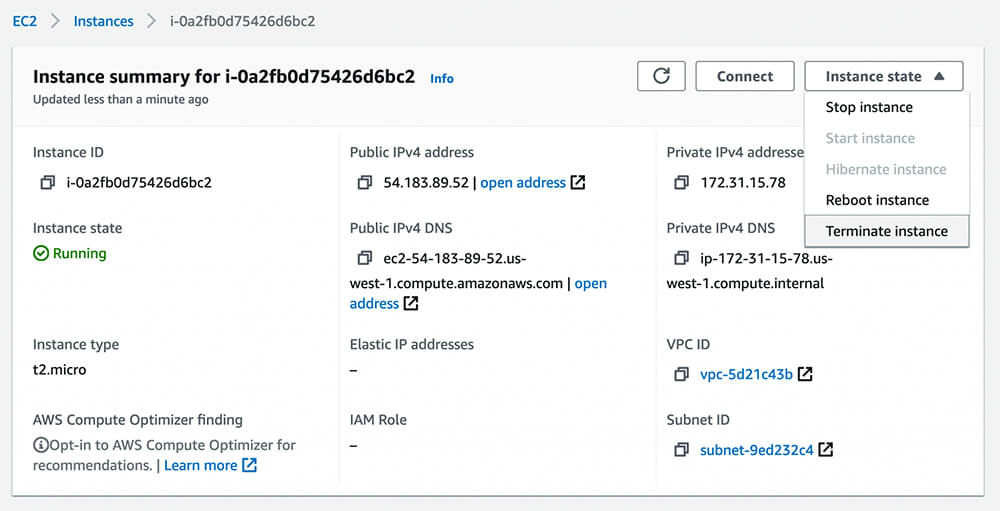
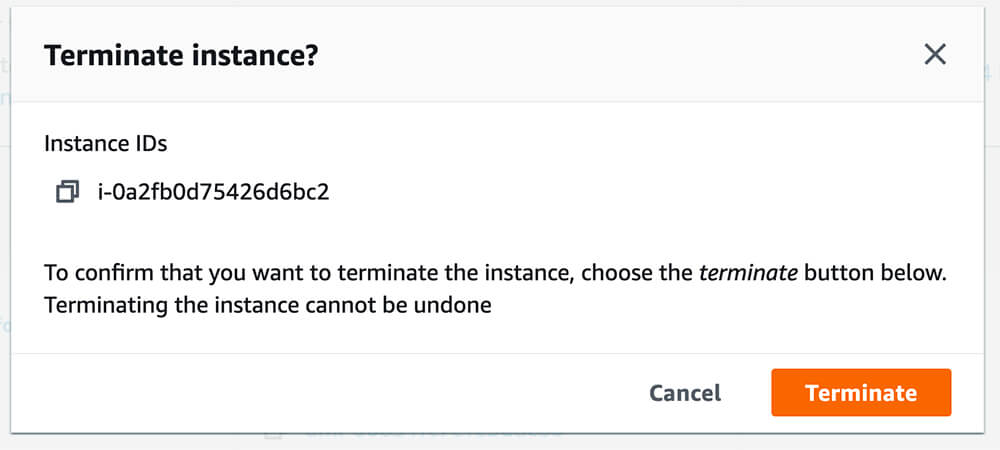
If this is a test site, or you made a mistake, select your server in the “Instances” EC2 tab, click the “Instance State” drop-down and select “Terminate.” Then confirm.
This will terminate your server. There is no undo, so make sure you back up anything you need before terminating.
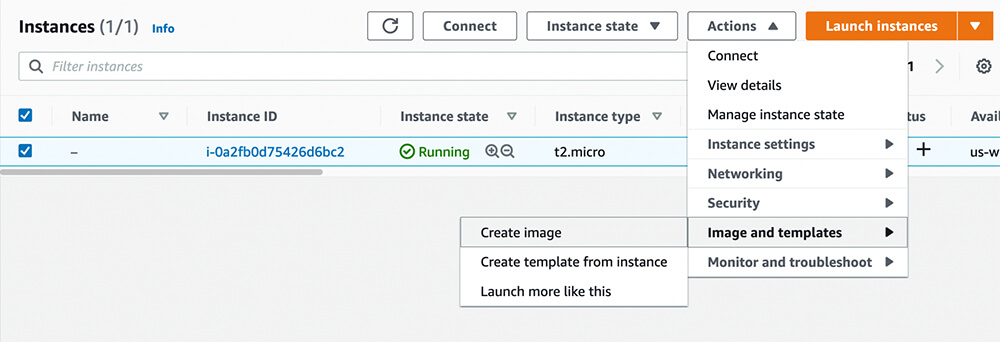
To create a backup, select the server, click “Actions” -> “Image and Templates” -> “Create image“, then give the image a name and description on the next screen and click “Create image.”

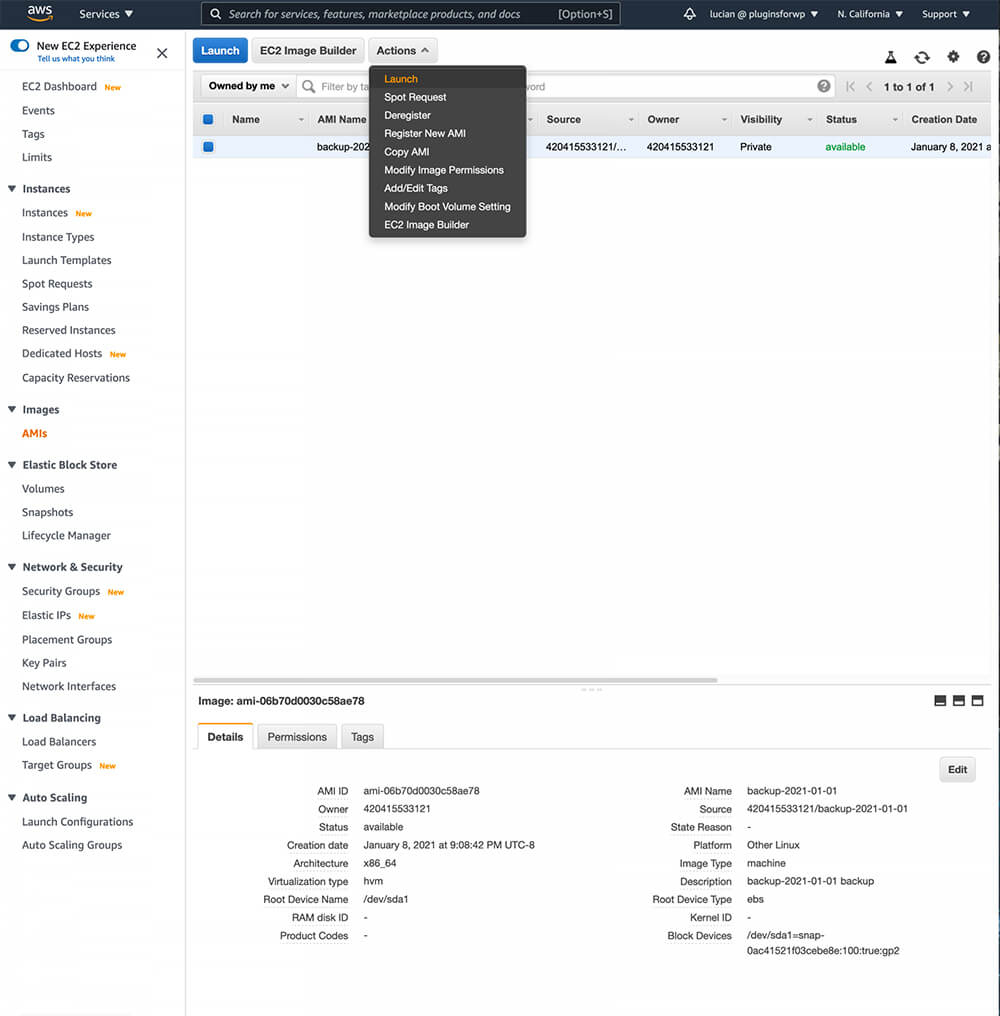
Once you’ve created an image (AMI), you can restore it from the “AMIs” tab. Select the image, click “Actions” -> “Launch” and continue with the launch settings wizard.
You can select any type of machine so this is a good way to downgrade or upgrade your machine easily without losing anything.
Enjoy your new WordPress sites!
Related Articles
- Using Git To Manage Your WordPress Websites.
- Install WordPress on Digital Ocean.
- Using WP-CLI to Manage WordPress on the Command Line.
- Running WordPress locally on your Mac with MAMP.
Conclusion
In this article, you learned how to install WordPress on Amazon servers.
The Amazon servers are great for any WordPress website because they are fast, reliable, and scalable.
Leave us a comment and let us know if you have any questions regarding the process.
Also, make sure to subscribe to our YouTube channel and like our page on Facebook.
