Introduction
Using git to track changes in your WordPress website and deploy it is a great idea and easily done. With git, you will be able to keep a record of all the code changes on your site and easily compare and restore old versions with new versions. It’s also a simple way to deploy your WordPress site and keep it up to date.
We’ll start by downloading the WordPress source first and adding it to a local git repository (repo). Then we’ll make some changes and commit those. Finally, we’ll push our code to Gitlab and pull it onto our production server for deployment.
Note, that while this will keep track of the changes to our code and related files like styles, images, and other media, it will not do the same for the database. Adding a new post is a database operation, for example, and git will not help keep track of that. Keeping track of database changes between different environments is a problem to be addressed by a later post.
Part 1: git and the repository
To start, make sure you have a terminal program for your OS (Terminal.app on a Mac, any Linux Terminal app like Konsole, or use the putty GUI for Windows). See the git installation instructions for your OS and install git. It’s a simple download on Mac or Windows and one command on Linux. If you’re using Homebrew on a Mac, you can install it with:
brew install git
Once that’s installed, download the WordPress source to a directory where you will work on your website. You can do it manually by visiting the WordPress site or on the command line. I prefer to get the tarball (.tar.gz file) as it’s easy to decompress on any Linux, BSD, Mac, or similar system.
wget https://wordpress.org/latest.tar.gz
Once downloaded, extract the file and enter the wordpress directory.
tar xzvf latest.tar.gz
cd wordpress
Initialize the repository
Before we can use git in this directory, we need to initialize or create a new git repository here. This will create a new git repository that will keep track of all our changes and that we can clone on other machines to have exact copies anywhere we want. Run:
git init
Once the repository is initialized, you can get its status:
git status
That will output:
On branch master

No commits yet

Untracked files:
  (use "git add <file>..." to include in what will be committed)
	index.php
	license.txt
	readme.html
	wp-activate.php
	wp-admin/
	wp-blog-header.php
	wp-comments-post.php
	wp-config-sample.php
	wp-content/
	wp-cron.php
	wp-includes/
	wp-links-opml.php
	wp-load.php
	wp-login.php
	wp-mail.php
	wp-settings.php
	wp-signup.php
	wp-trackback.php
	xmlrpc.php

nothing added to commit but untracked files present (use "git add" to track)
Add and commit
This indicates we have not committed anything to the repository. To make our first commit, we first need to add the files using git add, then commit to the repo with git commit. We will add all files using a wildcard to add them all at the same time:
git add "*"
Ignore any warnings about line endings. Once this is done, git status shows all the added files. This was truncated for brevity:
On branch master

No commits yet

Changes to be committed:
  (use "git rm --cached <file>..." to unstage)
	new file:   index.php
	new file:   license.txt
	new file:   readme.html
	new file:   wp-activate.php
... (truncated)
Now that we’ve added the files for our initial commit, it’s time to commit them to the git repo:
git commit -m "Initial commit"
The -m switch here indicates the commit message. This should describe what the changes were. In this case, this is the first commit so we say that. git will indicate that the files are added:
[master (root-commit) e5b19ab] Initial commit
 2171 files changed, 1145765 insertions(+)
 create mode 100644 index.php
 create mode 100644 license.txt
 create mode 100644 readme.html
 create mode 100644 wp-activate.php
 create mode 100644 wp-admin/about.php
... (truncated)
After the commit, git status shows:
On branch master
nothing to commit, working tree clean
Everything has been committed. There are no changes.
Part 2: Changes
Let’s make some changes. I will now add a wp-config.php file to the repo. Now git status shows:
On branch master
Untracked files:
  (use "git add <file>..." to include in what will be committed)
	wp-config.php

nothing added to commit but untracked files present (use "git add" to track)
To add and commit this file, I follow the same steps as before:
git add wp-config.php
git commit -m "Adding config"
If I then update that file, git status shows:
On branch master
Changes not staged for commit:
  (use "git add <file>..." to update what will be committed)
  (use "git restore <file>..." to discard changes in working directory)
	modified:   wp-config.php

no changes added to commit (use "git add" and/or "git commit -a")
Now I can commit the changes with the exact same steps as above, or I can commit all modified (and previously added) files with the -a switch to git commit:

git commit -am "Updating config"
Part 3: Gitlab
The next part is to get an account at Gitlab (Github, etc. would work similarly) and push the code there. When there are changes made to the code locally or on other development machines, the changes will get pushed to the repository at Gitlab and they will then get pulled onto the production server(s).
Adding an SSH Key
First, we have to add an SSH Key so that we can identify ourselves to Gitlab and Gitlab can authenticate us. If you already have an SSH key, you can use that, otherwise follow that tutorial and generate a new SSH key for yourself. Once you have the ssh key, copy the contents of the public key to the clipboard. To display the default RSA key:
cat ~/.ssh/id_rsa.pub
Or for a DSA key:
cat ~/.ssh/id_dsa.pub
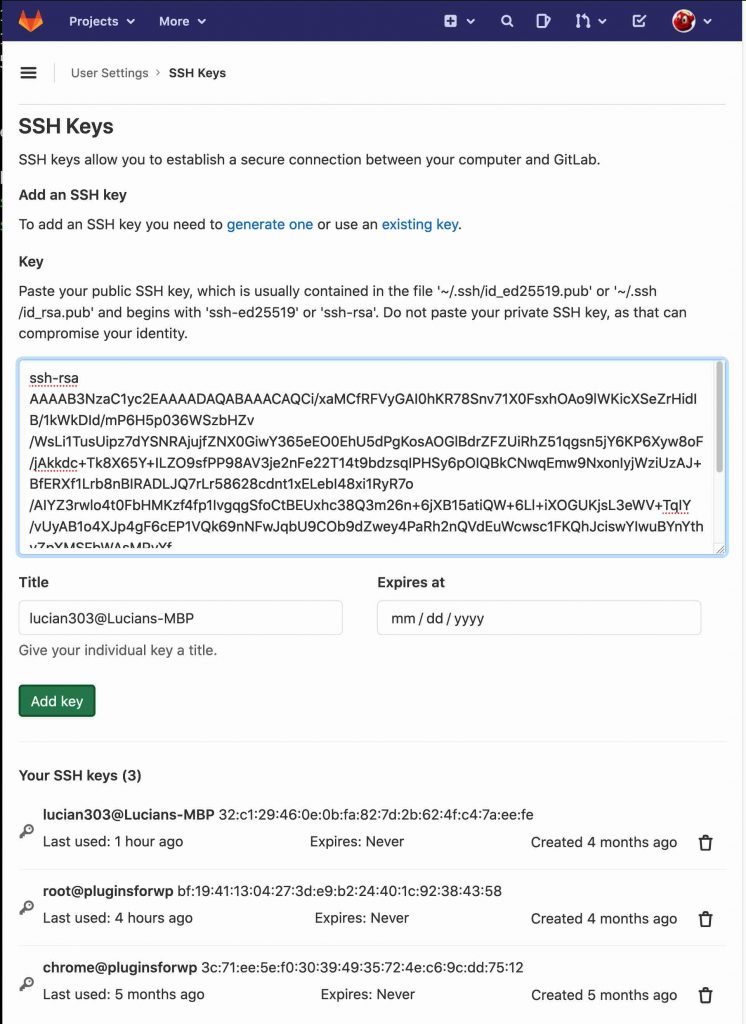
Select and copy it to the clipboard. In Gitlab, click on your user icon drop-down -> Settings -> SSH Keys.
Paste your key and click “Add key.” Now Gitlab will be able to authenticate you.
Pushing to Gitlab
Click the “New Project” button then click “Create blank project.”
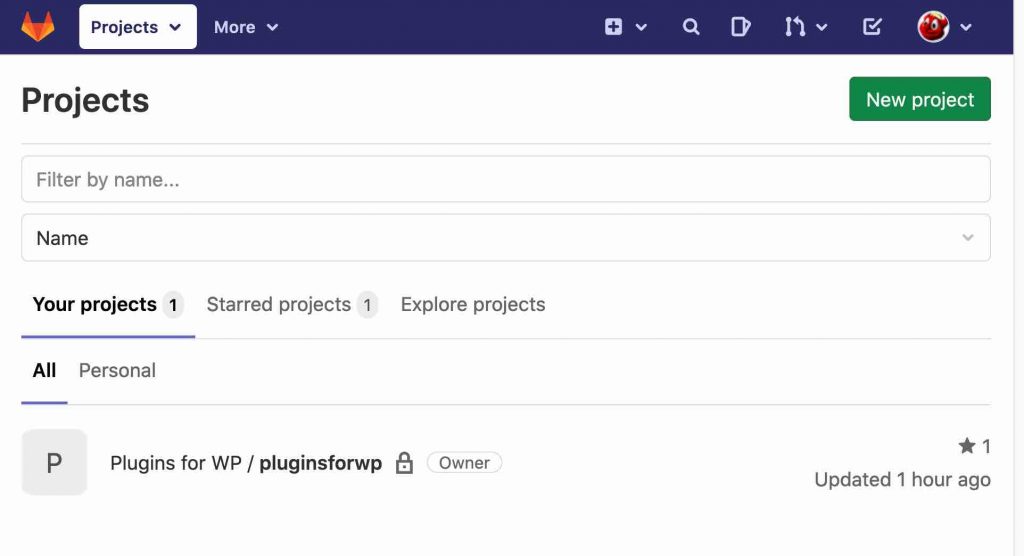
On the next screen, you’ll be able to select a name
Once the repo is created, you should be able to add a remote called “origin“. This tells git that a remote copy of this will be held at Gitlab’s server. You will be able to pull changes from it and push your own changes to it. Use the git remote add command from the “Push an existing folder” section. It’ll be similar to this:
git remote add origin [email protected]:plugins-for-wp/test-wp.git
Then push the changes we have already committed in Parts 1 and 2:
git push -u origin master
You’ll see something like the following:
Enumerating objects: 2457, done.
Counting objects: 100% (2457/2457), done.
Delta compression using up to 16 threads
Compressing objects: 100% (2371/2371), done.
Writing objects: 100% (2457/2457), 15.00 MiB | 565.00 KiB/s, done.
Total 2457 (delta 238), reused 0 (delta 0), pack-reused 0
remote: Resolving deltas: 100% (238/238), done.
To gitlab.com:plugins-for-wp/test-wp.git
 * [new branch]      master -> master
Branch 'master' set up to track remote branch 'master' from 'origin'.
Now there’s an identical copy of the git repository on the Gitlab servers. After the first push, you can just do a simple:
git push
To push your code. Or:
git pull
To pull any changes that the remote repository has. If you’re working with other team members, each member will pull changes from the Gitlab central repository and then push their own changes to the Gitlab repository in turn.
Part 4: Deploying on the server
First, get a server to deploy on. You can follow the instructions in my previous blog post here to get a server at AWS. Now SSH into the server. Instead of downloading WordPress directly, create and add the server’s SSH key to Gitlab as you did with your own local one. Once, you’ve added the server’s SSH key, you’ll be able to clone the repository. You can copy the clone URL straight from Gitlab using their button. It will look similar to this:
git clone [email protected]:plugins-for-wp/test-wp.git
This will clone your WordPress repository, creating an exact copy of the repository you have locally and on Gitlab. Run that where you want the WordPress files to live, probably in /var/www or similar. Once that’s done, you can rename the folder as necessary or point your web server to the files by modifying its configuration. In /var/www for example, run:
rm -rf html
mv test-wp html
That should replace the default html directory with your WordPress directory if you followed the instructions from the last blog post.
It’s important to hide (or remove) the .git directory when serving a public website. For instructions on how to do so, see here for Apache and nginx.
Conclusion
In this article, I introduced the git program and how to use it to manage your WordPress source code. I showed you how to how to initialize, add files to a repository, make changes, commit, and push the changes to a remote repository like the ones offered by Gitlab. I also showed how it’s possible to use git to deploy to a server or set of servers by cloning the code (and hiding or removing the .git folder). Now you’re ready to use source control and git like the pros and never have to worry about losing changes or forgetting what happened with your code again.
Also, make sure to subscribe to our YouTube channel and like our page on Facebook.