In this tutorial, you’ll learn what is 301 redirects in WordPress, when it’s an excellent time to use them and how to create them.
There are many redirect methods like 301, 302, 307, but in this tutorial, we’ll only focus on the standard 301. The other techniques are barely used, not SEO friendly, and are out of the scope of this tutorial.
What is 301 Redirect in WordPress
301 redirect is a way to redirect our site visitors from one page to another. For example, if our site’s visitors are trying to visit ‘Page A’ and the page is no longer available, they will be redirected to ‘Page B’ instead.
With the 301 redirect method, the browser will inform search engines about the deleted page and save you from losing visitors.
We’re keeping the traffic on our website when the users aren’t aware of the redirection when using it.
When to Create a 301 Redirect
You guessed it right. You’ll need to set a 301 redirect in a few cases. Here are a couple of common reasons when to create it.
- When you deleted a page and you want to redirect that page traffic to a different page or a blog post with the same subject.
- When you changed the URL of a page or a blog post and you want the older URL to redirect the traffic to the new URL.
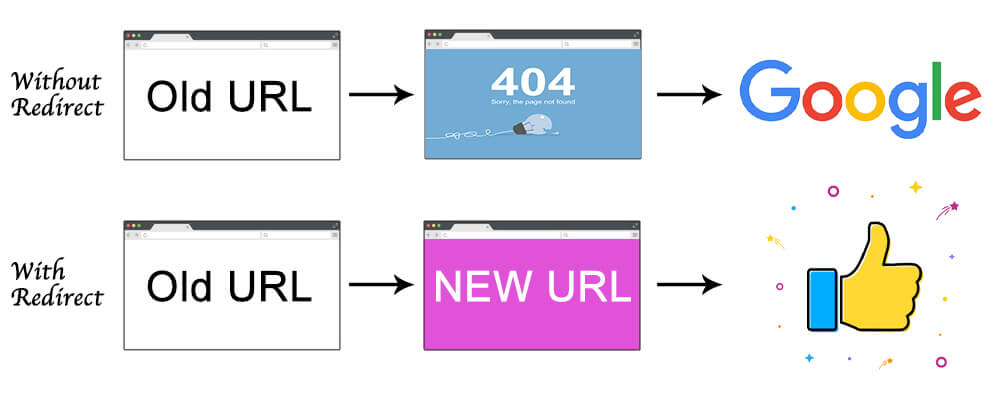
If you didn’t set up a 301 redirect, a visitor trying to view your deleted page will reach a 404 page (page can’t be found) and leave your website.
Not creating a 301 redirect will also affect your SEO drastically. How so? Think about your site visitor reading your blog post about the Paleo Diet. The user clicked on your link after searching for Paleo diets on Google. If the visitor sees a 404 page, he will immediately return to Google, and that will increase your bounce rate.
Also, when Google crawls your website and faces the 404 instead of the Paleo Diet page, it won’t re-index that URL again. Thus, the page will disappear from the search results.
If you created a 301 redirect, Google bots will crawl and index the new page and send traffic your way.
Now you understand how important it is to create a 301 redirect after deleting or changing the URL of a page or a post.
There are a couple of ways to create a WordPress 301 redirect, and in this tutorial, we will show you both ways.
The first way will be with a WordPress plugin, and the second way will be by modifying the .htaccess file. Let’s start by using a WordPress plugin.
How to Create 301 Redirect With a Plugin
Today, there are WordPress plugins for everything. And yes, there are plugins to help you to create redirects too.
In this tutorial, the plugin that we will use is ‘Easy Redirect Manager.’
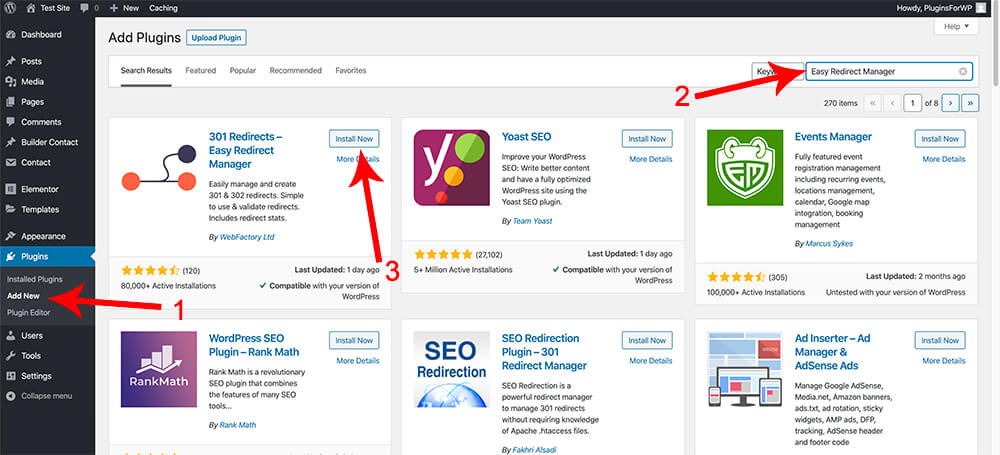
Step #1 Install and activate ‘Easy Redirect Manager’.
The first step is to install and activate the plugin. From your WordPress dashboard, navigate to Plugins -> Add new and search for ‘Easy Redirect Manager.’
Click on Install and then Activate.
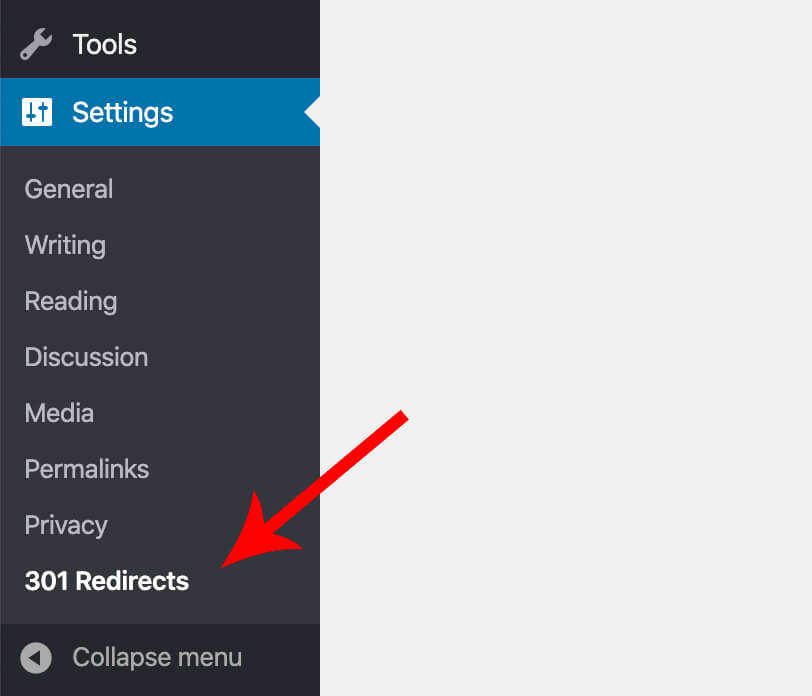
Step #2 Create the redirect rules
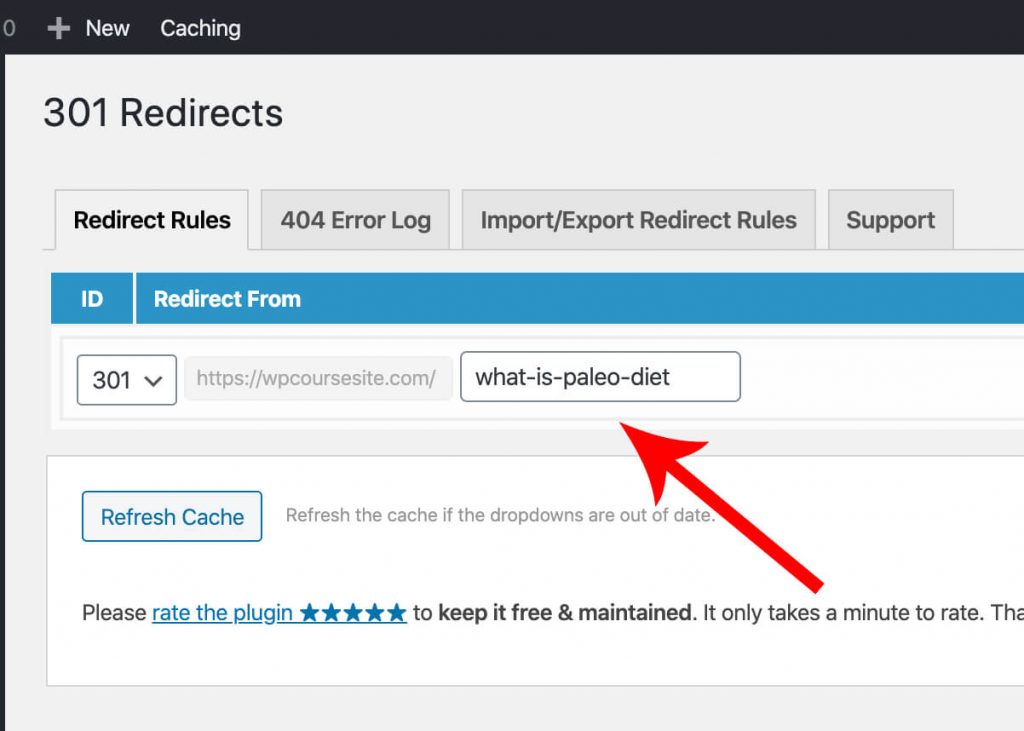
After activating the plugin, navigate to Settings -> 301 Redirects.
Below the Redirect Rules tab, you’ll have a simple interface to create redirect rules.
Under the ID column on the left, make sure it’s set as a 301 redirect rule.
In the redirect from column, your website name is grey out, so you won’t be able to change it.

Enter the URL of the page you would like to redirect from without the root website address (because it’s already there – the greyed-out one).
You’ll have a drop-down menu with some options on the Redirect To column. If you choose the custom option, you’ll need to enter the new page or post the URL address, including the website name.
This option is excellent for redirecting a page to a completely different website.
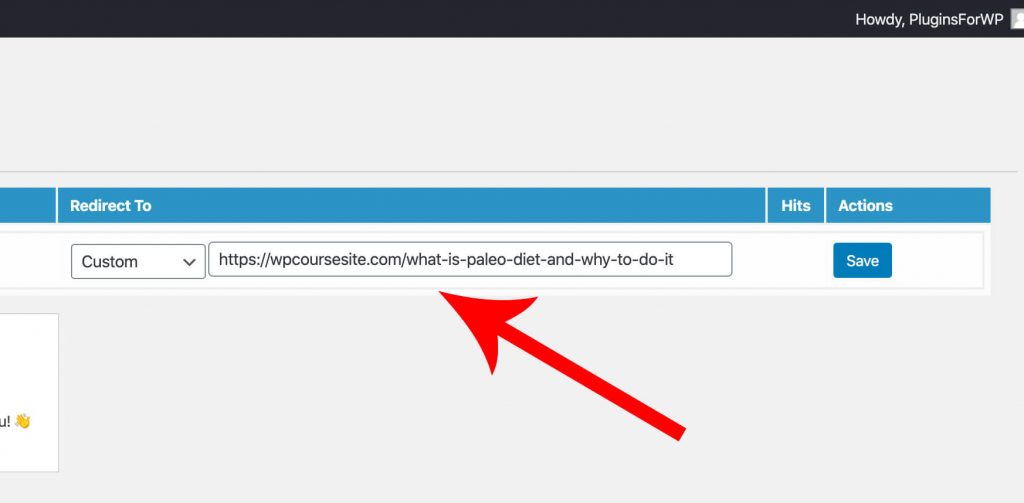
If you choose a different menu option like ‘Post,’ ‘Page,’ or ‘Template,’ choose the desired destination without entering the URL address.
After setting up the 301 redirect rule, click on the Save button on the right.
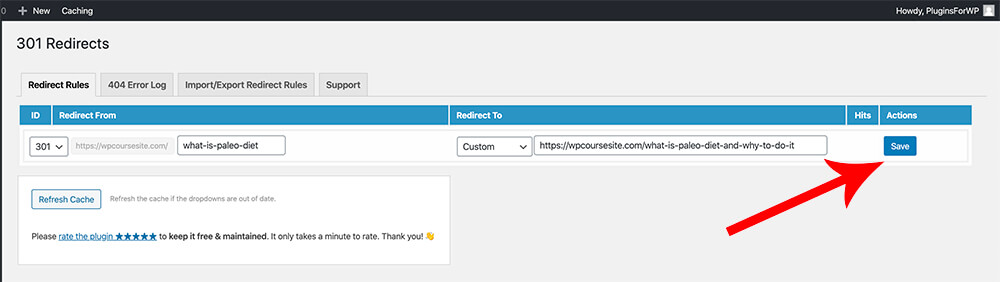
Step #3: Test the redirect rule
After we set it up, we shall test and ensure that the Redirect is working. Open the old URL that doesn’t exist anymore, and if done right, we will be redirected to the new URL that we entered.
If you’ve been redirected to the new URL, you did it right. It’s working. You’re keeping the visitors to your website and Googles’ bots happy.
Next, I would like to show you how to create a 301 redirect through the .htaccess file without using a plugin.
How to Create a 301 Redirect Using the htaccess File
In this section, I would like to show you how to create redirections from inside your htaccess file.
When creating the redirect rule in your .htaccess file, you skip the middle-man and speed up the process.
When creating the 301 redirect rule in your .htaccess file, you don’t use that middle-man, resulting in a quicker process.
Please note, I do NOT recommend this method to WordPress newbies. While editing the htaccess file, any small mistake can prevent your website from loading up. Thus, before editing the htaccess file, you’ll need to create a backup and restore it if needed.
If you still want to edit your .htaccess file, you’ll need access to your WordPress website using an FTP client or through your MySQL panel.
You can contact your host provider for more information or ask them to set it up for you.
I will access the htaccess file using an FTP client in this tutorial.
- Open your FTP software, use FileZilla, and connect with your website server.
The
.htaccessfile should be in the root folder of your website. The htaccess file may be hidden, if you’re using FileZilla, follow these steps here to expose it.After you found the file, drag it to your desktop (or another folder) to keep it as a backup in case something goes wrong.
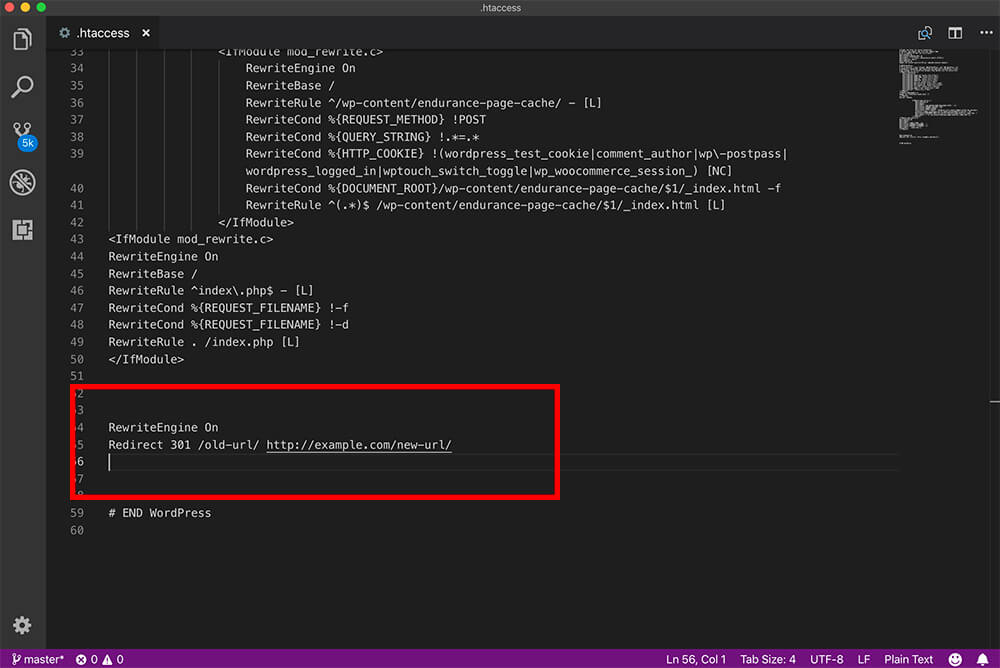
- Scroll down to the bottom of the file and add this code:
RewriteEngine On
Redirect 301 /old-url/ http://example.com/new-url/
You’ll need to change the example.com with your websites’ URL address.

You can add as many redirects as you wish, each Redirect in a new line.

After you have done it, save the file.
- Once saved, navigate to the old post URL address. You’ll be redirected to the new page or post URL address if done right.

Conclusion
This article taught you why, when, and how to create WordPress redirect rules.
If you have any questions or comments, please let us know using the comments box below.
Also, make sure to subscribe to our YouTube channel and like our page on Facebook.