Many small businesses constantly look for additional ways to increase revenue and reach new audiences.
Adding a custom items department to your eCommerce store is one of the best and easiest ways.
With a print-on-demand service by Printful, you can add additional revenue streams without investing big bucks on stock or warehouse.
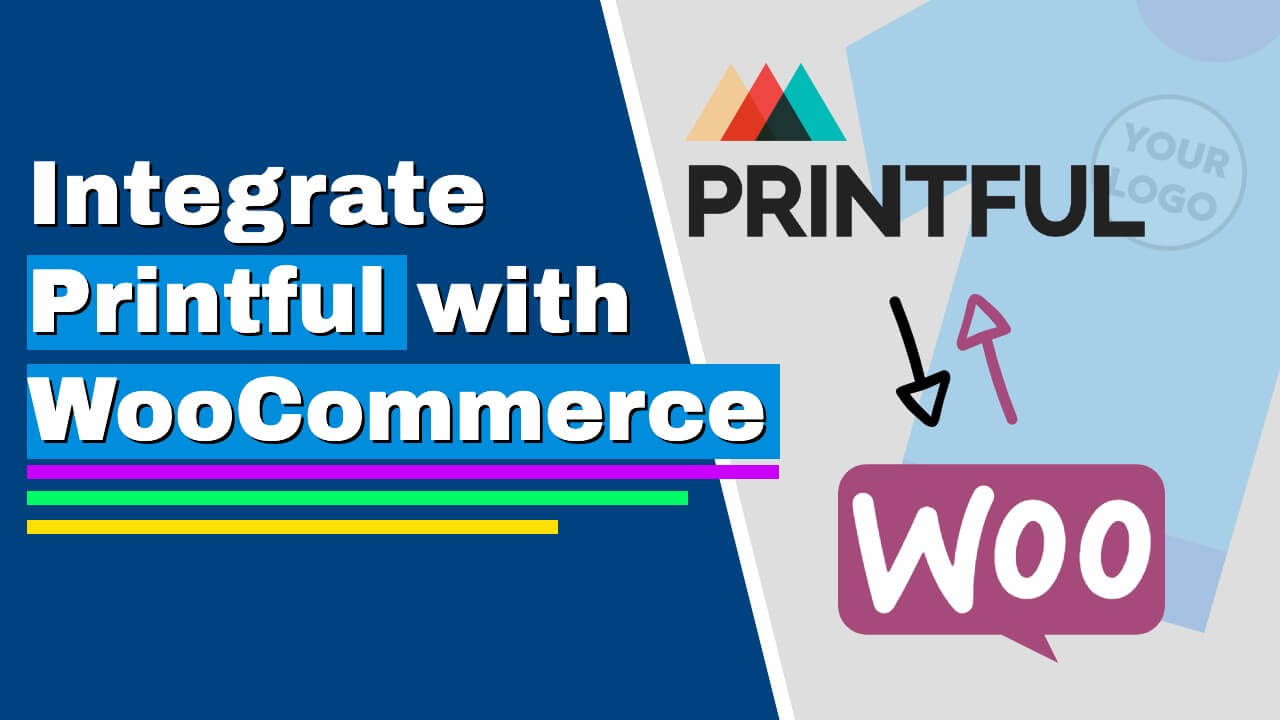
This article will teach you how to connect Printful with WooCommerce, so new orders can be placed on your website and processed through Printful.
What is Printful?
Printful is a print-on-demand US-based company that enables designers and business owners to create and sell their art on printable items such as clothes, aprons, coffee mugs, etc.
Benefits of using Printful:
- Show off your brand’s logo with custom merchandise to increase exposure offline.
- Total freedom for your customers to add custom names, numbers, images, or initials.
- Worldwide shipping – because Printful will fulfill the order made on your WooCommerce store, it is not limited to specific locations and can ship anywhere on the planet.
- A print-on-demand service saves you the need to invest starting capital on stock and storage. After completing the checkout on your WooCommerce store, the item will be printed and shipped on demand.
When combining all the benefits, there is no reason not to connect the two apps. It’s a win-win situation for your business and customers at once.
Your WooCommerce store will enjoy many new products carrying your business logo, and your customers will enjoy high-quality premium products printed by order and freshly made.
All the pros above make it a no-brainer for us to use the Printful WooCommerce integration and start selling custom products.
Which Businesses Can Use Printful
The businesses that can and should use Printful are not limited to a specific category or type.
While in the past, clothing stores were the only ones used to sell clothing or custom souvenirs, it’s no longer the case. Today, the customers’ demand to support the ideas and businesses that follow their core values is more significant than ever, making it an important opportunity to capitalize by entering this market.
The simplicity of connecting the WooCommerce plugin with Printful creates whole new opportunities to expand our store.
Whether you own a brick-and-mortar physical business like a coffee shop or provide services like a carpenter, start thinking about your next step and incorporate Printful with WooCommerce.
Printful WooCommerce Integration Requirements
Integrating WooCommerce with Printful is a relatively straightforward and automatic process.
Some pre-conditions requirements need to be filled for the connection to succeed.
Before moving to the next section to learn how to use the Printful WooCommerce integration, follow the conditions below.
- Update WooCommerce to its latest version to ensure the proper function of all features.
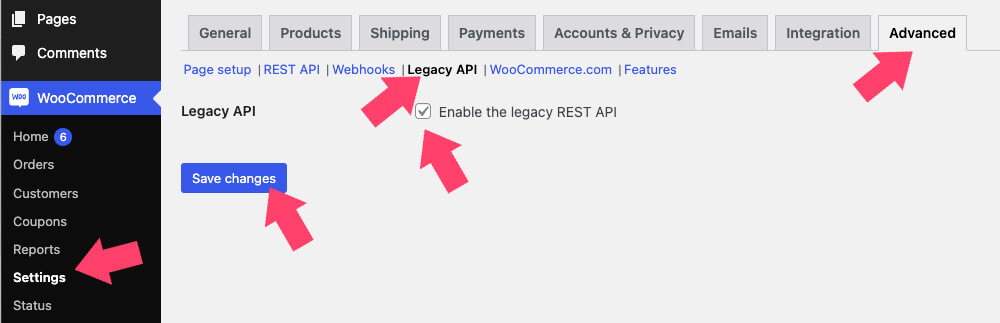
- WooCommerce API will not work if your website’s permalink is set to ‘Plain.’ Navigate to the permalink settings page and change the default plain option to anything else, like the post name.

- Enable the WooCommerce Legacy API option to allow both apps to communicate with each other. Navigate to the plugin’s Settings -> Advanced screen, check the Legacy API option, and save the changes.


Once all the rules above are in place, keep reading about how to integrate Printful with WooCommerce.
Printful and WooCommerce Integration
We have already covered when and why to use Printful with WooCommerce. I assume that you sold on that.
This section will teach how to connect the two services with the Printful WooCommerce integration.
Although there are multiple services to connect WooCommerce with Printful, such as Zapier, the easiest is using the integration plugin. Therefore, that is my method of choice.
Follow the steps below to integrate Printful with WooCommerce:
-
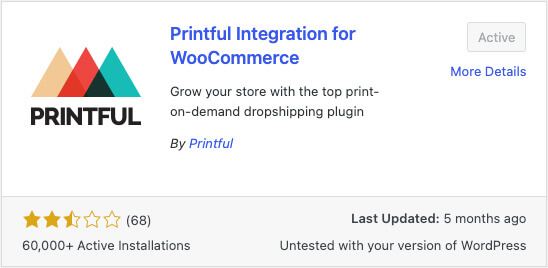
Download and activate the Printful integration for WooCommerce plugin on your WordPress website.

-
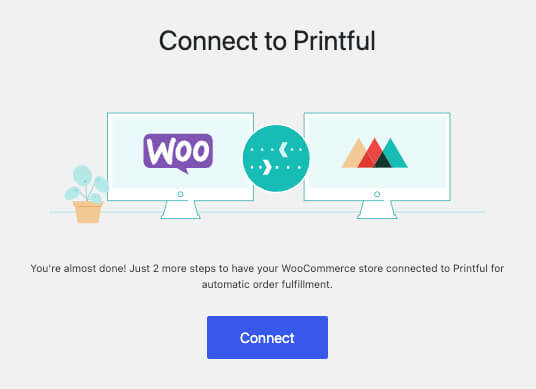
Navigate to the Printful tab, and click on the Connect button.

-
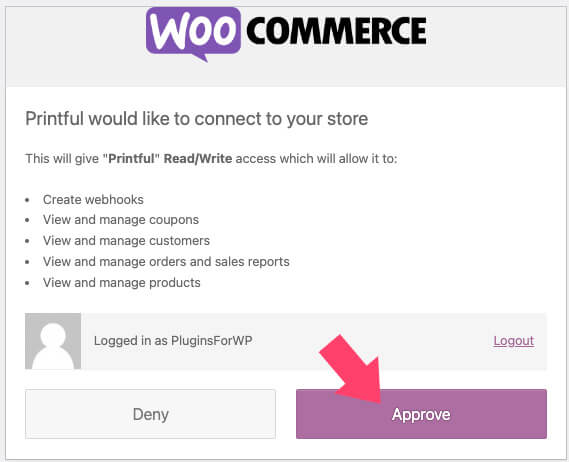
On the new window, enable the connection by clicking on the Approve button.

-
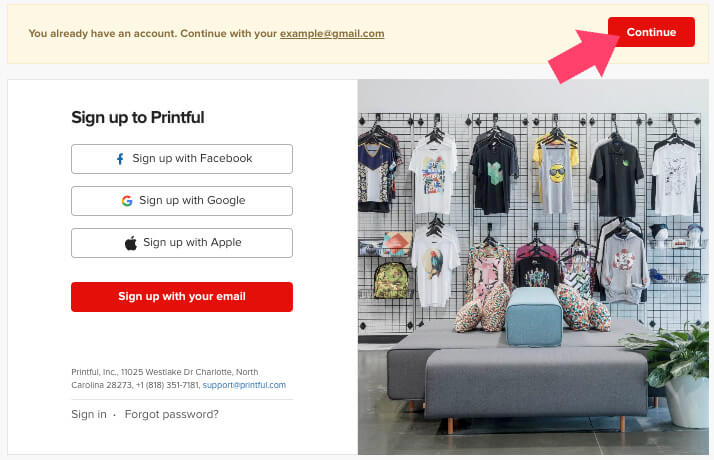
On the next screen, create a new Printful account, or use an existing one by clicking on the Continue button.

-
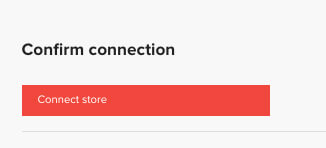
Click on the Connect store button to successfully integrate Printful with WooCommerce.

Once you walk through the connecting process and Printful communicates with WooCommerce, let’s test it and create a new product.
If Printful WooCommerce integration works as expected, any product we add to Printful will be automatically added to our eCommerce shop.
Create Products in Printful
Connecting WooCommerce to Printful is just the first step. We need to create a new product in Printful and display it automatically in WooCommerce.
Thanks to the connection plugin, adding a new product to Printful is enough, and the integration component to WooCommerce will do the rest.
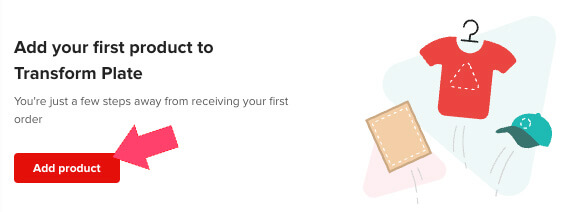
Click on the Add product button to add a new product in Printful.
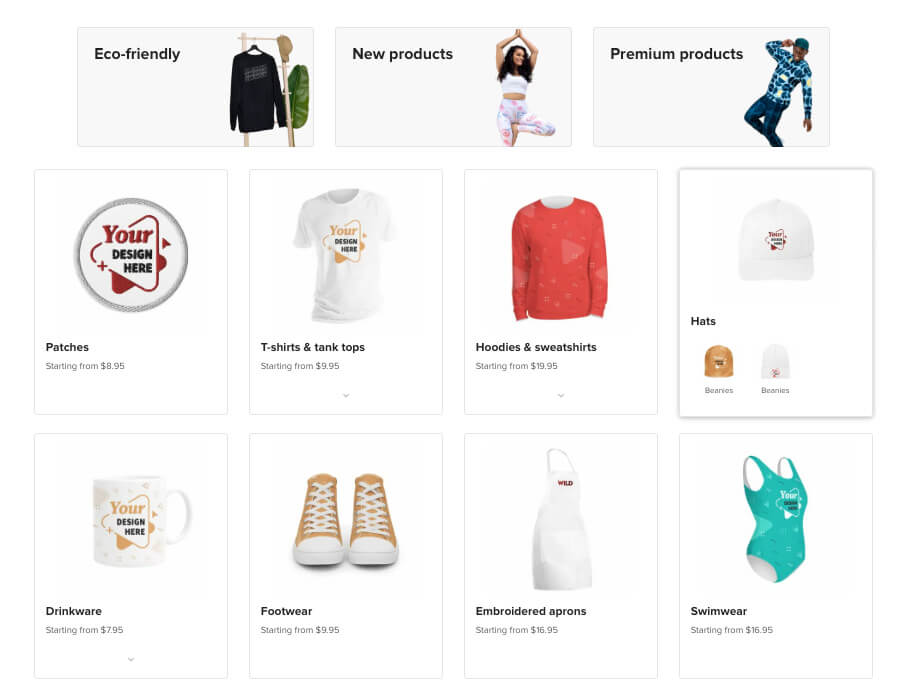
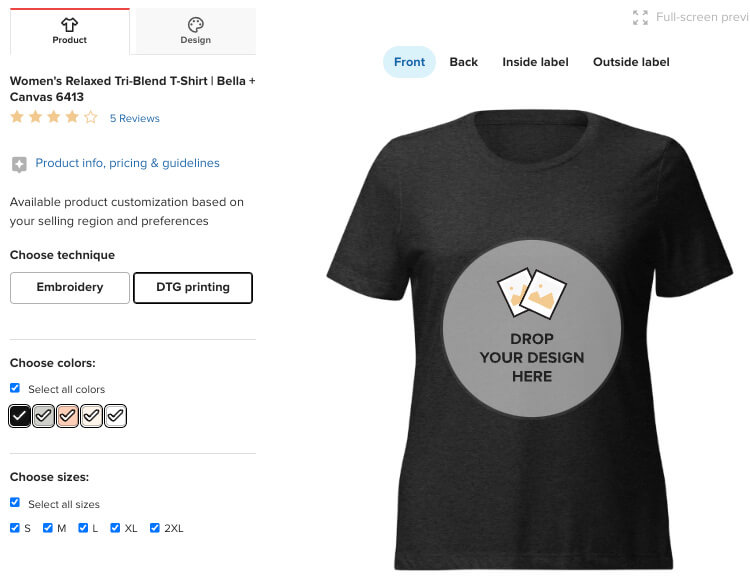
On the next screen, choose the custom products you want to add. You can select unlimited products from various categories, including clothing, accessories, coffee mugs, shoes, phone cases, etc.

Each product has its options and variables, depending on the item. For example, t-shirt-related options can be different sizes, while a coffee mug product will have a capacity in ounces.
Go through the different options for the product you selected, and when done, click on the Drop Your Design Here button to use a custom logo or text.
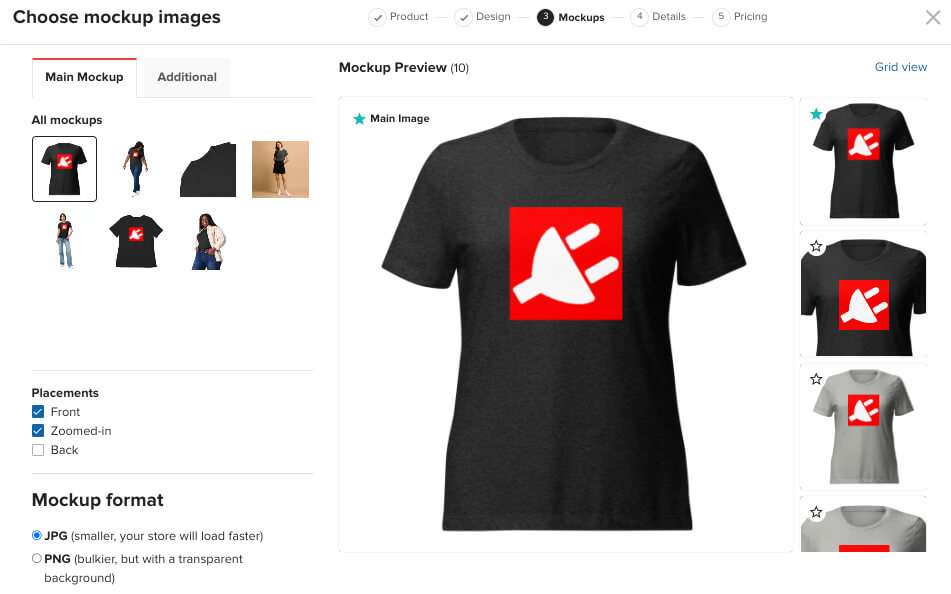
Once you have uploaded and finished setting up the product, click on the Proceed to mockups button.
On the main mockup screen, you’ll see what the product will look like in different colors, models, and poses. The mockup images on this page correlate with all the options you chose on the previous screen.
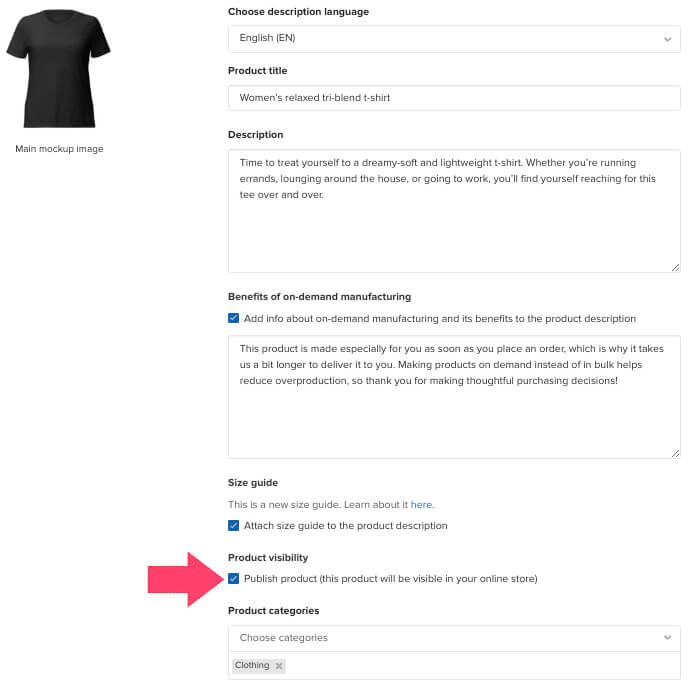
Next, you’ll need to enter a custom product description or leave it as-is and use their generated text. For your store’s benefit, I recommend you enter a unique explanation to prevent having duplicate content with another website, which will negatively affect your SEO.
In addition, verify that the product visibility option box is checked so that the product will appear in WooCommerce.
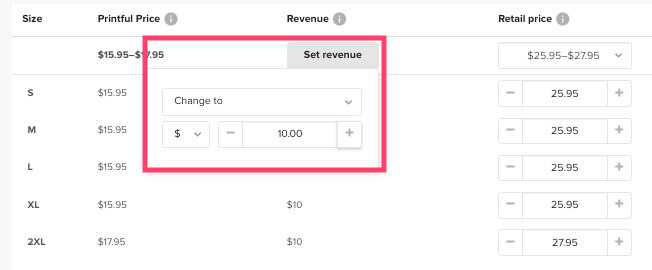
Finally, view the Printful price and expected revenue on the last screen.
If you want to adjust the numbers to serve your company better, click on the Set revenue button and decide your margin. Once you change the total revenue amount, the retail price column will adapt accordingly.
Lastly, click the Submit to store button to push the new product to WooCommerce.
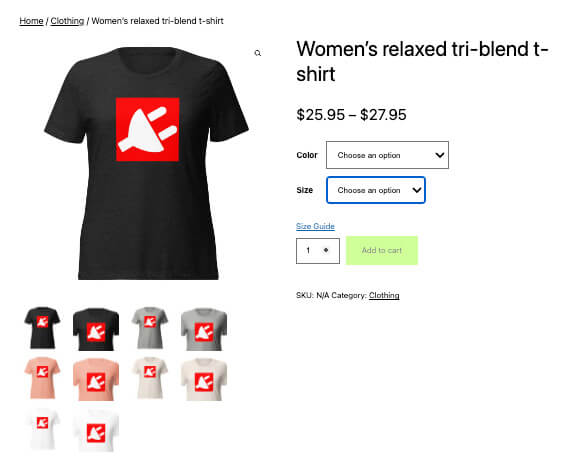
View the Product on WooCommerce
This is the exciting part: visit your WooCommerce shop and view the freshly added product created with Printful.
You can access the product from the Printful dashboard by clicking on the View in WooCommerce link or going to the Products page.
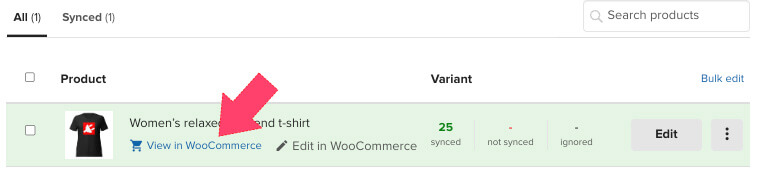
Because the Printful integration still uses the WooCommerce product object, the page will look identical to any other product you added through WordPress.
Then, keep improving your WooCommerce store by hiding the additional information tab, adding swatches, and reordering the products.
If you need to edit or change any aspect of the product, you can use the native editor screen or go back to Printful to adjust it there.
When customers are ready to order, they will go through the WooCommerce checkout process without leaving your website.
On the checkout page, the store will honor the taxes and shipping methods you defined to match the other products.
After the customer finishes checking out, the order will be transferred to Printful, and they will start to fulfill the order at your convenience.
Conclusion
This article showed you how to connect Printful to WooCommerce using the integration plugin.
Opening your store to a new line of products can help you immensely by increasing exposure, eventually leading to new customers.
If you haven’t yet, I highly encourage you to create your Printful store and sell products with your brand’s logo.
Please comment and tell us what products you sell with Printful and WooCommerce.
Also, make sure to subscribe to our YouTube channel and like our page on Facebook.