Colors are one of the best ways to make any website more visually appealing.
Using WordPress, you probably know that finding the proper settings to change isn’t easy and often confusing.
This article will teach you how to change link color in WordPress.
Why to Change the Links’ Color
It will be very beneficial to match the various elements of your website with your brand’s colors.
When all the website elements match each other, it will improve brand recognition and, most importantly, increase the conversion rate.
You can read the article by Investopedia about how important is brand recognition for your business.
A website color can psychology affect the decision-making of your visitors. Therefore it should always match the color scheme and target toward acting.
Skip the section below if you already know your desired link’s color. Otherwise, keep reading and find out how to reveal the correct color code.
Finding The Right Color
To change the link color, we first must know which color we want.
While most popular colors can be referred to as blue, purple, yellow, etc., the rest combines letters and numbers, creating a hexadecimal value.
For example, the hexadecimal code of the color blue is #0000ff. The hexadecimal code of red is #ff0000.
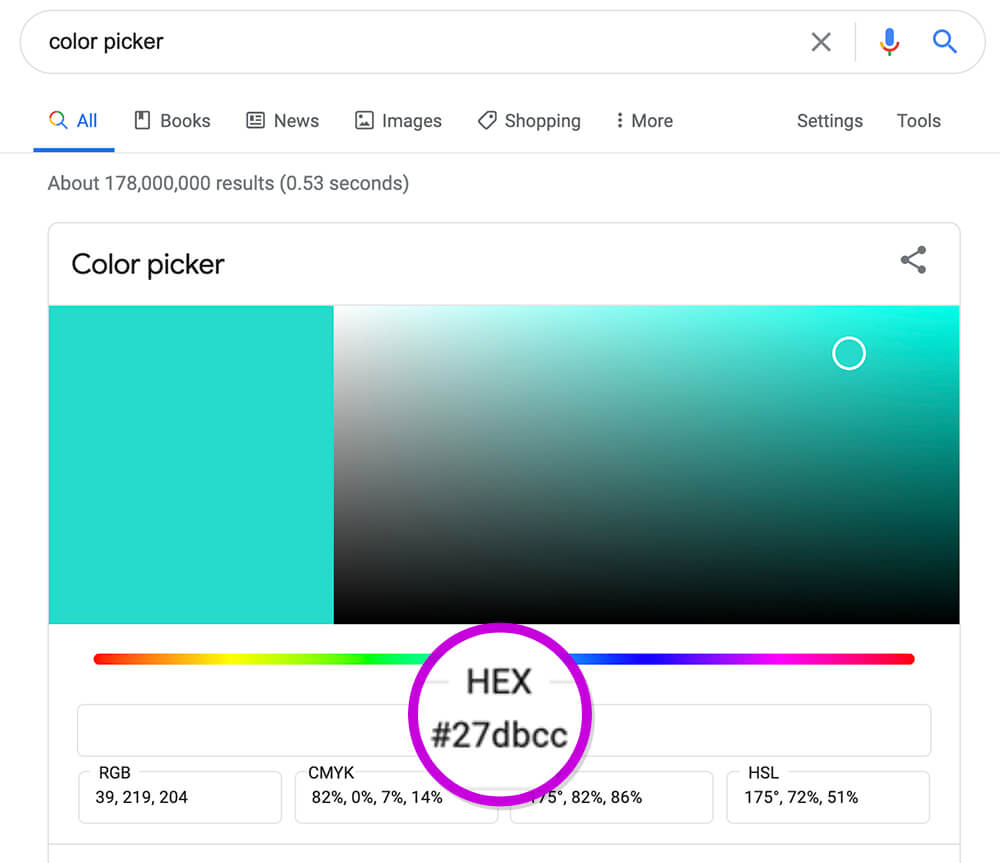
To find the hex code of your desired color, navigate to Google and search for a color picker.
The color picker will be displayed at the top of the search result.
Move the slider left or right and the selector to the desired color and copy the Hex code.
Once finding the correct color code, move forward and learn how to change the link color.
Change Link Color In WordPress
You can change the link’s color of your WordPress website in many different ways.
Some of the most popular ways are:
In the following few sections, we will explore all of these ways. Feel free to choose the method you like the most or experience with them all.
Method #1: Use CSS
CSS (Cascade Style Sheet) is written with [Property] : [Value] pairs and commands the browser on how to style the elements of the document.
By default, the link color of any website is set to blue or in CSS rule:
a { color: #0000ff; }The a is the property, and it means Anchor (or link) and #0000ff is the hex code (value) of the blue color.
If you want to change the color of the links, we will need to enter a new CSS rule.
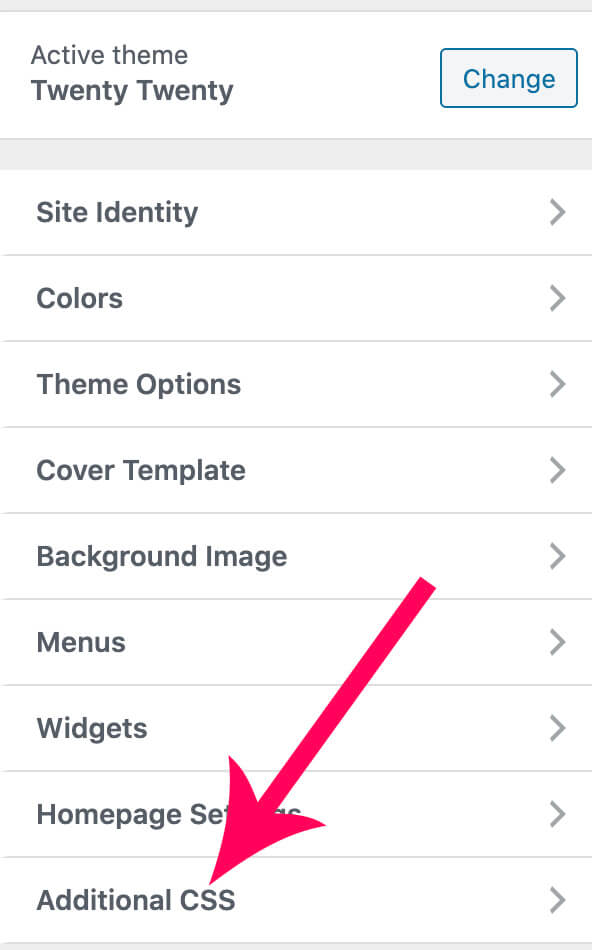
First, click on Customize from the admin bar to access the customization screen.

Then, please navigate to the Additional CSS tab to enter the new rule.
On this screen, paste the code below.
a {
color: hex code;
}
Make sure to replace the hex code with the actual color code you found on the last step and click Publish.
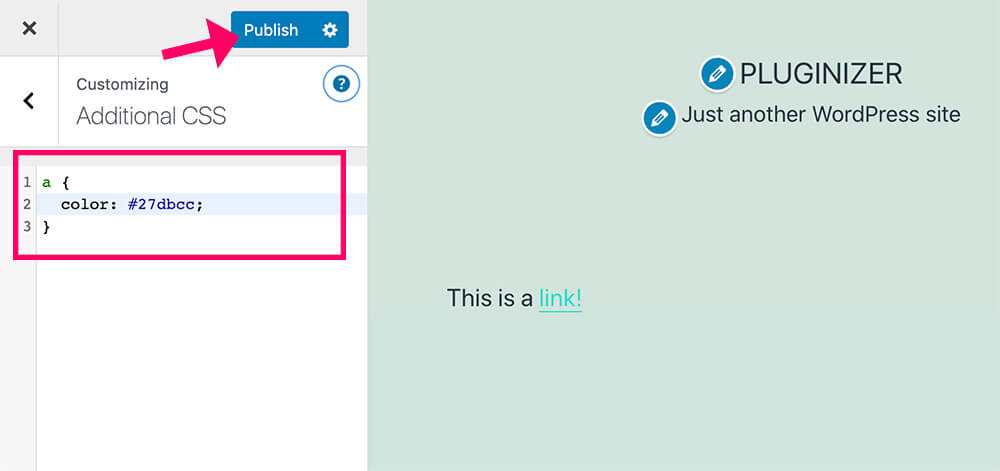
Now, revisit your website and make sure the link color was changed successfully.
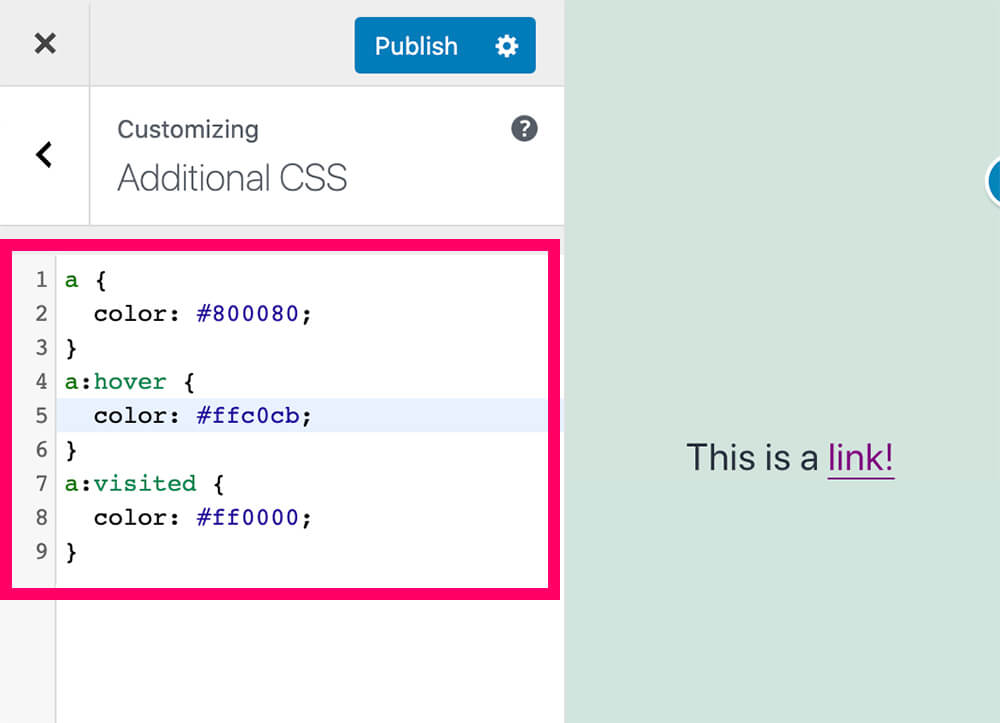
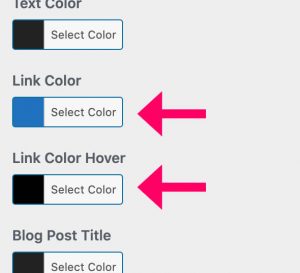
In addition, you can also set different colors when hovering on the links and for visited links.
Add the CSS below to the code above and change the hex code.
a:hover {
	color: #ffc0cb;
}
a:visited {
	color: #ff0000;
}
In this example, I set the links’ color to purple, the hovering color to pink, and the visited color red.
CSS is my preferred way because it should work with all themes and websites.
However, if you don’t want to use CSS, we can change the colors for most themes from the customization screen.
Method #2: Theme customization
Many themes will have the option to change the link colors using their customization screen without using any plugin or CSS. Therefore, we should use this option when possible.

Usually, you can access the desired settings screen from the customization window.
This section will go through the most popular themes and learn how to access the right screen.
Most chances are that you can still change it for your theme even if you are not using one of the themes below.
OceanWP
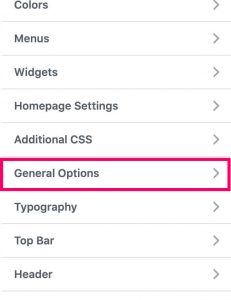
First, access the customization screen by clicking on the customize link from the admin bar.
Then, click on the General Options tab.
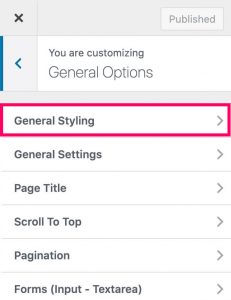
Now, click on the General Styling tab and scroll to the bottom.
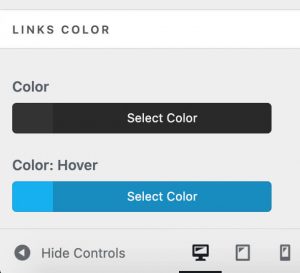
At the bottom of the sidebar, you’ll have the option to change the link and the link hover colors.
First, set your desired colors and click on publish afterward.
GeneratePress
Open the customization screen and click on the Colors tab.
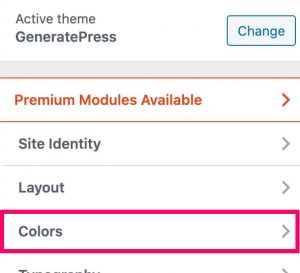
On this screen, you’ll have the option to change the colors of the links for both normal state and hover. Select your desired color and save the changes.
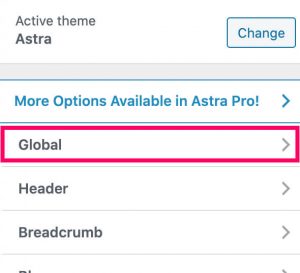
Astra
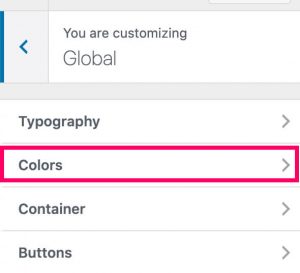
For the Astra theme, launch the customization screen and click on Global.
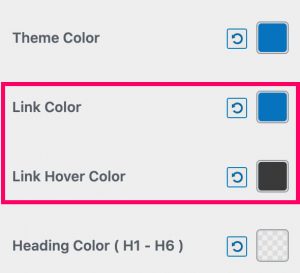
Then, click on the Colors link and Base Colors.
There, you’ll have the option to change the link and the link hover colors. Make sure to save the changes when done.
We can still style the link colors with a plugin if you can’t find the right setting screen for your specific theme.
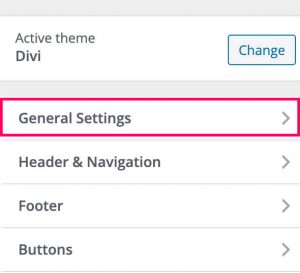
Divi
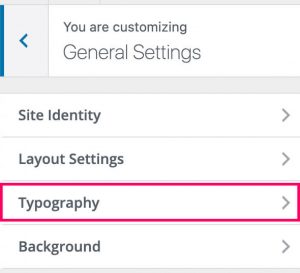
For Divi, navigate to the customization screen, and click on General Settings.
On this screen, click on the Typography option.
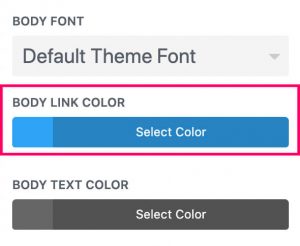
Then, select your desired color for the Body Link Color and click publish.
Method #3: Use a plugin
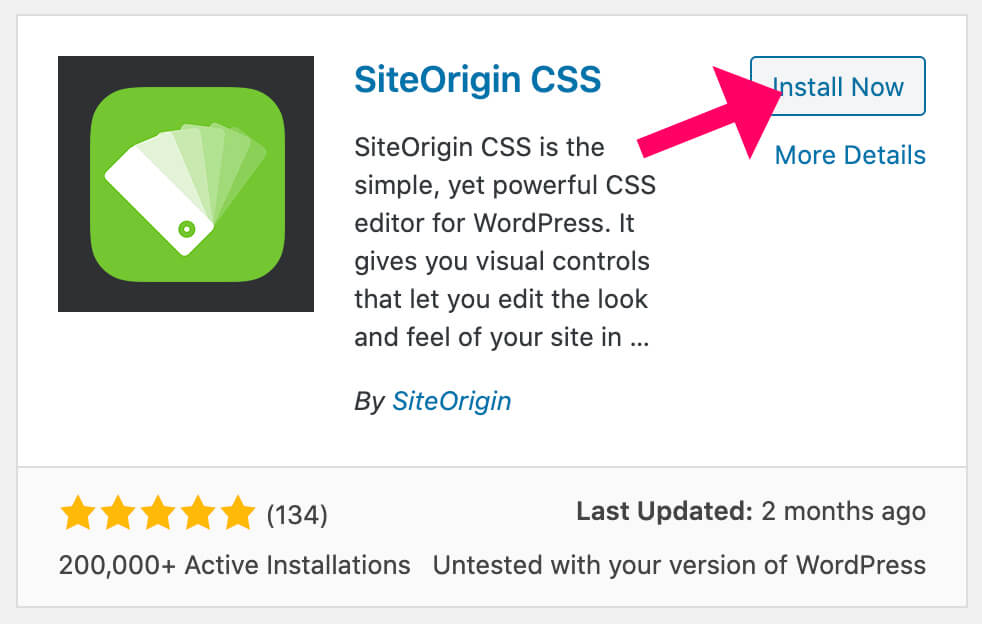
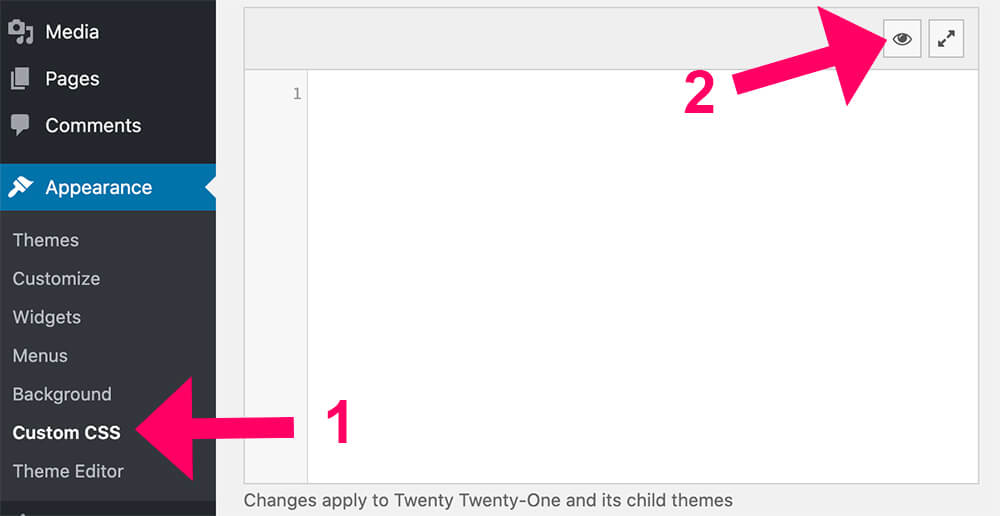
From the backend of your WordPress website, navigate to Plugins -> Add New, search, install and activate the SiteOrigin CSS plugin.
After activating the plugin, navigate to the new Appearance -> Custom CSS tab and click on the eye icon to launch the visual editor.
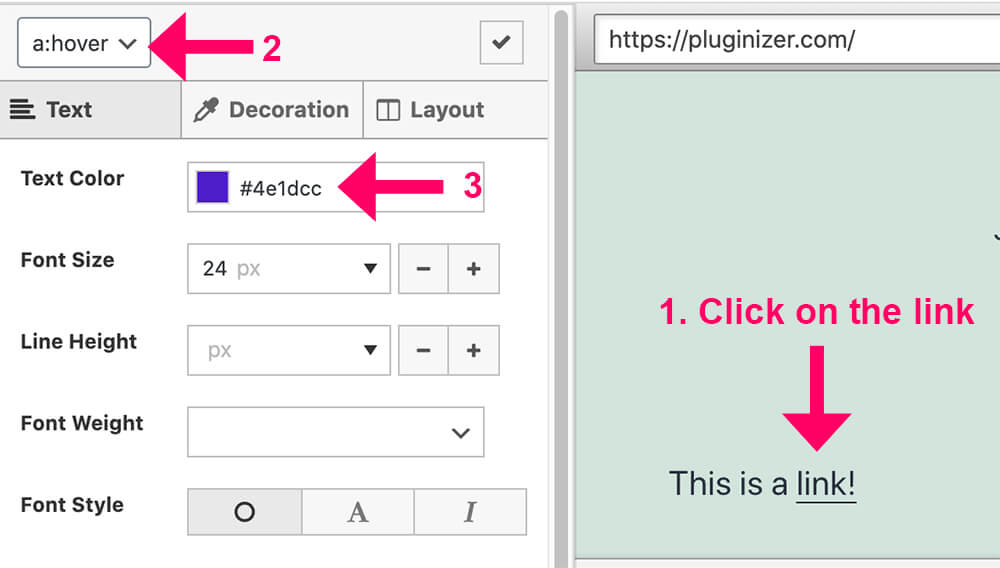
Here, click on any of the links to highlight it and notice that the selector was changed on the left top corner to a:hover meaning that you’re editing the settings for the hover state.
Style the hover state as you wish and set a color, bold, underline, etc.
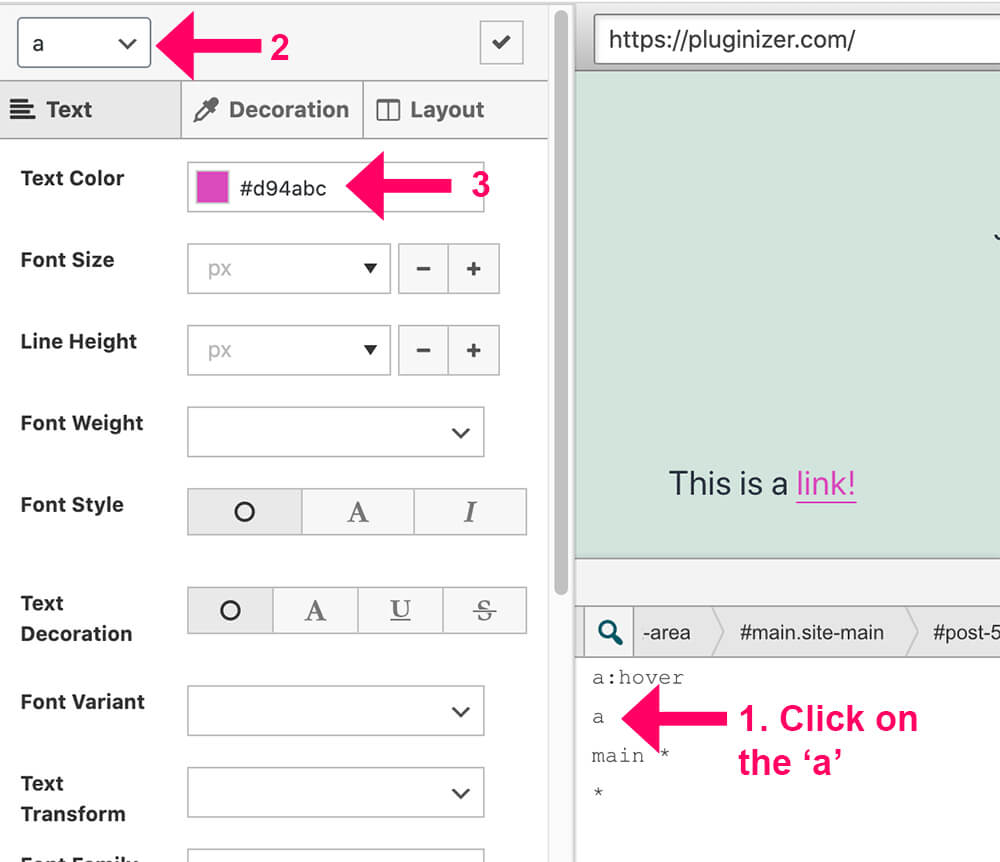
To change the normal state of the link, click on the a attribute from the list at the bottom and verify that the selector on the left top corner changed accordingly.
Now, style this state as desired and click on the checkmark icon when finished.
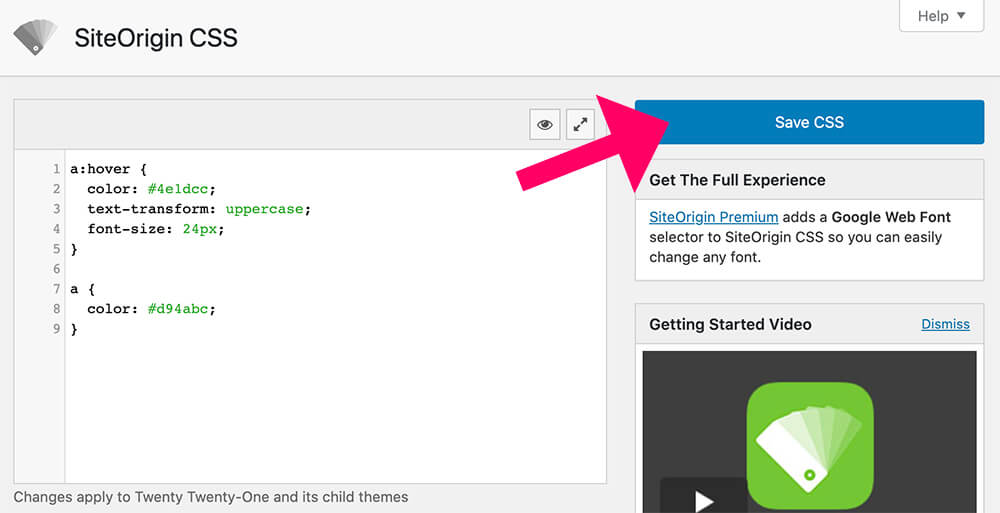
After adding both CSS rules to the SiteOrigin plugin screen, click on the Save CSS button and revisit your website to verify that the new style was applied successfully.
If you’re already using a page builder with your WordPress website, you can change the global settings of the page builder and skip the steps above.
Method #4: Elementor page builder
All the popular page builders will enable you to change the global styling of various elements of your website.
This section will go through Elementor and discover how to access their global styling screen.
Launch the Elementor editor and click on the hamburger menu on the left top corner.
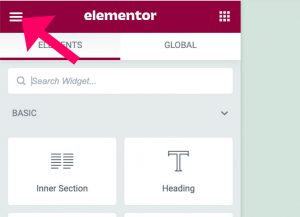
Then, click on the Site Settings option.
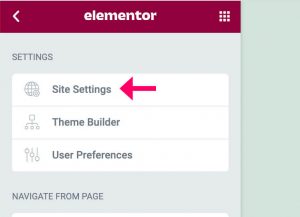
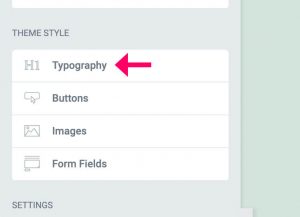
Now, click on the Typography tab under Theme Style.
On this screen, change the colors and styling of the link for normal and hover state and click on the update button when done.
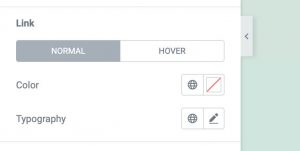
Once you have published the changes, revisit your website and make sure the color of the links changed successfully.
Conclusion
In this article, you learned how to change the link color of your WordPress website in various ways.
Leave us a comment and let us know which methods you used.
Also, make sure to subscribe to our YouTube channel and like our page on Facebook.