WordPress classes are the easiest way to style or target a specific page, post, or element on our website.
When working with WordPress, there is a high chance that you’ll need to know how to add a custom class to different parts of your website at one point or another.
Because we often use CSS rules to style our website, it will be very beneficial to know how to add a class to various elements.
Most WordPress themes add various classes to pages, posts, or menu items by default. Yet, sometimes we find it insufficient, and we would like to add our classes.
This article will teach you how to add a body class in WordPress with or without a plugin.
Why Add a Body Class?
When building a website, we need to use classes to group many pages to style them similarly.
We can link multiple pages or posts by their ID with CSS rules. However, it’s not intelligent for two main reasons:
- The page ID does not match the local environment and production.
- The CSS rule was too long.
.page-id-2, .page-id-3, .page-id-4 {
    background-color: grey;
}
It makes more sense to give all the pages the same class and target them that way. Further, it also made adding more pages in the future simpler.
How to Add a Body Class in WordPress
There are a couple of ways to add a body class in WordPress, and I will show you both in this article. The first way is by using a plugin, and the second way is hardcoding it into the template file.
Let’s start first by using a plugin.
Method #1: Add a body class with a plugin
From your WordPress dashboard, navigate to Plugins -> Add New, search, and install the Custom Body Class plugin.
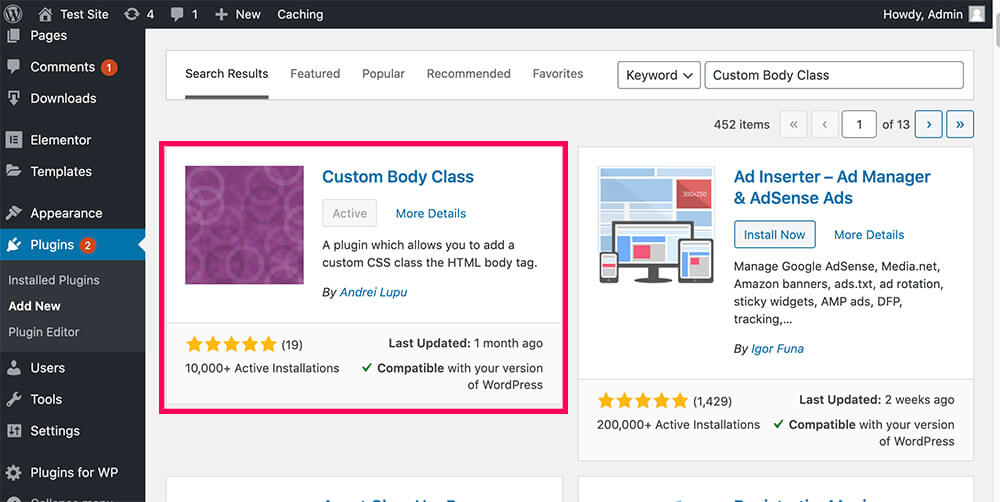
Once activated, edit any page or post to which you would like to add a class.
Then, click on the new option called page classes or post classes.
Enter your desired class and update the page.
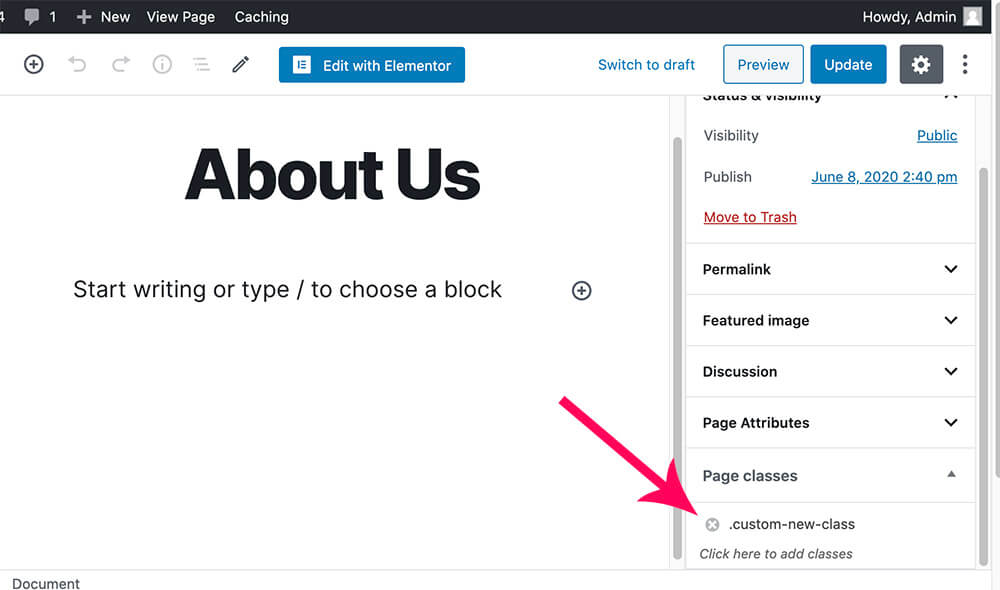
Once updating the changes, revisit your page or post and inspect it to ensure the new class was added successfully.
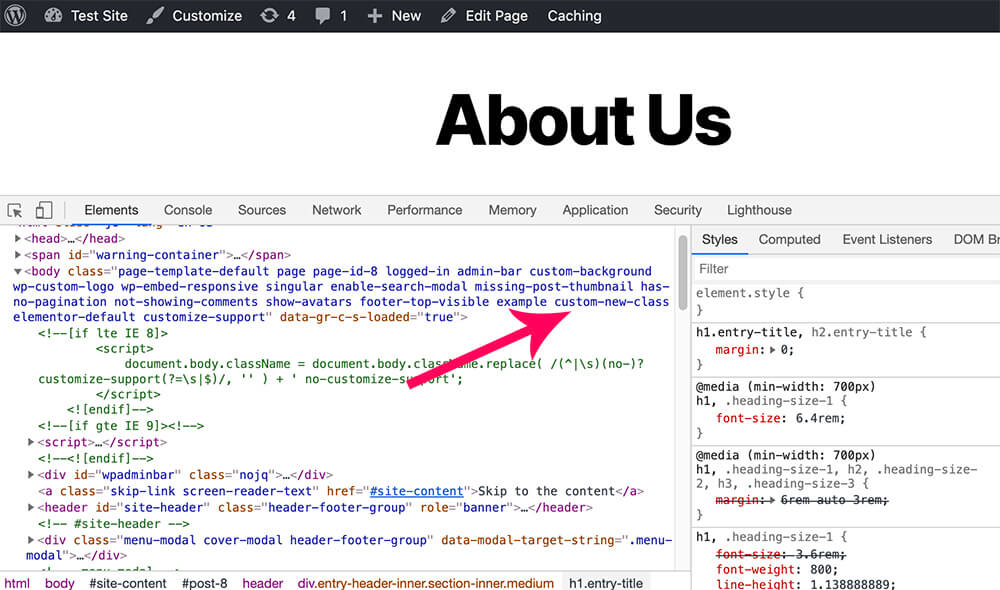
Using a plugin is the most simple and straightforward way, and therefore, recommended. However, if you prefer adding a body class using a function, read the section below.
Method #2: Add a body class using a function
Alternatively, you can add a body class to any WordPress page, post, or custom post type using a function instead of a plugin.
We recommend you use the functions below inside your functions.php file of your child theme or a custom plugin.
Tip: please backup your website before editing core files.
add_filter( 'body_class', 'pfwp_add_custom_class' );
function pfwp_add_custom_class( $classes ) {
    if ( is_page([8, 10]) ) {
        $classes[] = 'example';
    }
    return $classes;
}
The code above will add a custom class (‘example’) to page ID 8 and Page ID 10.

Make sure to change the ID number of the pages in the code above to your desired page IDs. Please read our article on finding any page or post ID number.
Method #3: Add a body class inside a template
Another great way to add a class or multiple classes to your body tag is by passing the custom classes into the body tag itself.
In most WordPress themes, you can find the opening body tag inside the header.php file.
Again, editing the child theme files is better to avoid losing the changes in the next theme update.
Navigate to Appearance -> Theme Editor and click on the header.php file from the files list on the right.
There, search for the opening body tag. In most cases, it will look like that:
<body <?php body_class(); ?>>Now, add your custom body class as an argument to the function like so:
<body <?php body_class('new-class'); ?>>To add multiple body classes, use an array inside the function like so:
<body <?php body_class(array('new-class-1', 'new-class-2')); ?>>Conditionally add the body class to a page template
You may need to add a body class based on the template name when creating a custom page template.
For example, on our website, we needed to add a custom class to the page template changelog-template.php that we created for our changelog page.
To add the custom class to our template, we used this function:
add_filter( 'body_class','pfwp_add_class_page_template' );
function pfwp_add_class_page_template( $classes ) {

    if ( is_page_template( 'template-name.php' ) ) {
        $classes[] = 'custom-class';
    }

    return $classes;

}
The function above will only add the custom body class to the pages using the specific template name.
Make sure to replace the template-name.php with your template name.
Add Class to a Menu Item
Adding a class to the WordPress menu item is easier than you think because you can do it without using any plugin or a function.
Moreover, WordPress allows us to add a menu item class by default, but the option is hidden.
To add a class to any WordPress menu link, we will first enable that option.
Firstly, inside your WordPress dashboard, navigate to Appearance -> Menus.
After that, click on the Screen Options at the top right corner and check the CSS Classes box.
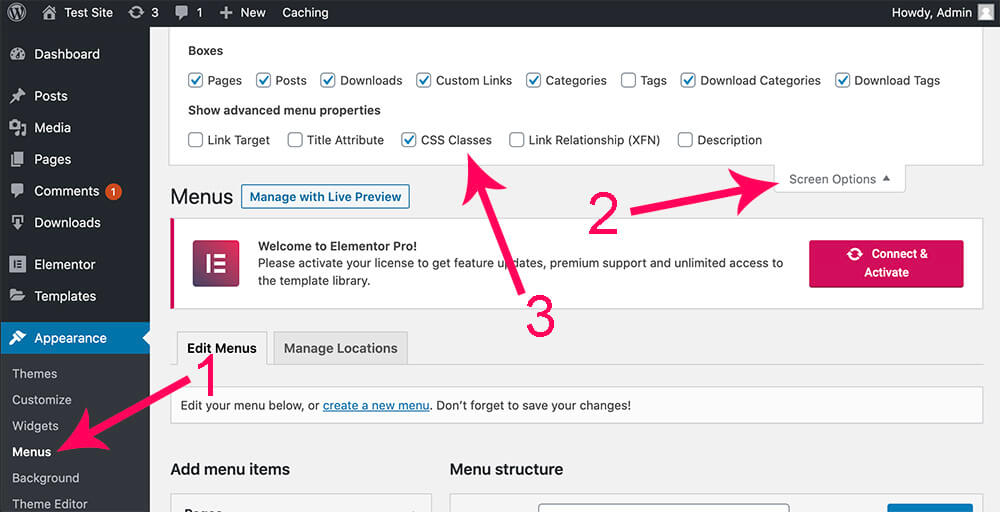
Secondly, click on the menu item for whom you would like to add a class.
You will see the new CSS Classes option where you’ll need to enter your desired class.
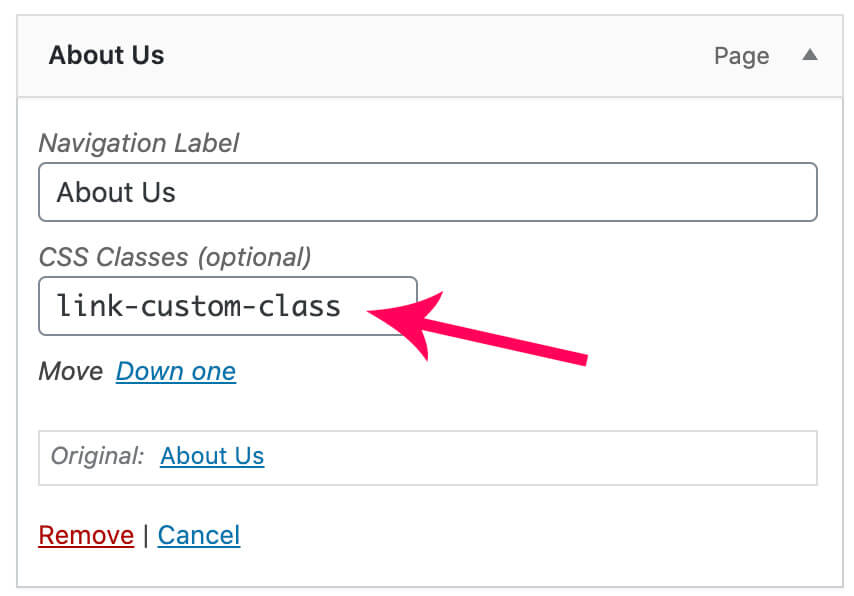
Thirdly, save the menu, revisit your website after adding the class, and inspect the menu element to ensure the course was added successfully.
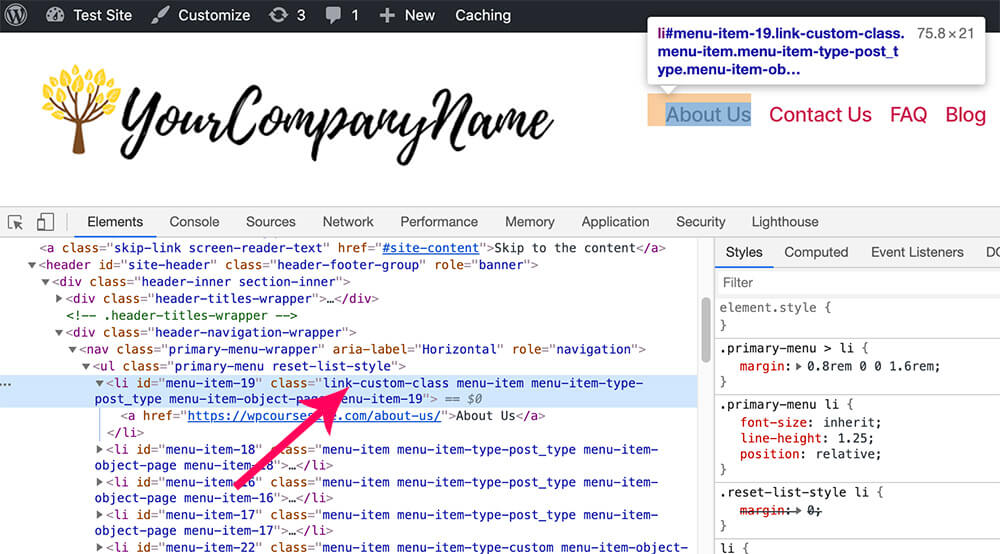
Add a Class to a Widget
To add a class to a WordPress widget, we will use a simple plugin that will allow us to do just that.
Therefore, navigate to Plugins -> Add New, search and install and search for Widget CSS Classes.
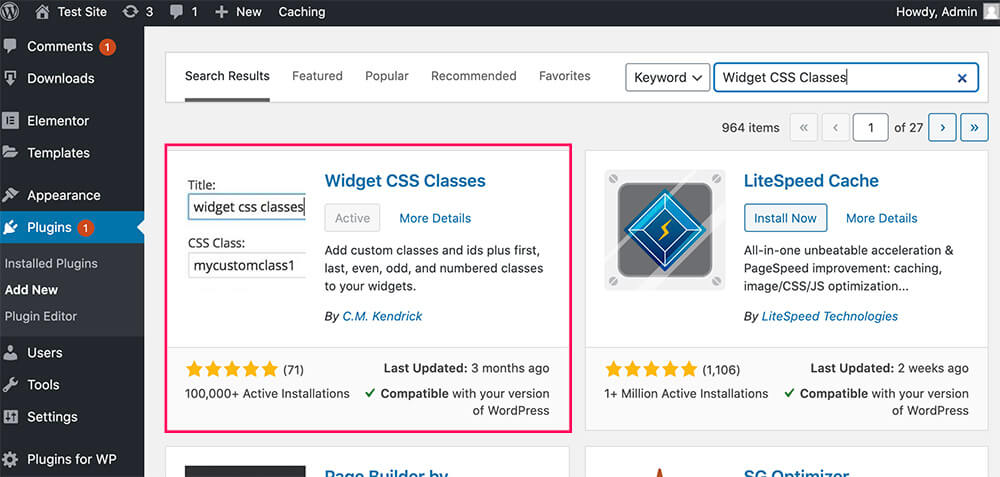
Once you activate the plugin, navigate to Appearance -> Widgets and expand the widget you would like to give a class.
You will see the new CSS Classes box, where you can enter as many classes as you wish.
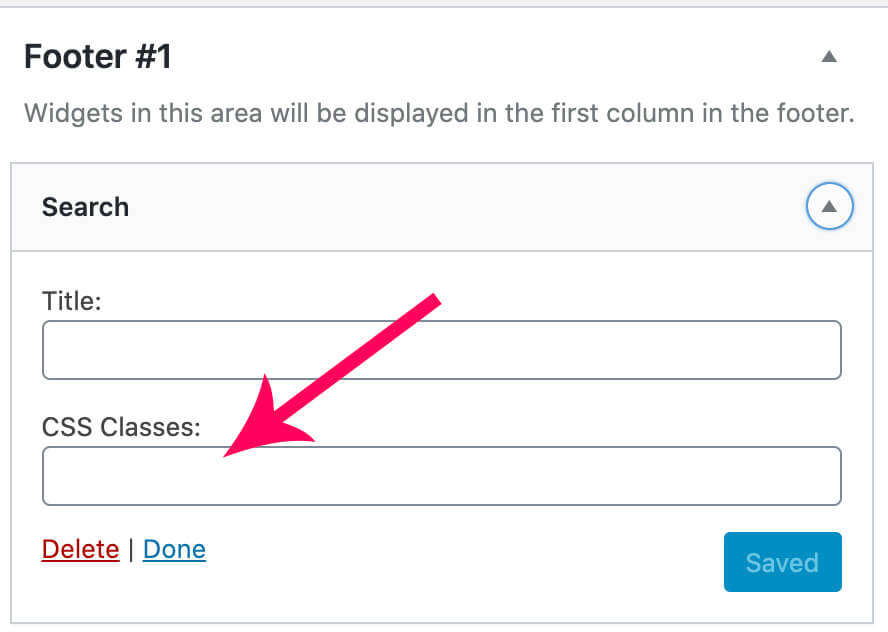
If you want to enter multiple classes, separate each class with space.
Conclusion
In this article, you learn how to add a body class in WordPress in several ways.
Leave us a comment and let us know your methods to achieve this task.
Also, make sure to subscribe to our YouTube channel and like our page on Facebook.


