
The WooCommerce checkout page has many fields to fill before submitting the order.
Often, the different fields are necessary, and you should keep them. However, they aren’t; you should remove or disable them in other cases.
This article will teach you how to use the WooCommerce checkout field editor plugin to add or remove fields.
Why Editing the Checkout Fields
Editing the checkout fields makes the user experience and flows short and easy.
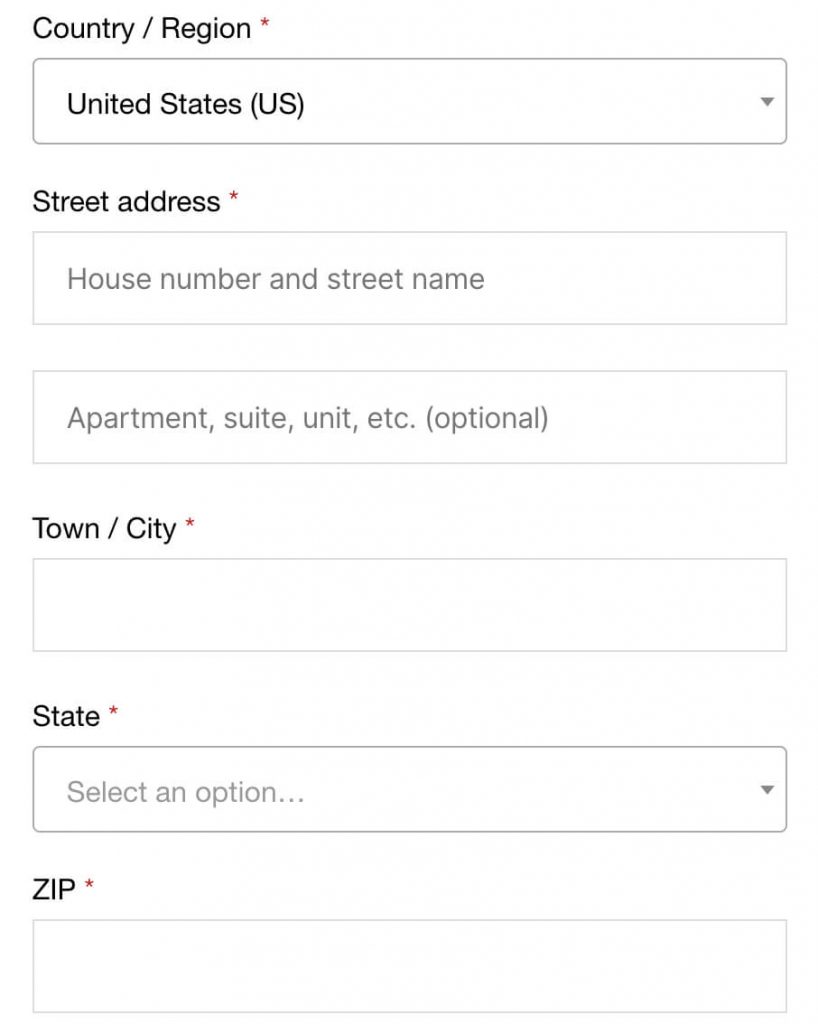
The WooCommerce checkout page contains many fields such as first name, last name, company name, psychical address, etc.
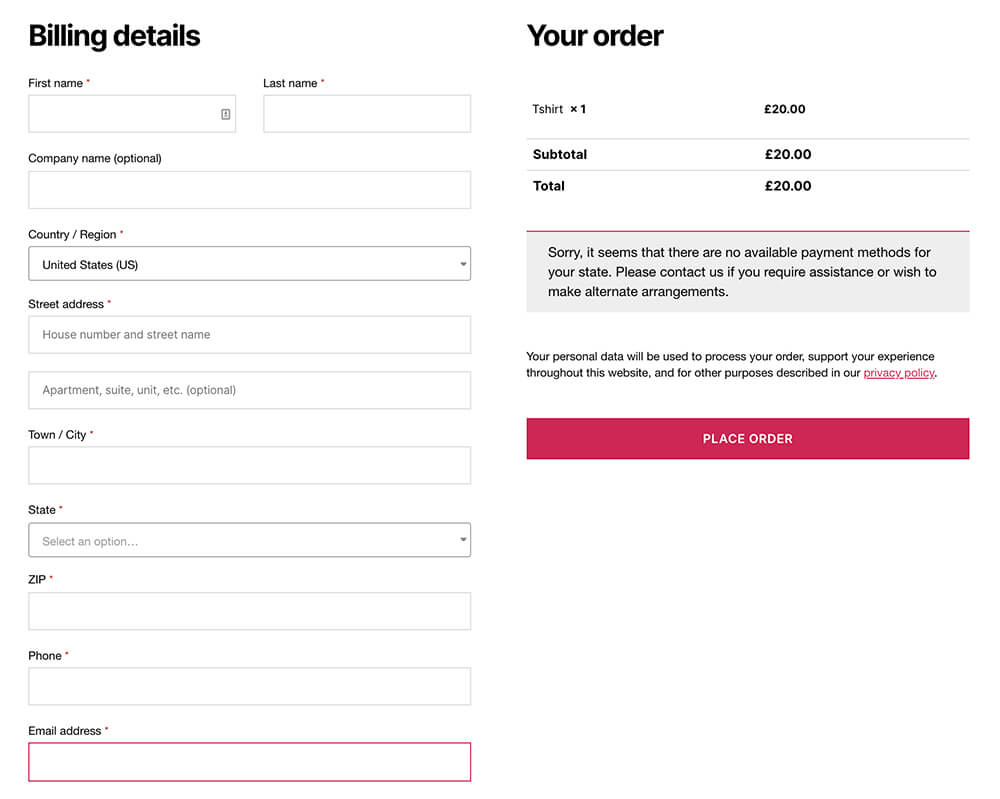
Often, you don’t need the customer to fill all the fields, and leaving them on the page may intimidate the customer from purchasing your products.
Asking the customers to provide irrelevant information about themselves will lead them to leave your site. As a result, you will lose the sale.
You can read more about improving this process by reading Bolt’s best checkout practices article.
For example, there is no need for the shipping fields when selling digital products, and you should remove them.
On the other hand, if you would like to receive additional information from your customers, such as their website name, you can add fields to the checkout page and require them to fill them in before submitting the order.
Do both with the WooCommerce checkout field editor plugin, or add or disable fields from checkout.
Edit the WooCommerce Checkout Fields
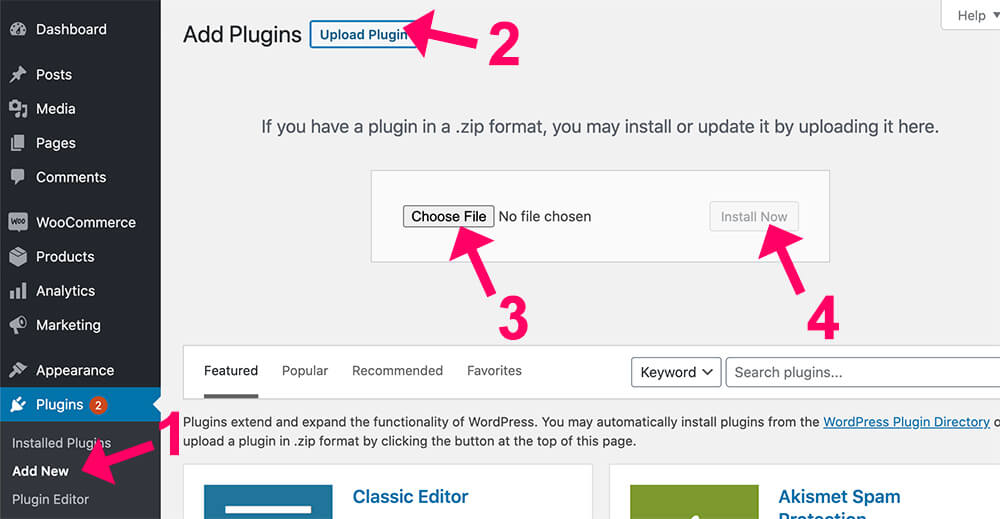
First, we must install the WooCommerce checkout field editor plugin to add or remove fields.
You can get the checkout field customizer plugin from the official WooCommerce website for the total price ($49) or the same plugin from us for only $4.99.
After downloading the plugin, log in to your WordPress website’s backend, navigate to Plugins -> Add New -> Upload Plugin, choose the plugin you just downloaded, and activate it.
After activating, navigate to the WooCommerce -> Checkout Fields, and there you will be able to edit and customize the fields.
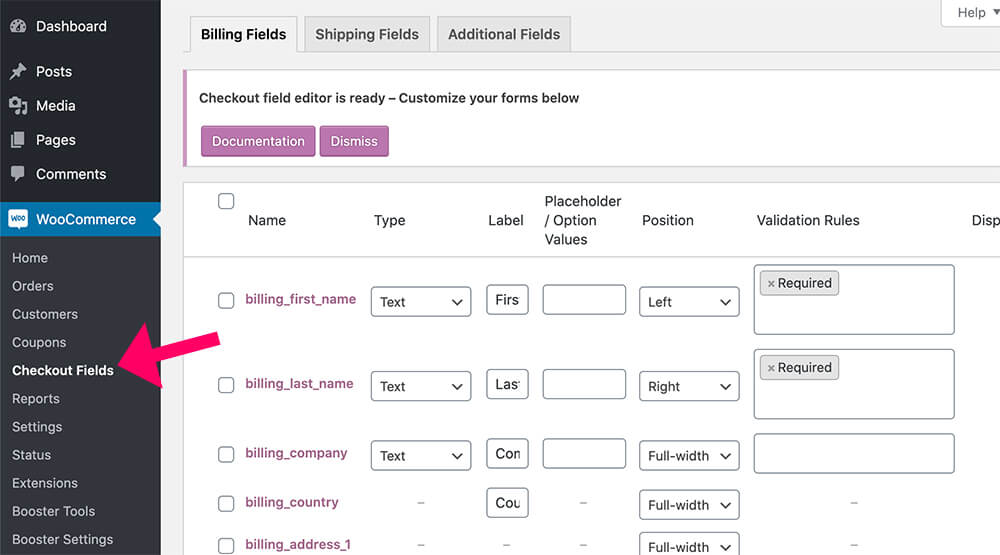
All the fields on that page are currently enabled on your website’s checkout page.
The field’s options
The plugin’s page has three tabs indicating which part of the checkout page you are editing.
The tabs are Billing Fields, Shipping Fields, and Additional Information.

Under the Billing Fields tab, edit everything related to the billings fields of the checkout page.

You can edit any aspect of the field, such as type, label, placeholder, position, and validation rule.
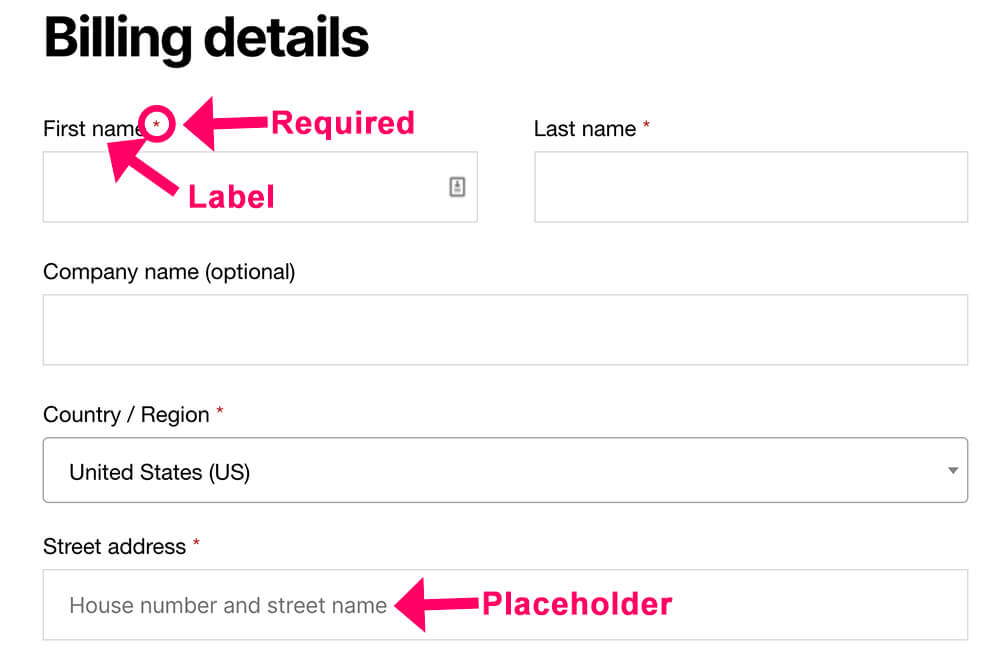
Let’s take the top row, for example, the billing_first_name option.

Type is text meaning the customer can type any text inside the field. If, for example, you set it to be a phone number, the customer can only enter digits.
The label is the text that appears outside the field and notifies the customer of what he needs to fill.
A placeholder is the text inside the field and will disappear when the customer is typing his text.

Last, the position indicates where the field is. We can see that the position is set to the left; therefore, the first name field is only taking 50% to the left of the last name option.
The customer must fill the field before submitting the order when the validation rules are required.
Remove Fields From the WooCommerce Checkout Page
Removing specific or multiple fields from the checkout page is very easy.
You will first need to check the box of the field or the fields you would like to remove.
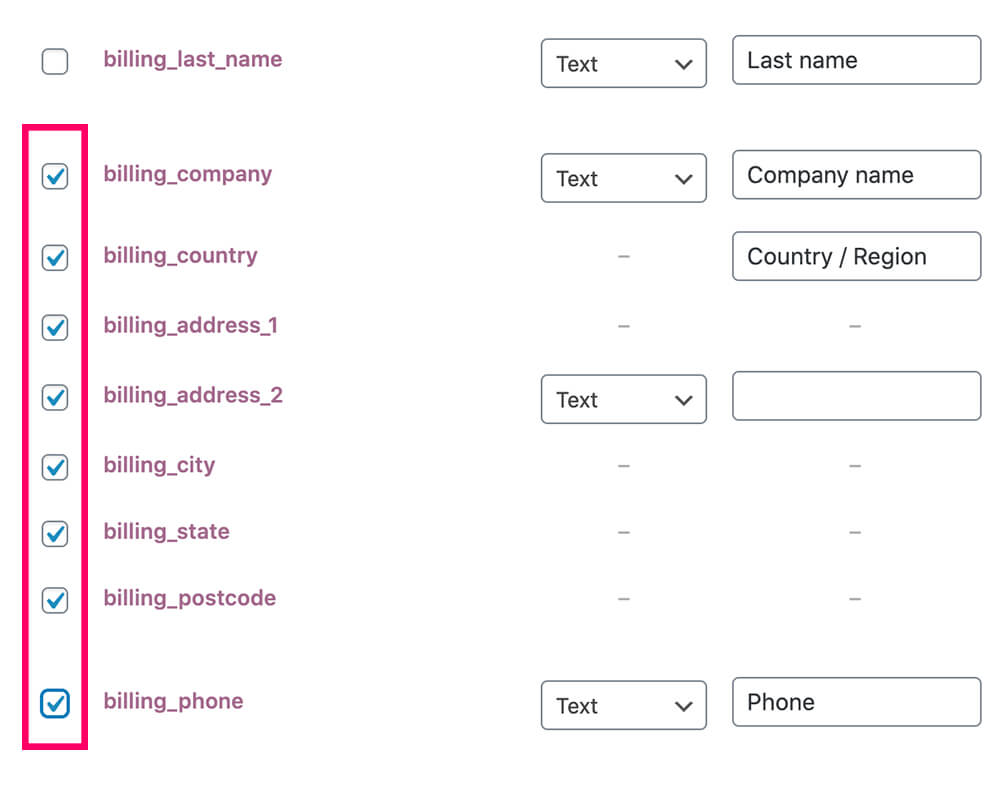
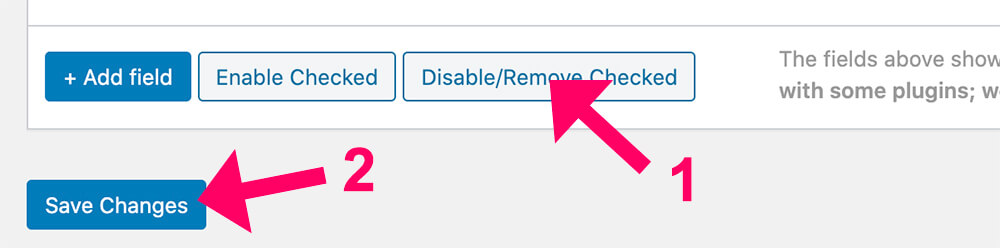
Once checked, scroll down and click on the Disable/Remove Checked button.
After clicking the button, the checked boxes turned light grey, meaning they were disabled and won’t be displayed on the checkout page.
Then, click on the Save Changes button.
We can now move on to the last step and test the checkout page.
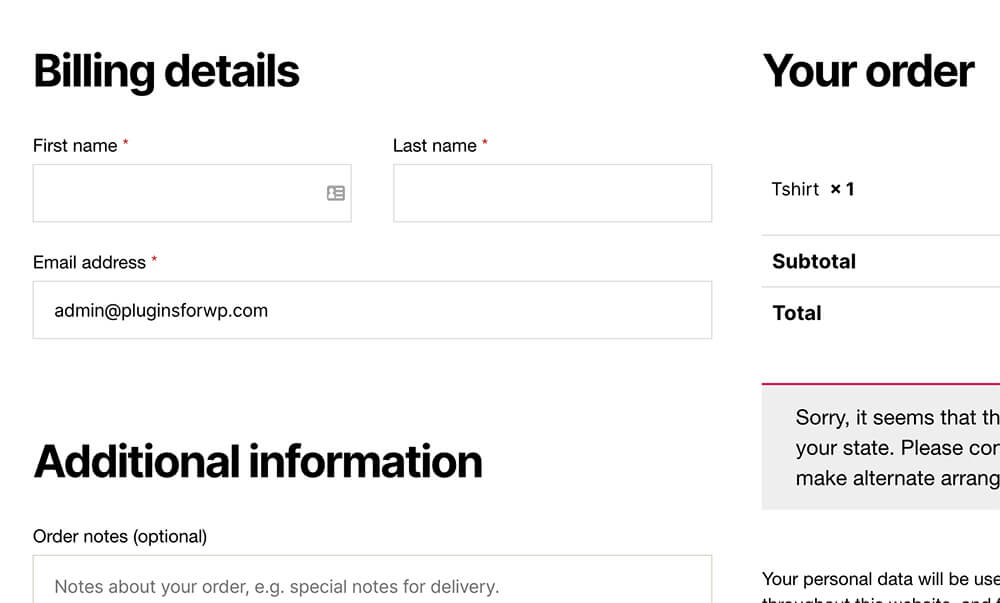
After saving the changes, relaunch your website checkout page and refresh it.
You’ll notice that all the fields you disabled in the last step disappeared from the checkout page.
Please note that remove the required tag inside the validation rules box if you want to keep a field but not set it to be required.

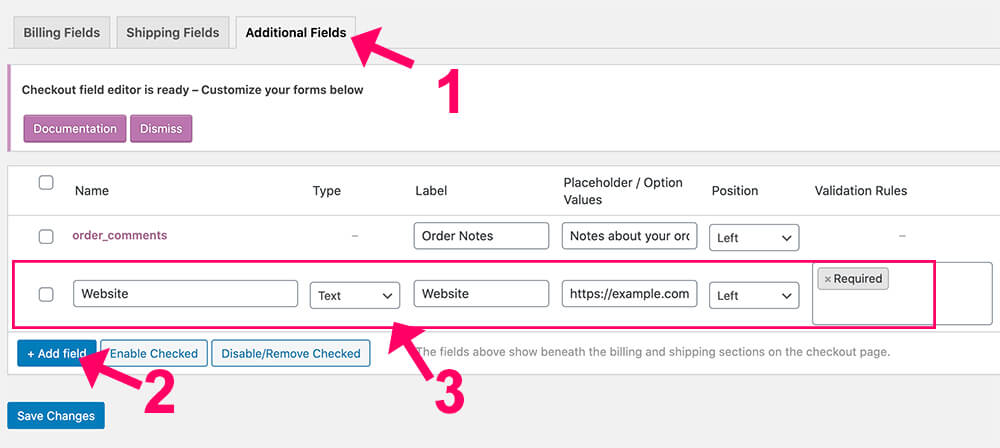
Add Fields to WooCommerce
With the WooCommerce checkout fields editor plugin, you can add fields to the checkout page by clicking the Add Field button.

After clicking the button, you can find the empty field at the bottom of the page.

Drag it up or down to rearrange the order of the fields. Then, fill the new field with relevant information such as name, type, label, etc.
Add a website field, add a text type, label it, and make it required.

Once defining the new field, save the changes, and revisit the checkout page to display the new edited field.

Please note the website field is below the fields of the billing section because you added it inside the billings tab.
If you want to display the website field under the additional information tab, switch to the additional information tab and add the new field over there.
To improve the user experience further, read our article on redirecting WooCommerce after checkout.
More WooCommerce checkout editor
The checkout field editor plugin mentioned above is the best WordPress plugin to edit WooCommerce fields.
It has the most customization options and allows you to take control of your customer checkout process.
However, it is not the only plugin.
Here are more plugins that will enable you to achieve this task:
- Checkout Field Editor (Checkout Manager) for WooCommerce
- MWB WooCommerce Checkout Field Editor-PRO
- YITH WooCommerce Checkout Manager
Related Posts
- How to redirect WooCommerce empty checkout pages
- How to Add ‘Continue Shopping’ Button to WooCommerce Cart Page
Conclusion
You learned how to use the WooCommerce checkout field editor plugin in this article.
Please ask us using the comment box below if you have any questions.
Also, make sure to subscribe to our YouTube channel and like our page on Facebook.