The WooCommerce plugin comes with a default thank you page that your customers will be redirected to after a successful checkout.
In some cases, when creating an upsell offer, for example, it is useful to change the default thank you page and redirects your checkout page to a custom one.
In this article, you will learn how to redirect the WooCommerce plugin to a custom thank you page after checkout.
Why Redirect a Checkout Page
There are few reasons why you may want to redirect the WooCommerce checkout page to a custom ‘thank you’ page.
One of the reasons is to create an upsell offer for a specific product while another reason is to create an A/B test between different kinds of templates or designs.
For example, you can create a specific ‘Thank You’ page with an upsell offer for customers who purchased a skateboard to purchase skateboard wheels while a different ‘Thank You’ page will display socks to customers who purchased shoes.
That way, you can customize the user experience and offer relative products to increase your revenue.
Redirect WooCommerce Checkout Page
Out of the box, WooCommerce will redirect the customers to a default page after checkout.
However, we have the option to redirect the WooCommerce checkout page in two different ways:
- Using a code snippet.
- Using a plugin.
Redirect the checkout page with a code snippet
When using this method, we can redirect the customers to a specific page using a PHP function.
Step #1: Open the functions file
The first step is to open the functions.php file of your child theme.
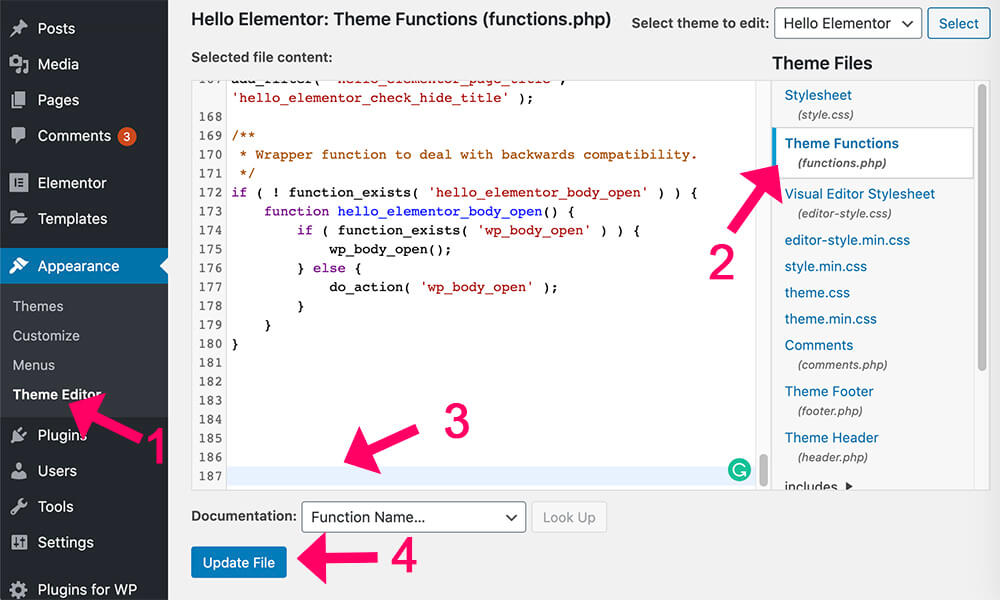
From the back-end of your WordPress website, navigate to Appearance -> Theme Editor.
On this page, click on the functions.php file from the right sidebar.
Step #2: use the code snippet
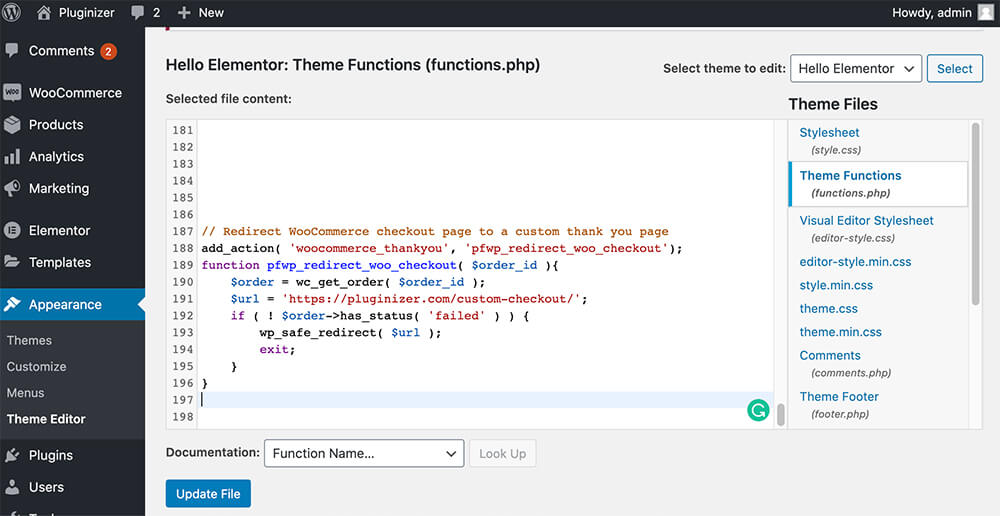
After opening the file, scroll to the bottom of the page and paste this code snippet:
// Redirect WooCommerce checkout page to a custom thank you page
add_action( 'woocommerce_thankyou', 'pfwp_redirect_woo_checkout');
function pfwp_redirect_woo_checkout( $order_id ){
    $order = wc_get_order( $order_id );
    $url = 'CUSTOM THANK YOU PAGE URL';
    if ( ! $order->has_status( 'failed' ) ) {
        wp_safe_redirect( $url );
        exit;
    }
}
Make sure to replace the CUSTOM THANK YOU PAGE URL with the actual URL of the desired page and click Update.
Step #3: test the code
After updating the file, purchase a free product from your store and make sure you’ve been redirected to the chosen page.

Redirect the checkout page using a plugin
In order to redirect the WooCommerce page without a function, we need to use a plugin.

The first step is to download and install the YITH CUSTOM THANK YOU PAGE plugin on your WordPress website.
You can get it from the official website for a full price or the exact same plugin from us for only $4.99.
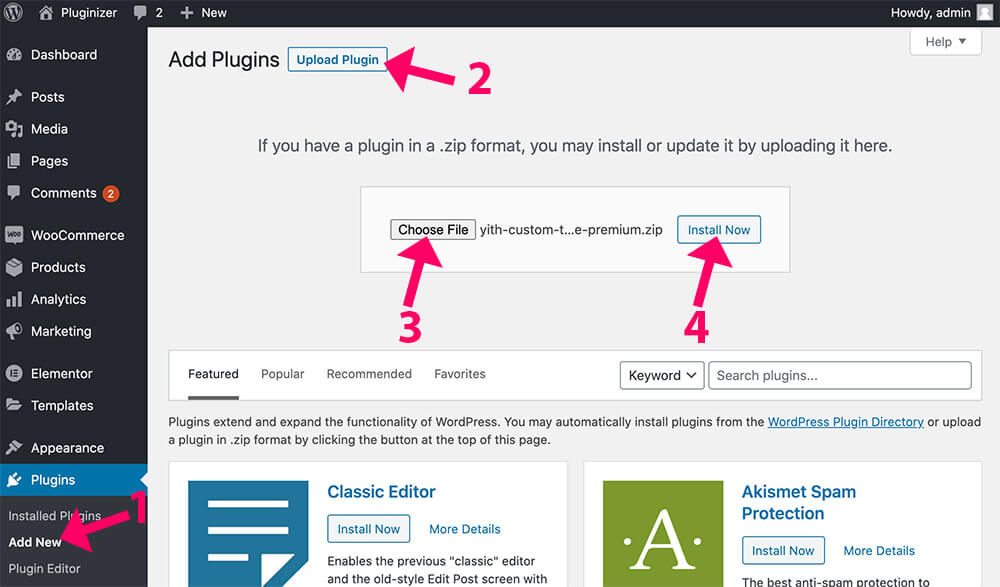
After downloading, navigate to Plugins -> Add New -> Upload Plugin, upload and activate the plugin.
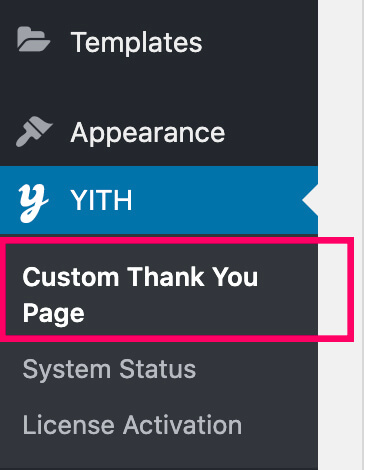
After activating the plugin, navigate to the new custom thank you page option under the YITH tab.
On this page, make sure to enable the custom thank you page option to Yes and choose whether to redirect to a custom WordPress page of your website or to an external page.
If you chose to redirect to a custom page on your website, select the desired page from the drop-down list.
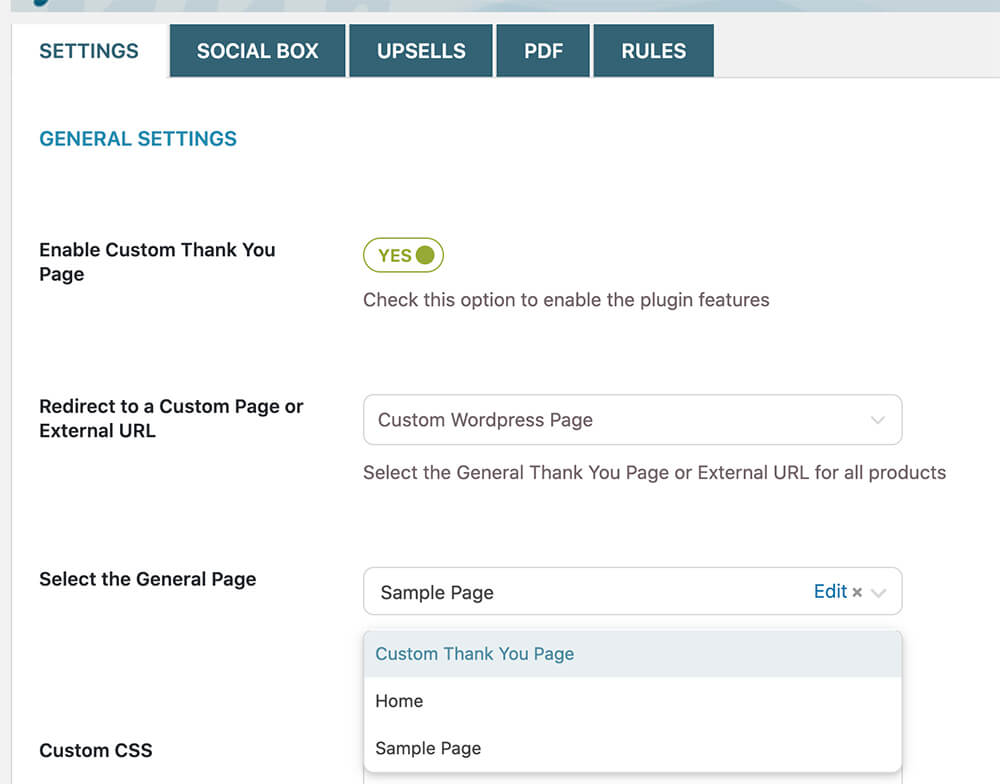
When done setting it up, scroll all the way to the bottom and click on the Save Changes button.
Now, go through the checkout process and make sure you’ve been redirected to the desired page successfully.
Redirect a specific product to a specific page
With the YITH plugin, you also have the option to set a specific thank you page just for a specific product.
As we mentioned above, you can set a custom thank you page just for customers who purchased shoes.
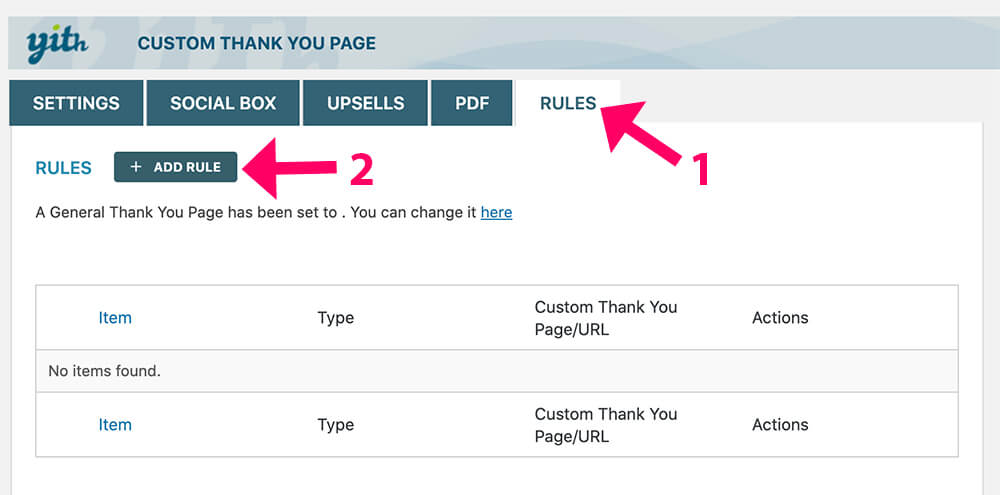
To accomplish that, navigate to the Rules tab and click on Add Rule.
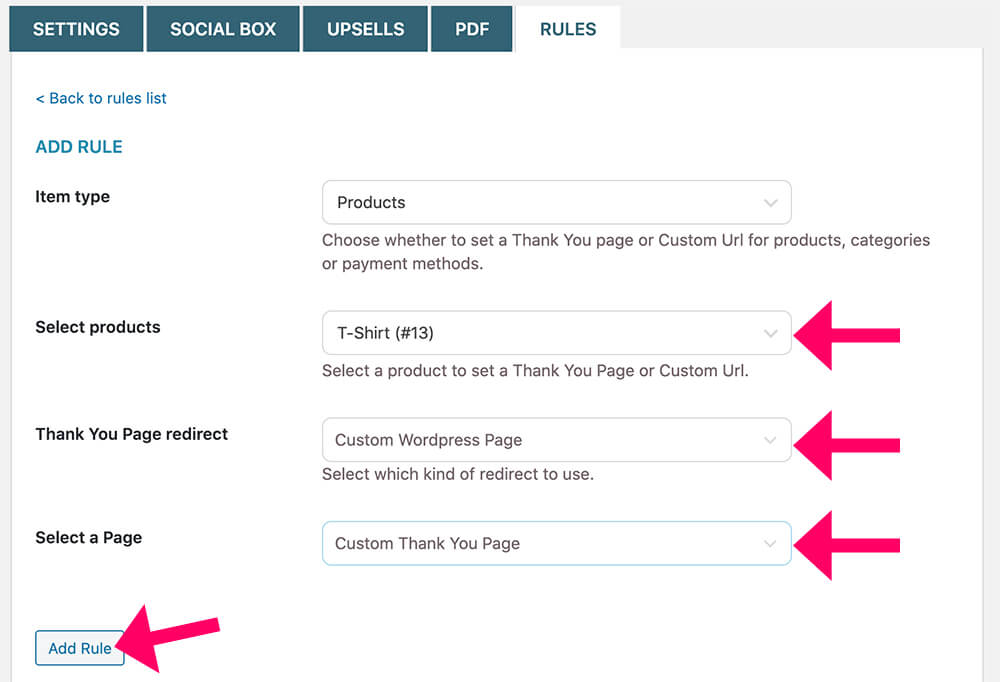
On the new rule page, chose the custom product/s that will redirect their customers to the custom ‘thank you’ page and select the desired page from the drop-down list.
When done, click one Add Rule and test the process to make sure it’s working properly.
More WooCommerce redirect plugins
The YITH plugin mentioned above is by far the best plugin to redirect the WooCommerce checkout page.
It has the most customization options and really giving you the ability to take control of your customer checkout process.
However, it is not the only plugin.
Here are more plugins that will enable you to achieve this task:
Related Posts
Conclusion
In this article, we learned how to redirect the WooCommerce plugin to a custom thank you page after checkout.
Leave us a comment down below and let us know if you used the code snippet or the plugin (and which one) to achieve it.
Also, make sure to subscribe to our YouTube channel and like our page on Facebook.