A title tag is one of the most important aspects of SEO for any page on your WordPress website.
By default, the title tag is generated automatically by WordPress to match the H1 page’s heading.
In this article, you’ll learn to add a title tag in WordPress.
What is a Title Tag
Every HTML document, such as websites’ pages, should contain a title tag to rank better in Google.
The <title> tag text tells search engine bots what the page or the article is all about. Thus, it’s essential to have one.
WordPress automatically takes the page title (H1) and makes it the title tag to simplify things.
How to Find the Title Tag
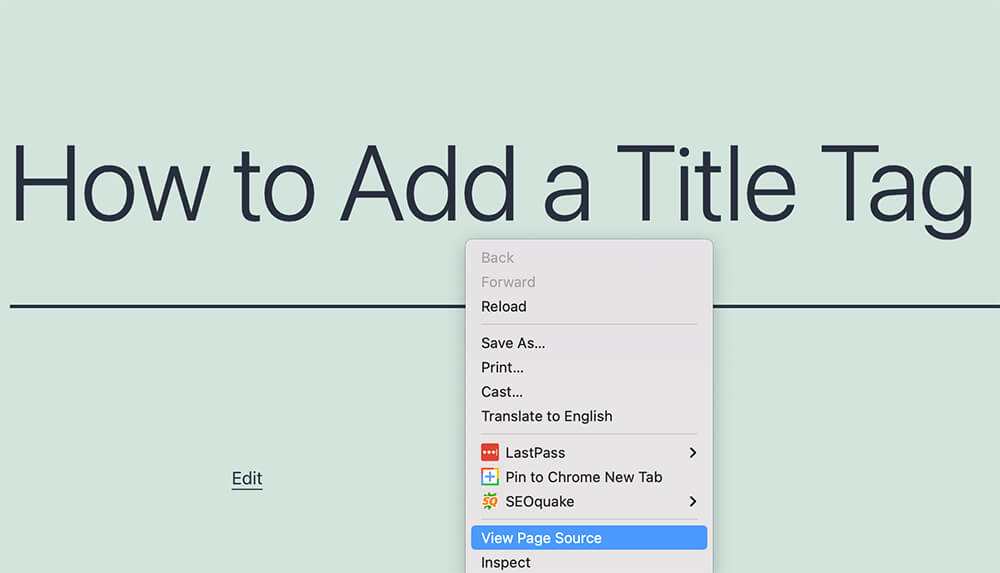
Navigate to your website, right-click anywhere on the screen, then click on ‘View Page Source.’
The title tag will be inside the <head> tag. Use CNTR+F or Command+F and search for <title>.
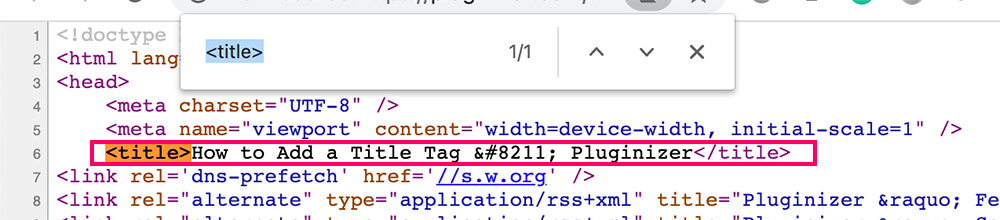
As you can see in the image above, the title tag text is our page title plus our website’s name.
<title>How to Add a Title Tag – Pluginizer</title>In most cases, this is great and can be left alone. However, in other cases, you may want to modify the text to improve SEO, and in the next section, I will show you exactly how.
How to Add a Title Tag
We already checked and saw that our page includes a title tag. To edit it, we will need to follow these steps:
- Download an SEO plugin.
- Edit the desired page.
- Open the page source to verify the new title tag.
First, let’s start by downloading an SEO plugin for WordPress.
Step #1: Install an SEO plugin
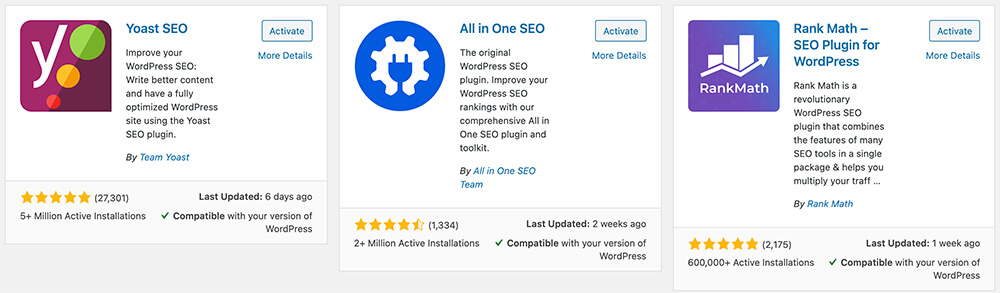
There are many good SEO plugins for WordPress, and in this article, I’ll show you how to use the top three: Yoast, All-in-one, and RankMath.
Most likely, you already have one of the plugins above installed on your website.
If not, feel free to install any of them. Here at PluignsForWP, we’re using Yoast, but they are all great. To prevent conflicts between the plugins, make sure to install only one of the plugins above and not all of them.
First, navigate to Plugins -> Add New and search for SEO.
The first three results are the plugins that we will cover in this tutorial.
Install and activate your desired one.
Once activated the chosen plugin, we can move forward.
Step #2: Edit the desired page
With whichever plugin you decide to use, we will need to open the page’s edit screen with the title tag that you would like to change.

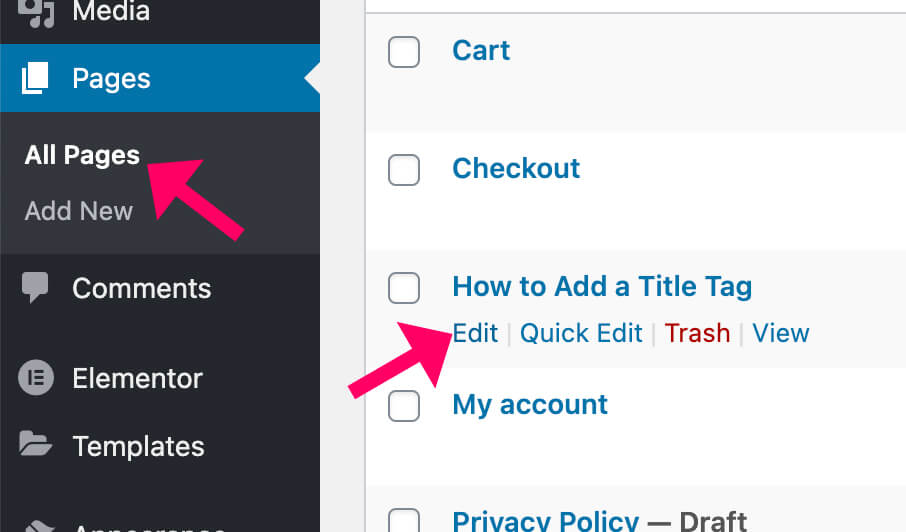
Navigate to Pages -> All Pages and click on Edit of the page that you would like to modify.
After opening the edit screen, let’s move to the last step and add the title tag.
Step #3: Edit the title tag
In this step, we will edit the title tag of the page. Follow the instructions related to the plugin you chose.
Yoast
Scroll down the page to the Yoast SEO box and look for the SEO title field.
We can see in the image below that our title is automatically assembled by a few variables: title page, separator, and site name.
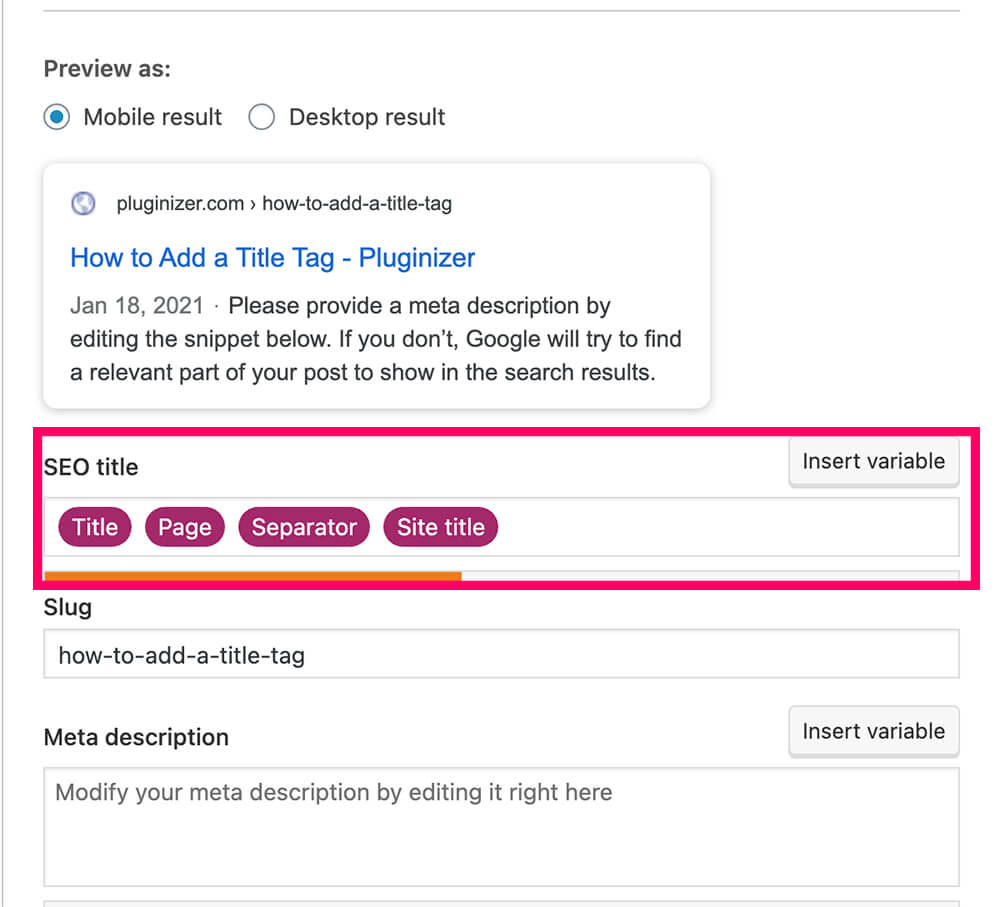
To modify that, delete all or some of the variables and enter your custom text instead.
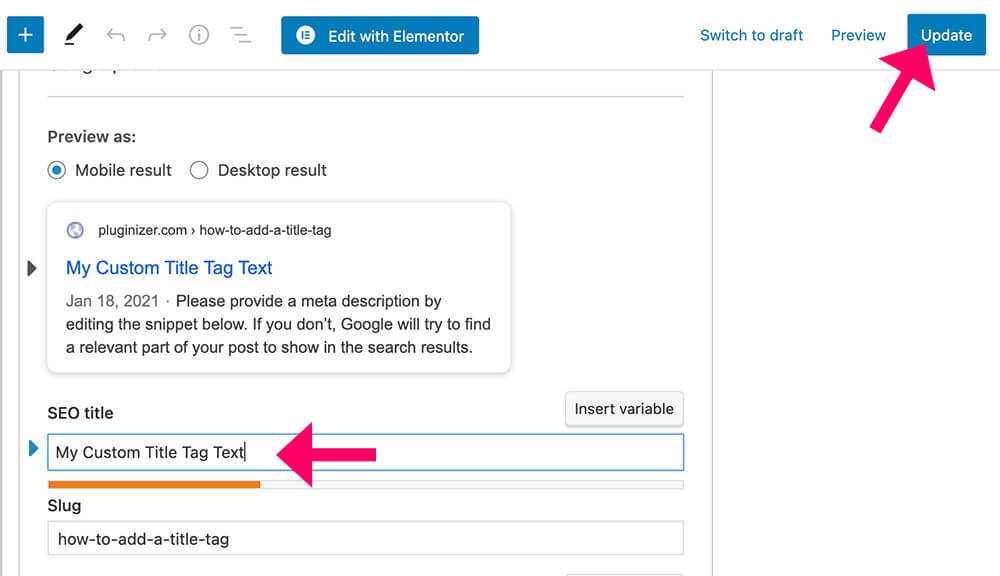
When done, click on update and move on to the next step.
All in one SEO
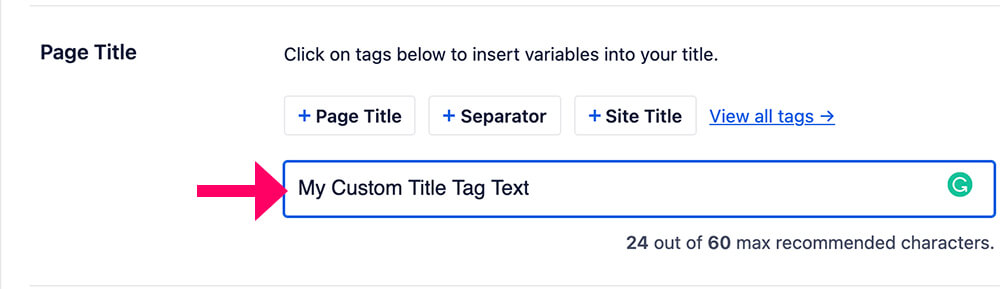
Scroll down to the AIOSEO box and into the Page Title field.
Just like above, this title is also generated automatically by variables.
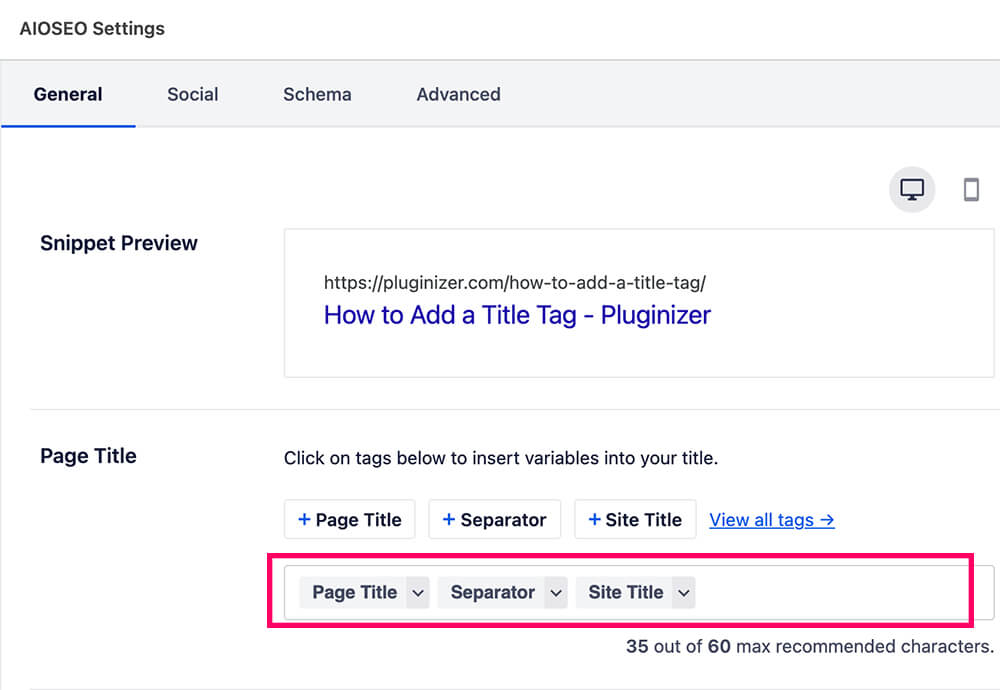
To change it, delete the variables, enter your text, and click update afterward.
Rank Math
Click on the score button from the top right corner to open the Rank Math sidebar.
Click on the ‘Edit Snippet’ button below the General tab to edit the title tag.
Inside the popup, you’ll see that the title tag here is also generated by variables, just like the other plugins.
Replace the existing text with your custom one and close the popup when done.
Then, update the page and move on to verify.
Step #4: Verify the new title tag
Once we change the title tag, let’s ensure that the new text is displayed by inspecting the page source again, as we did above.
When looking for the new title tag, we can see that it’s showing the custom text that we chose.

Feel free to keep improving your page and add a meta description.
Conclusion
This article taught you how to add a title tag to your website by using the most popular SEO plugins.
Leave us a comment and let us know which one of the methods above you used to accomplish that.
Also, make sure to subscribe to our YouTube channel and like our page on Facebook.