


WP Tasty is a WordPress plugin made specifically for food blogs.
While the demand for food blogs and recipes is becoming more popular, it is just a matter of time until WordPress has a dedicated plugin for the food world.
This article will review the WP Tasty plugin, what it is for, and how to use it.
Schema Markup for Recipes
When creating a recipe blog post, it is essential to populate it with relevant information to rank high in Google search results.
Therefore, writing the recipe by itself isn’t enough. It would be best to publish it in a certain way to compete with the other recipes already ranking high.
Let’s take the ‘Banana Pie’ term, for example. When searching for banana pie in google, we immediately can see recipe results packed with relative information regarding the query.
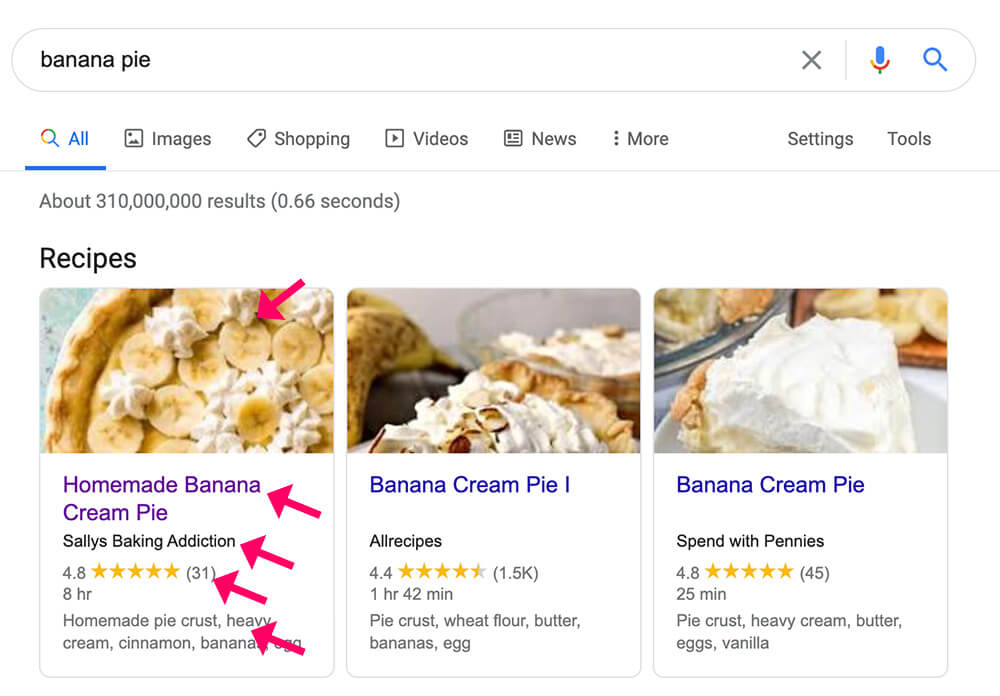
As shown above, the results display the recipes’ image, website name, review, cooking time, ingredients, etc.
You can only achieve the results above with the Schema HTML markup.
Schema is a set of extensible schemas that enables webmasters to embed structured data on their web pages for use by search engines and other applications.
In simple words, to rank for your recipes, you must inject them with custom Schema tags. The Schema tags will inform search engines about the recipes’ properties.
That’s exactly what the WP Tasty plugin is good for.
What is WP Tasty
As I mentioned briefly above, WP Tasty is a WordPress plugin created specifically for food lovers and website owners.
Once the WP Tasty plugin is activated, a new Gutenberg recipe block will be added to your blocks library.
The new WP Tasty block will have a dedicated field for every aspect of your recipes. Some areas are title, description, ingredients, prep time, etc.
The Schema markup is already built-in into the fields with the required information. Therefore, all you have left to do is to focus on making the best dishes possible.
How to Use the WP Tasty Plugin
You can get WP Tasty in a couple of ways. The first way is by purchasing the plugin from the official website for the total price or getting it from us for only $4.99. Both plugins are the same, but the only difference is that we don’t provide technical support.
WP Tasty Settings
Once downloading the plugin from inside your WordPress dashboard, navigate to Plugins -> Add New -> Upload Plugin and upload WP Tasty.
Then, activate it and navigate to Settings -> Tasty Recipes and into the plugin’s settings tab.
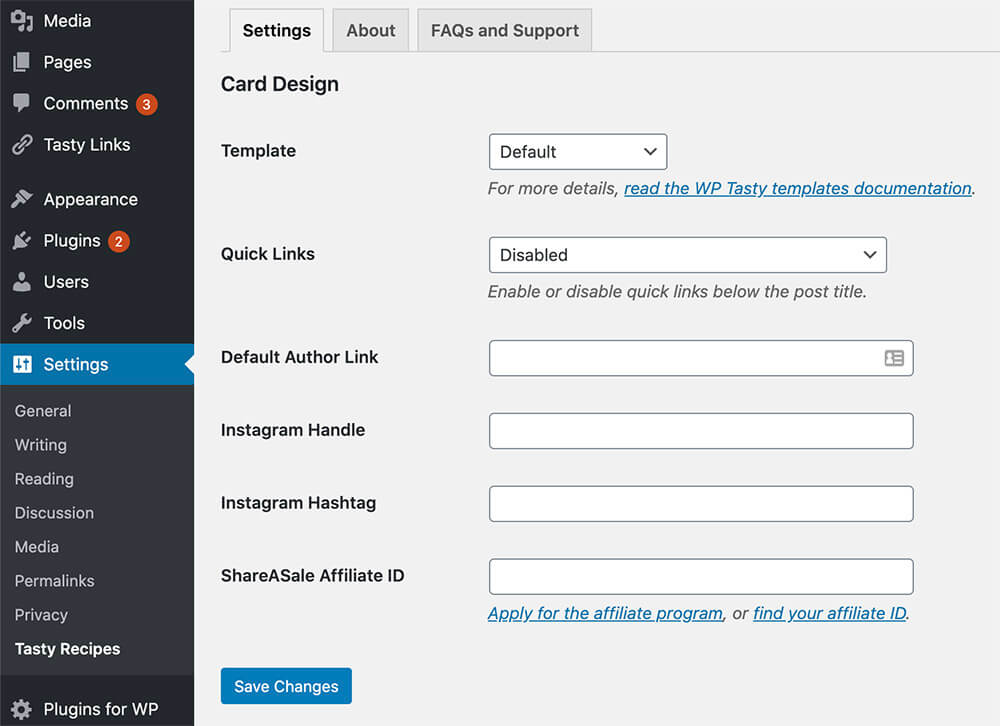
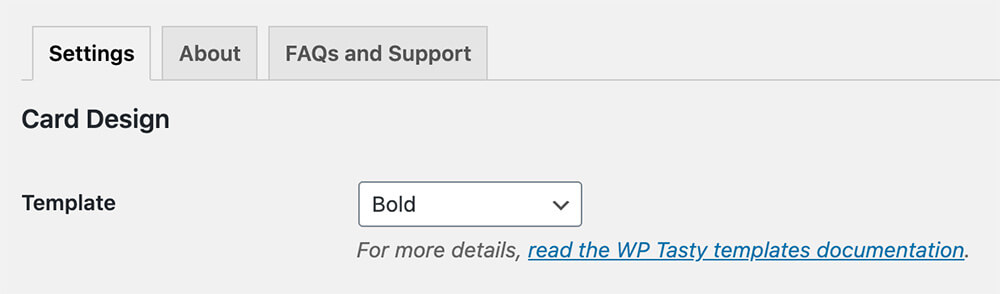
Here you will have a few options to define and set how to display your recipes.
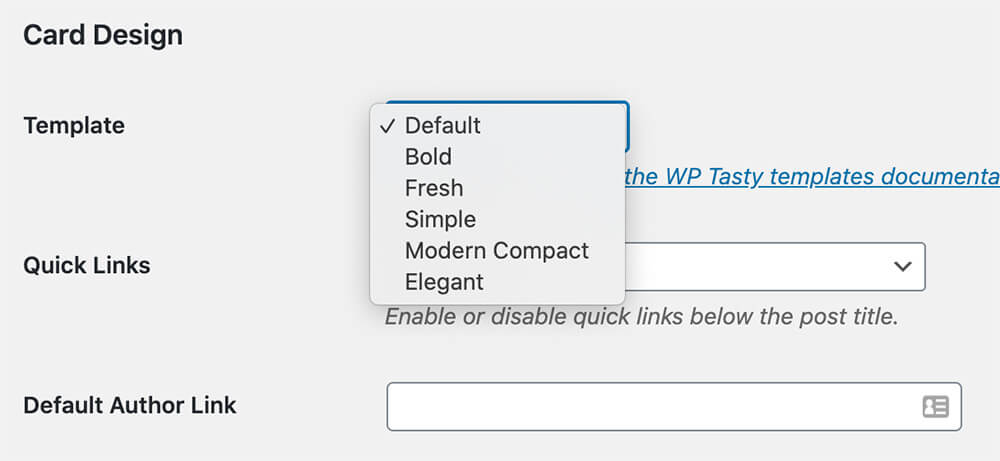
You can check the different templates on the WP Tasty document page. Additionally, you can also change it later after creating your first recipe.
The Quick Links option will enable you to display quick links to the recipe under the recipe title.
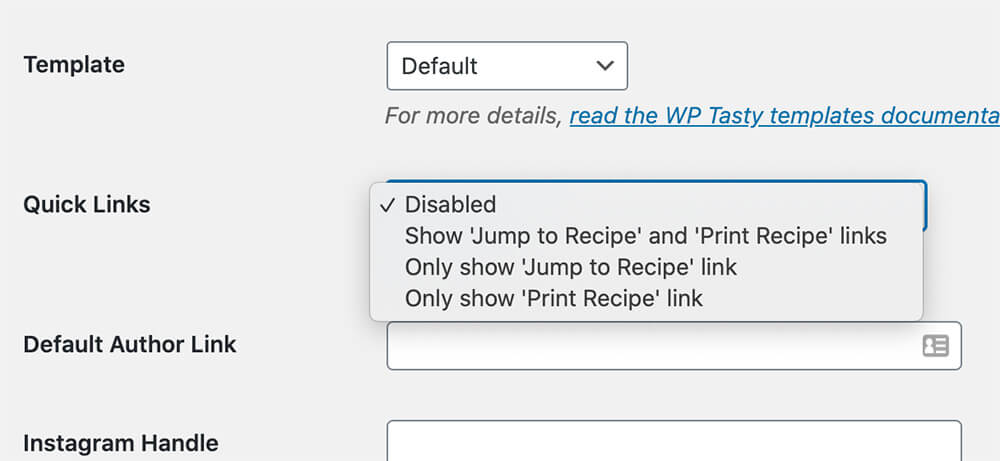
Choose whether to display both Jump to Recipe and the Print Recipe links, only one of them, or hide them both.
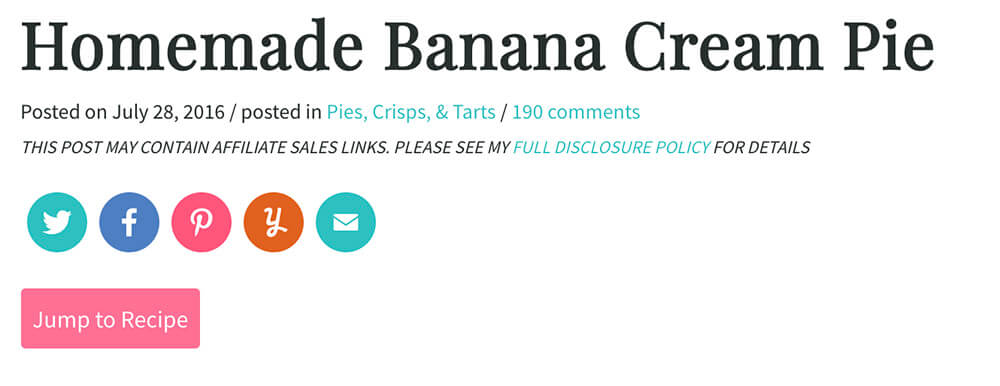
At the Sallysbakingaddiction website, you can see the Jump to Recipe link under the title.
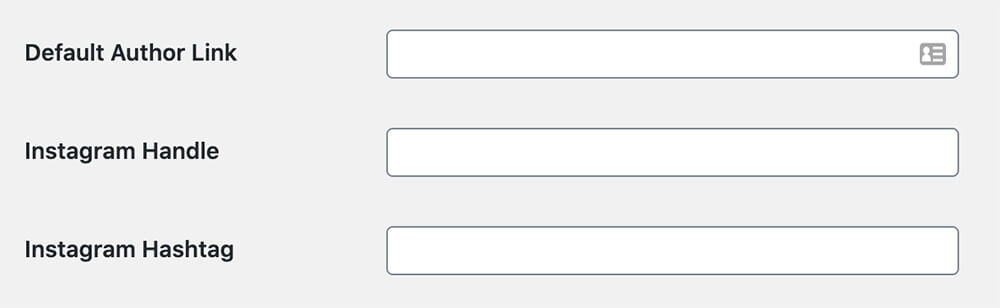
Below the quick links option, you can set a default author link, an Instagram handle, and a hashtag. Make sure to save your changes.
Once you set up the plugin, it’s a great time to move forward to what you like, publishing your unique dishes to the world.
Publish Recipes
We create recipes like simple WordPress blog posts using the WP Tasty plugin.
From inside your WordPress dashboard, you’ll need to create a new post by navigating to Posts -> Add New.
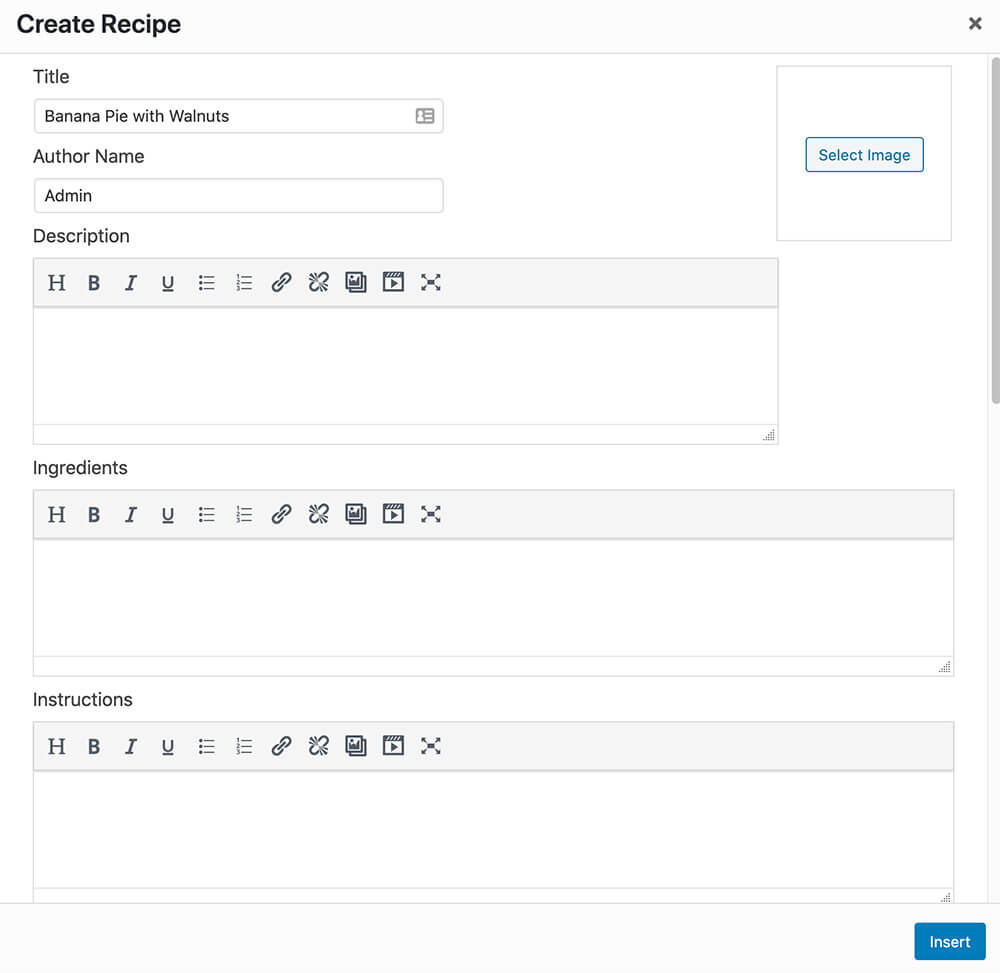
Like any other blog post, you’ll need to assign a title for the post. In our case, it will be ‘Banana Pie With Walnuts’.

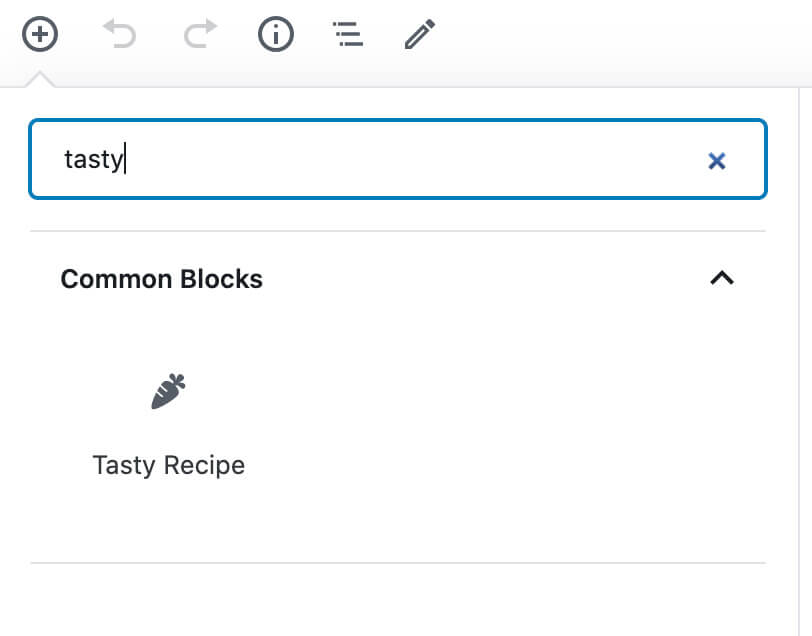
Now, click on the plus icon from the left top corner to add a new Gutenberg block, search for Tasty Recipe, and add it.
In the popup that will open up, you’ll need to fill in some details about the recipe.
You’ll have many options to fill such as dish image, description, ingredients, notes, prep time, diet, nutrition, etc.
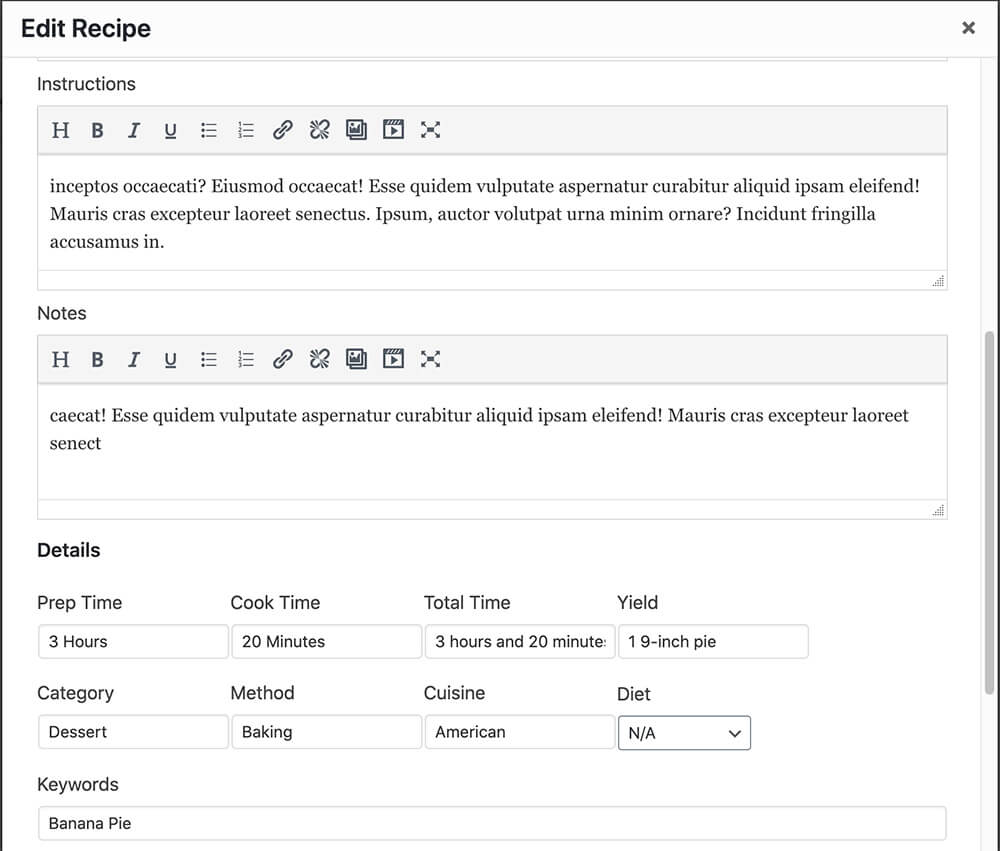
You don’t have to fill them all, but it’s recommended to do so if you know the details. After filling the fields, click on Insert.
Please note that you can insert different blocks above or under the Tasty Recipe block.
We added some paragraph blocks above the recipe to describe the dish in greater detail in our example.
Once completing the blog post, publish and visit it to see what it looks like.
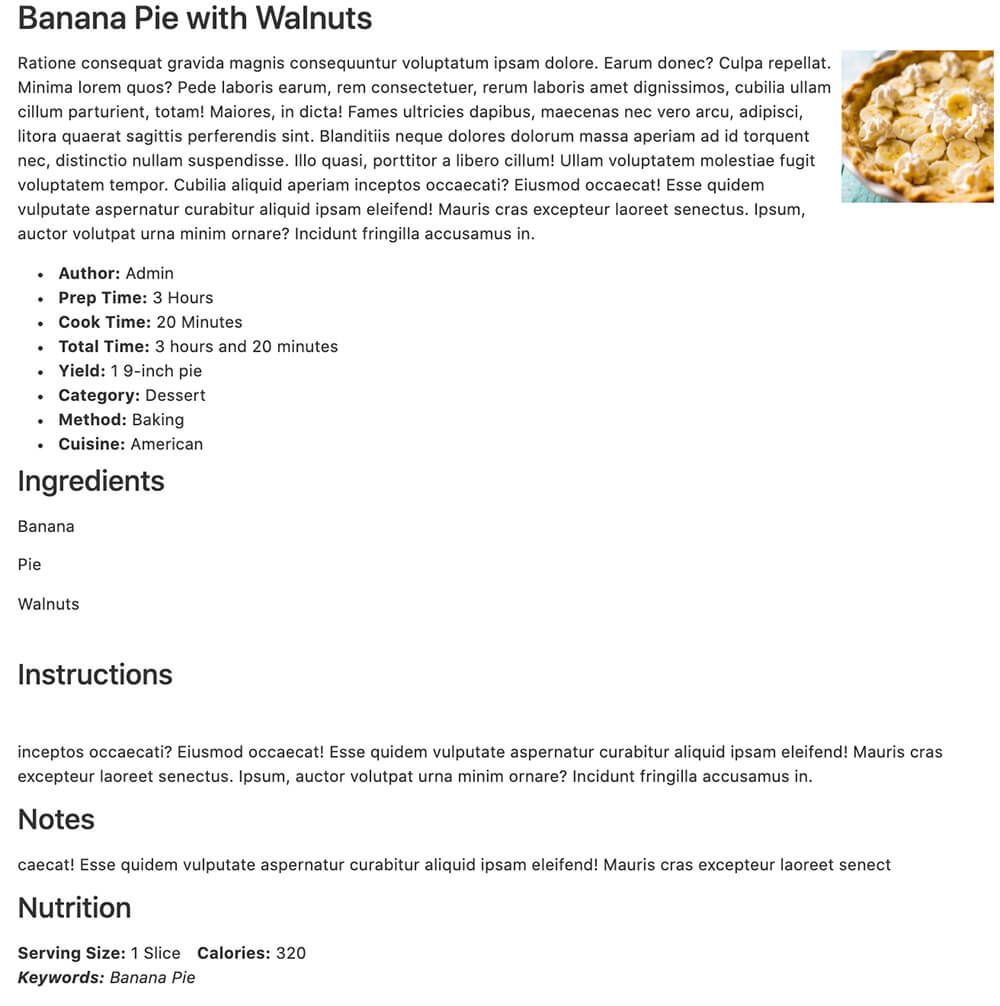
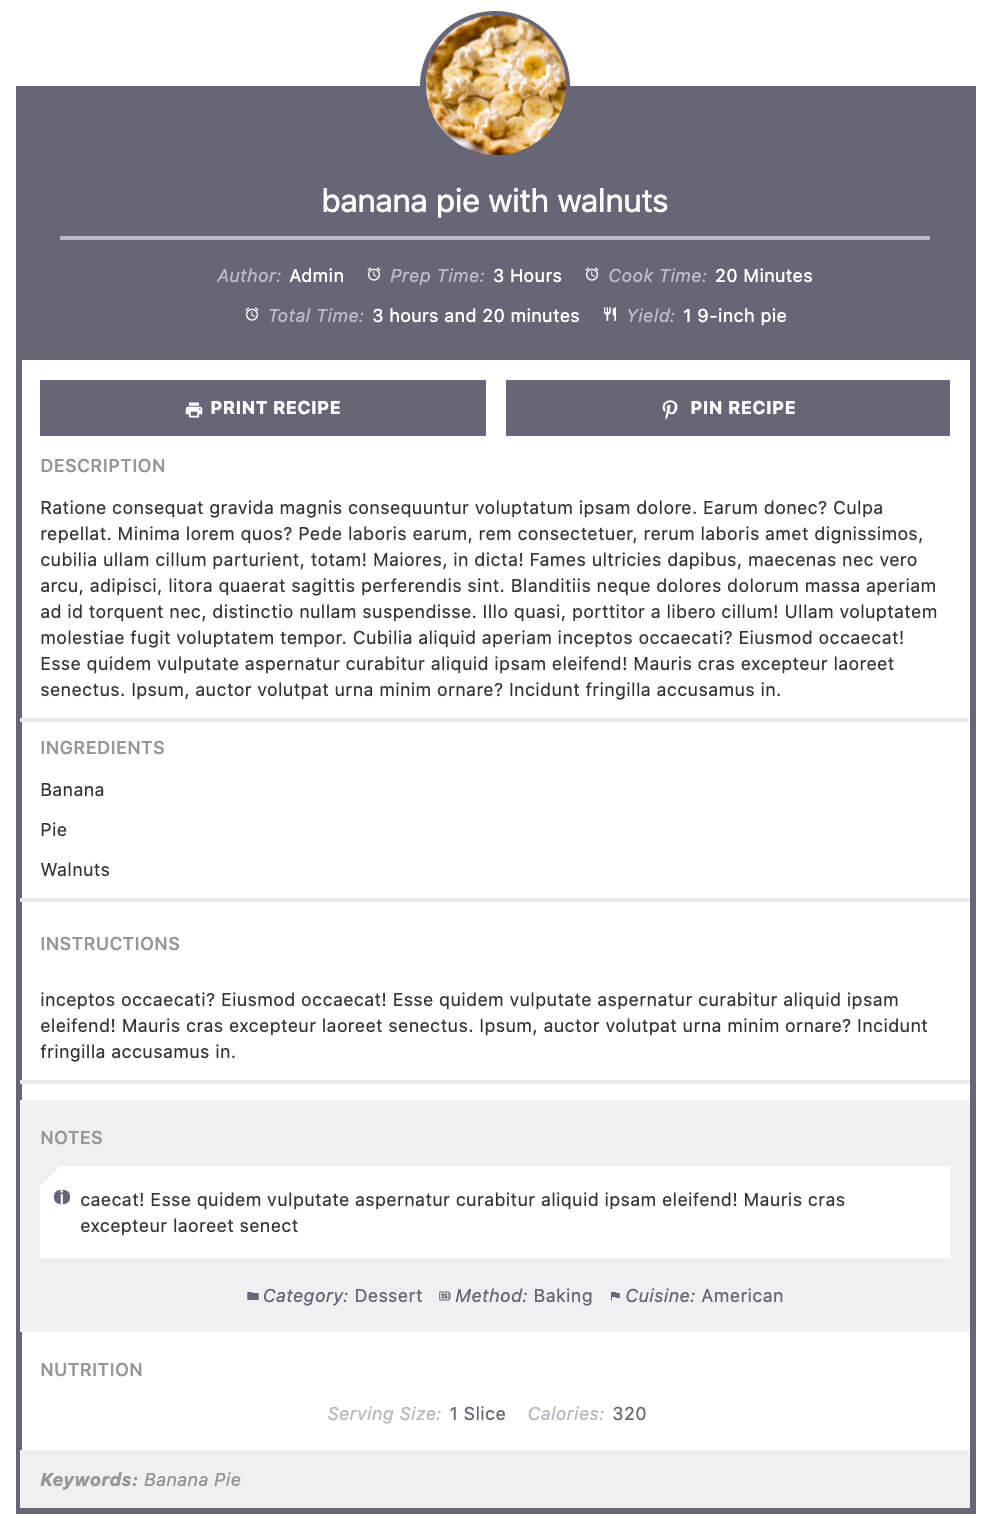
Remember that the recipe is displayed in its default form. If you like it, keep it. Please change the template from the settings tab and revisit the post to view the changes.
Once I changed the template to Bold, the recipe looked way better.
WP Tasty Extensions
The WP Tasty plugin has a couple of extension plugins that can help you even more with your food blog.
The first extension is Tasty Links, and the second one is Tasty Pins.
Tasty Links
Tasty Links will help you generate passive income through affiliate links in your recipes.
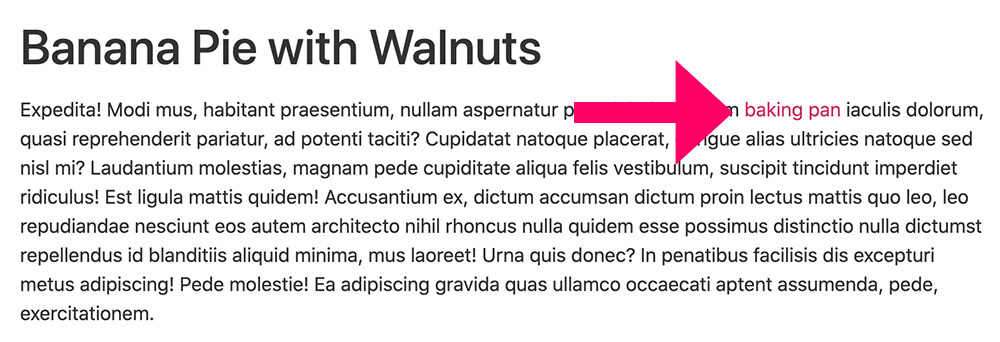
For example, when using the Tasty Links extension, you can define that all the Baking Pan keywords across your blog and recipes will link to Amazon (or any other website) with your affiliate link.
You can get Tasty Links from the official website or get it from us for a way better price.
After downloading Tasty Links, upload it to your WordPress food blog just as you did with the WP Tasty plugin above.
After activating the Tasty Links plugin, navigate to Tasty Links -> Add New.
Enter the keyword you would like to link, enter your affiliate link, and click publish on this screen.
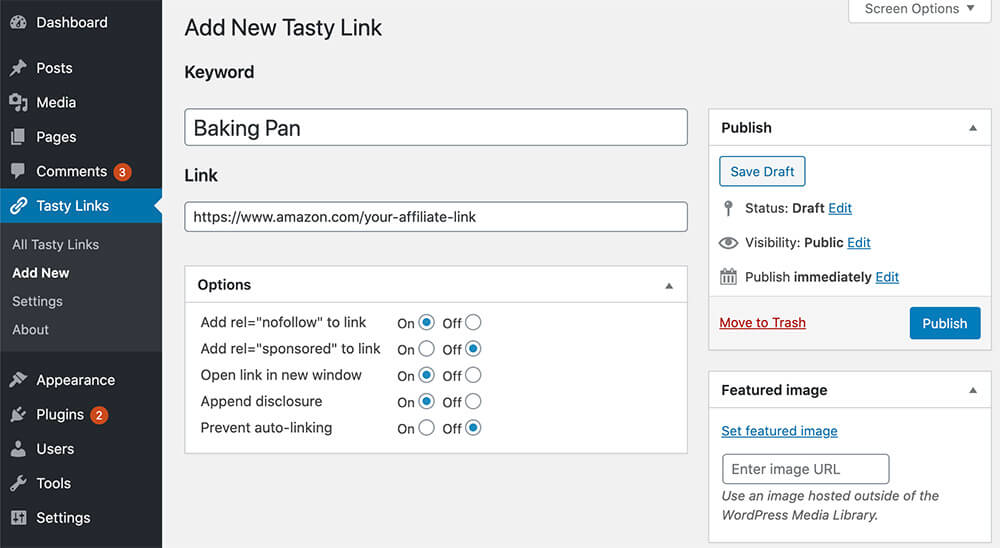
Now, every time the keyword Baking Pan appears in any blog post or recipe, it will link to your Amazon with your affiliate link.
The second WP Tasty extension is Tasty Pins.
Tasty Pins
The Tasty Pins extension will add extra options to optimize your images for SEO and Pinterest in a few ways.
You can get Tasty Pins from the official website or get it from us for a way better price.
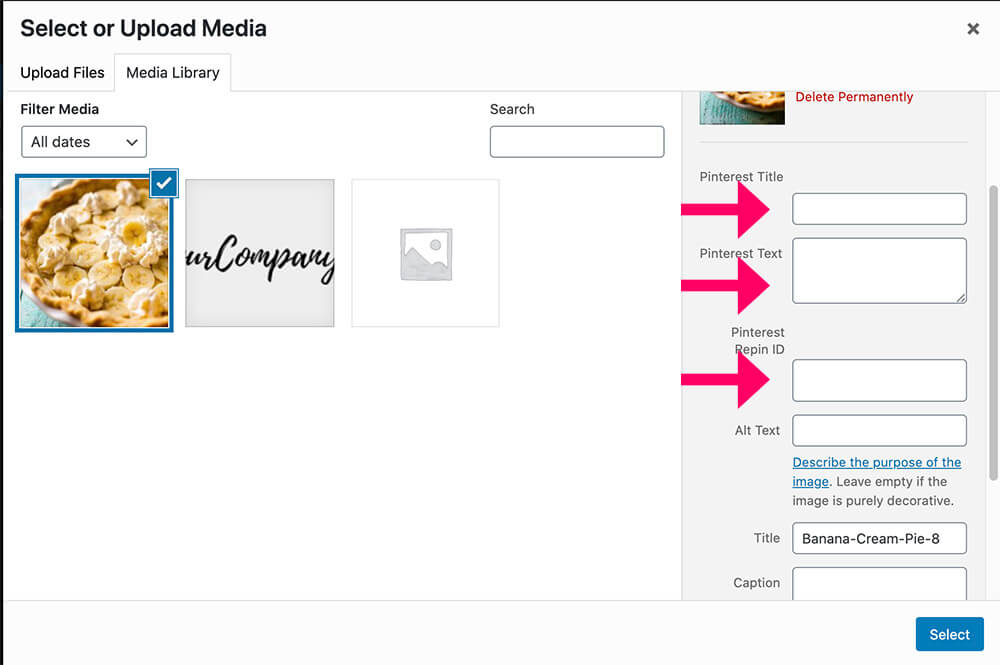
After activating the Tasty Pins plugin, you’ll be able to add alt text and Pinterest text for every image you’ll add to your blog post or recipe.
After adding an image, new field options will be added to the right-sidebar, where you can enter specific text for Pinterest.
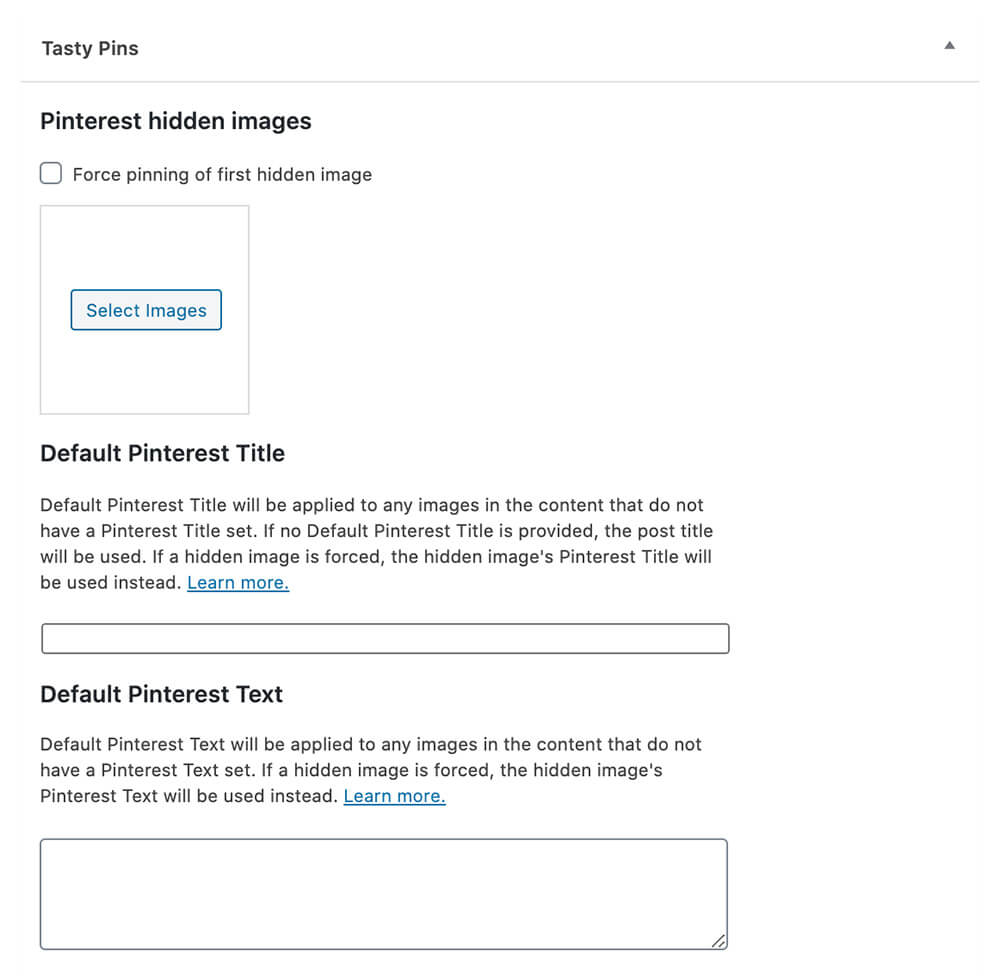
Also, at the bottom of each blog post, you will add more images that will not be displayed inside your post but will be available for the visitor to choose from when sharing the post on Pinterest.
Conclusion
Food Blogs and websites are a great way to share your delicious dishes with your readers.
If you want to reach more audiences and spread your recipes even further, you’ll need to do it the right way with good structure and SEO.
This article taught you how to use the WP Tasty plugin to publish food recipes.
Please leave us a link below to your food blog with which you’re using the plugin.
Also, make sure to subscribe to our YouTube channel and like our page on Facebook.
